Chapter 2 Installing the Cisco Nexus 3000 Series Switches
Installing the Switch
Se n d d o c u m e n t c o m m e n t s t o n ex u s 3 k - d o c f e e d b a ck @ c i sc o . c o m
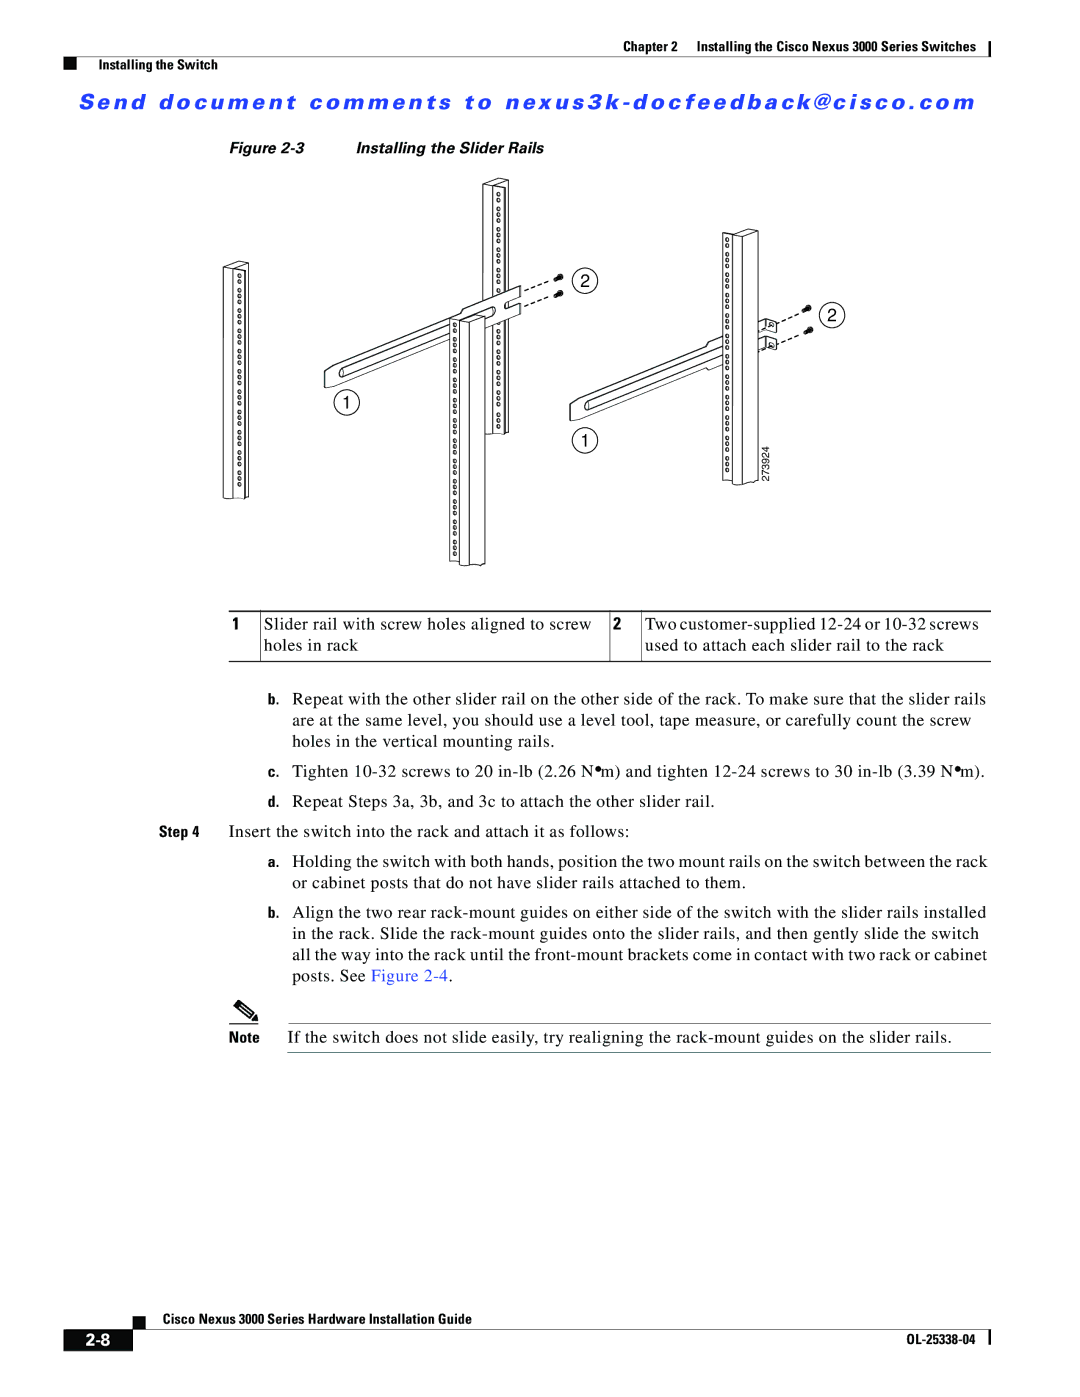
Figure 2-3 Installing the Slider Rails
2
1
1
2
273924
1
Slider rail with screw holes aligned to screw holes in rack
2
Two
b.Repeat with the other slider rail on the other side of the rack. To make sure that the slider rails are at the same level, you should use a level tool, tape measure, or carefully count the screw holes in the vertical mounting rails.
c.Tighten
|
|
| d. Repeat Steps 3a, 3b, and 3c to attach the other slider rail. | ||
Step 4 | Insert the switch into the rack and attach it as follows: |
| |||
|
|
| a. Holding the switch with both hands, position the two mount rails on the switch between the rack | ||
|
|
|
| or cabinet posts that do not have slider rails attached to them. | |
|
|
| b. Align the two rear | ||
|
|
|
| in the rack. Slide the | |
|
|
|
| all the way into the rack until the | |
|
|
|
| posts. See Figure |
|
|
|
|
| If the switch does not slide easily, try realigning· | the |
| Note | ||||
|
|
|
| ||
Cisco Nexus 3000 Series Hardware Installation Guide
| ||
|