iDP3550/3551 User ’s Manual
4.5Setting the Ribbon Cassette
1.Be sure that the power switch is turned off.
2.Detach the printer cover.
3.Open the auto cutter. (iDP3551)
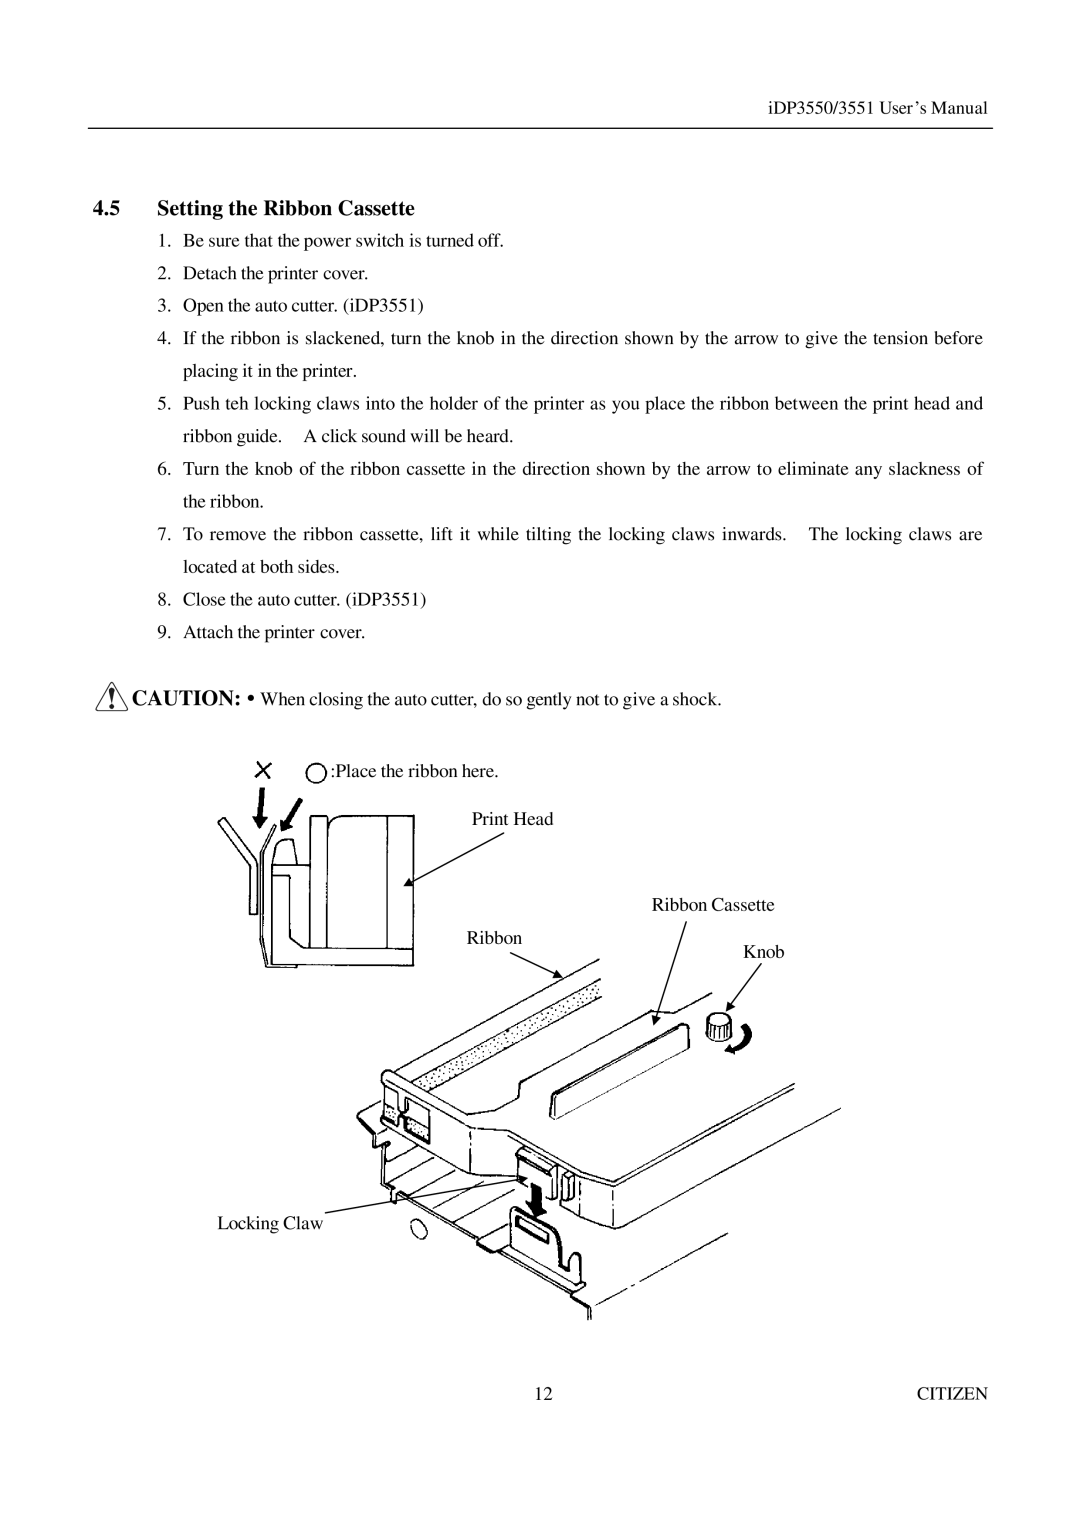
4.If the ribbon is slackened, turn the knob in the direction shown by the arrow to give the tension before placing it in the printer.
5.Push teh locking claws into the holder of the printer as you place the ribbon between the print head and ribbon guide. A click sound will be heard.
6.Turn the knob of the ribbon cassette in the direction shown by the arrow to eliminate any slackness of the ribbon.
7.To remove the ribbon cassette, lift it while tilting the locking claws inwards. The locking claws are located at both sides.
8.Close the auto cutter. (iDP3551)
9.Attach the printer cover.
![]() CAUTION: • When closing the auto cutter, do so gently not to give a shock.
CAUTION: • When closing the auto cutter, do so gently not to give a shock.
:Place the ribbon here.
Print Head
Ribbon Cassette
Ribbon
Knob
Locking Claw
12 | CITIZEN |