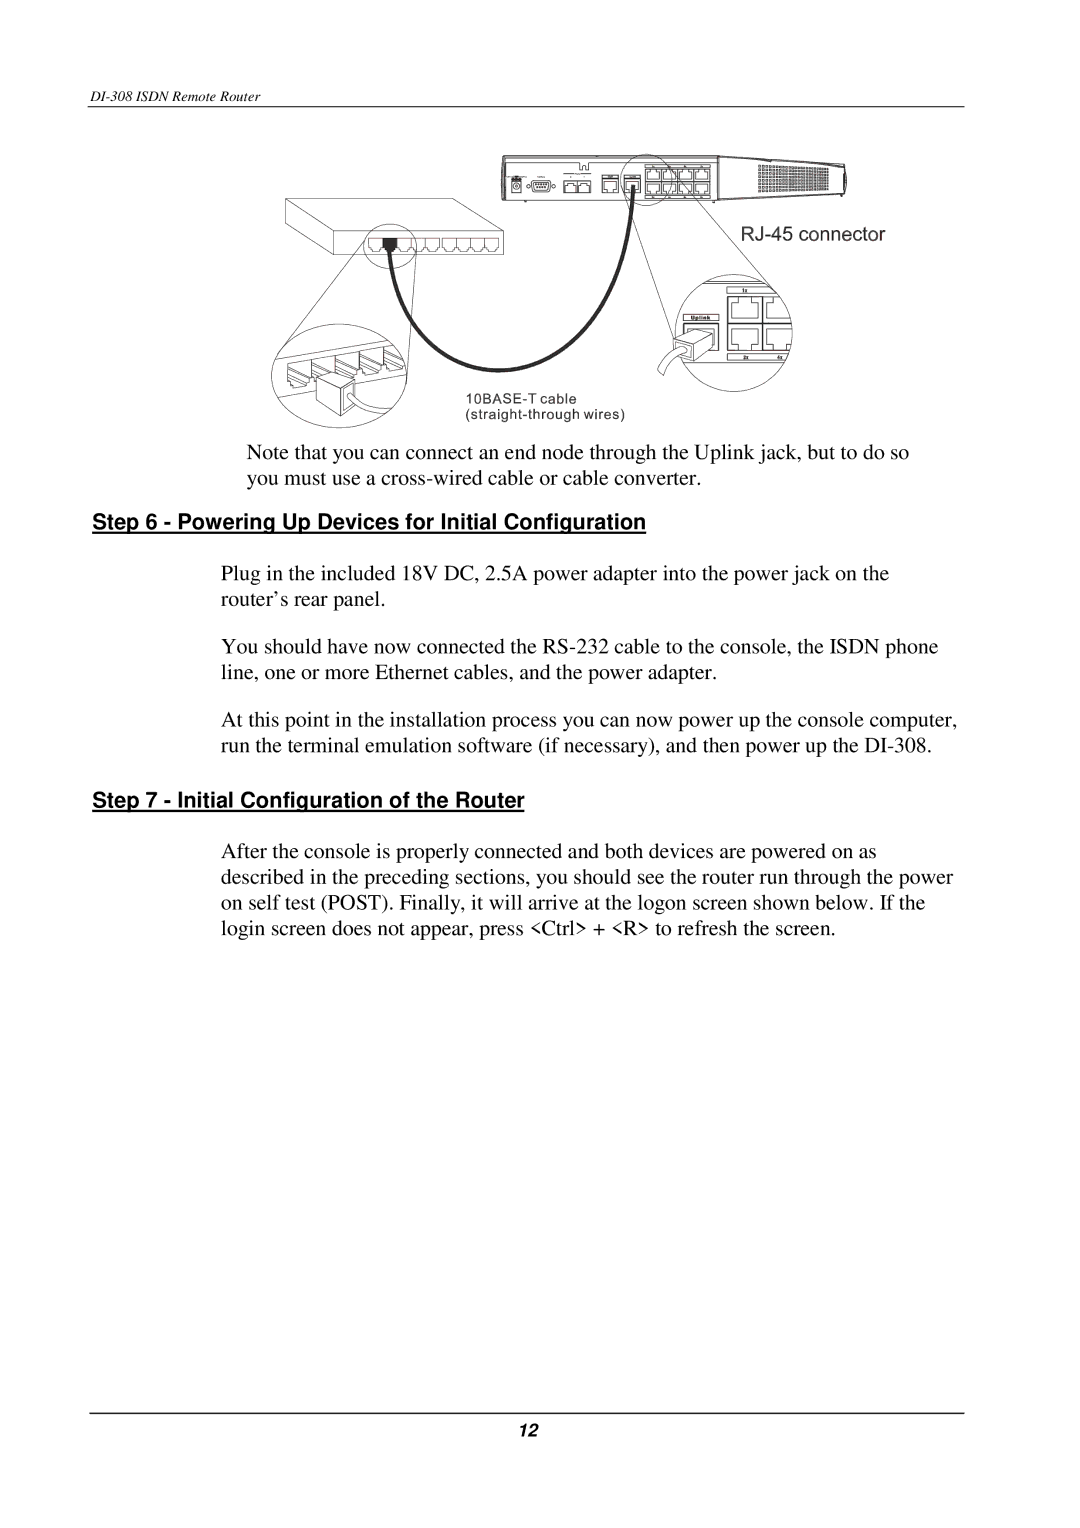
Note that you can connect an end node through the Uplink jack, but to do so you must use a
Step 6 - Powering Up Devices for Initial Configuration
Plug in the included 18V DC, 2.5A power adapter into the power jack on the router’s rear panel.
You should have now connected the
At this point in the installation process you can now power up the console computer, run the terminal emulation software (if necessary), and then power up the
Step 7 - Initial Configuration of the Router
After the console is properly connected and both devices are powered on as described in the preceding sections, you should see the router run through the power on self test (POST). Finally, it will arrive at the logon screen shown below. If the login screen does not appear, press <Ctrl> + <R> to refresh the screen.
12