6.Install the front bezel.
7.Using the MD Storage Manager, verify that the new
Physical Disks
Your system supports up to sixty 2.5 inch or 3.5 inch SAS and nearline SAS physical disks and 2.5 inch SAS SSDs per enclosure and up to a maximum 180 physical disks per storage array using premium features, by daisy chaining two additional MD3060e expansion enclosures.
Physical Disk Installation Guidelines
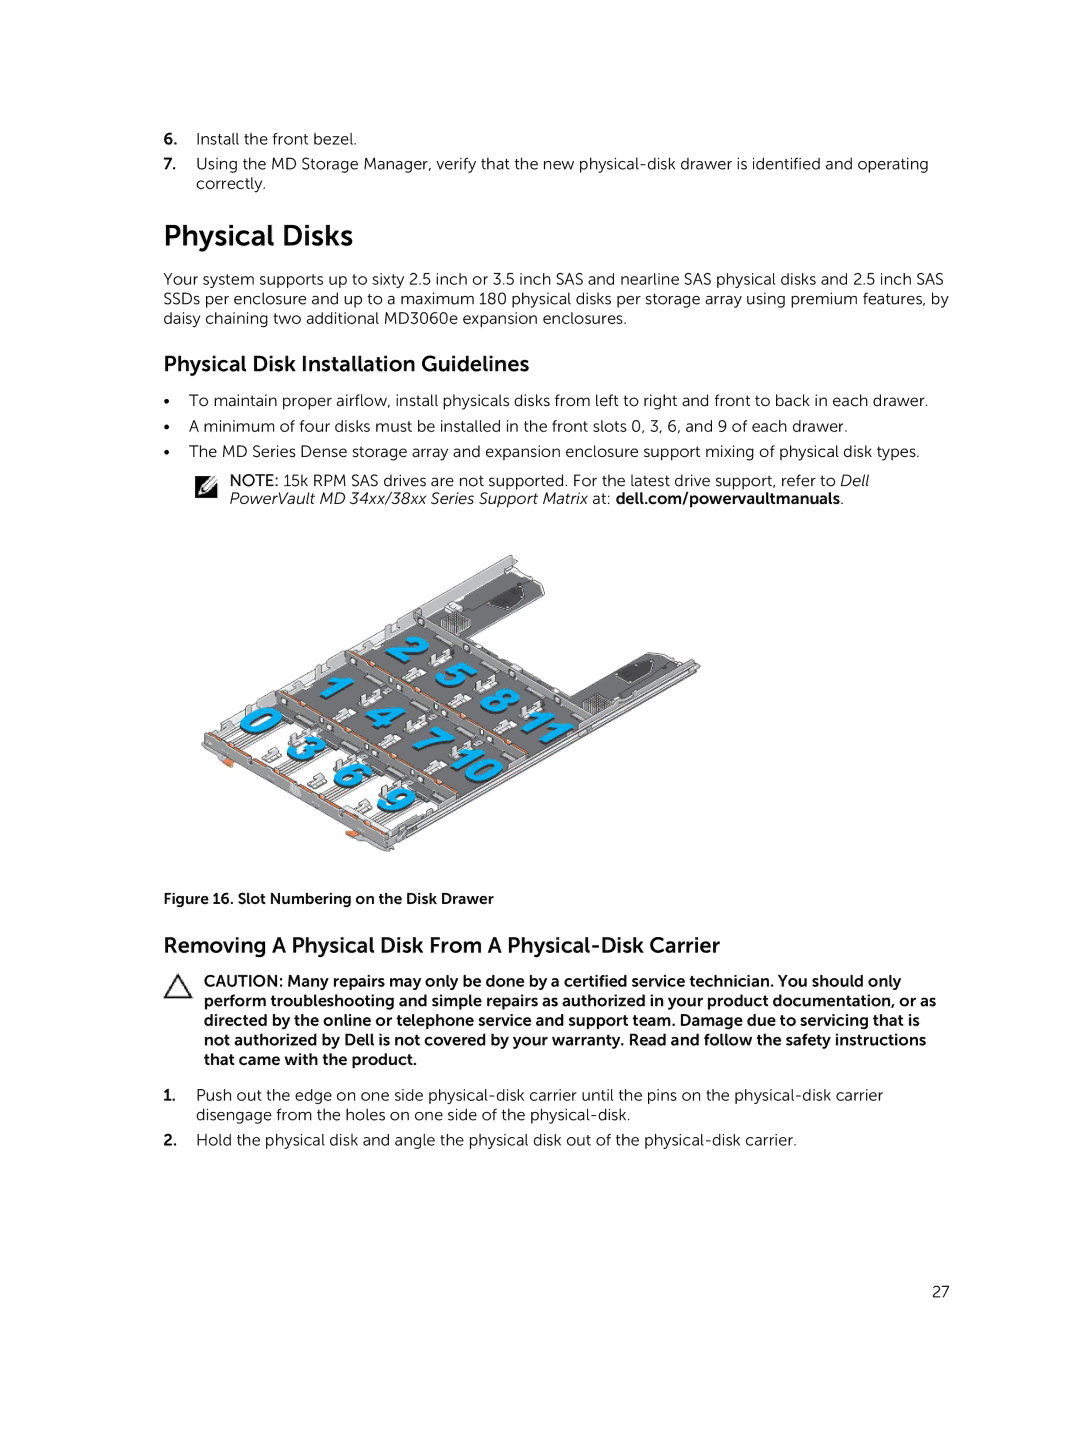
•To maintain proper airflow, install physicals disks from left to right and front to back in each drawer.
•A minimum of four disks must be installed in the front slots 0, 3, 6, and 9 of each drawer.
•The MD Series Dense storage array and expansion enclosure support mixing of physical disk types.
NOTE: 15k RPM SAS drives are not supported. For the latest drive support, refer to Dell
PowerVault MD 34xx/38xx Series Support Matrix at: dell.com/powervaultmanuals.
Figure 16. Slot Numbering on the Disk Drawer
Removing A Physical Disk From A Physical-Disk Carrier
CAUTION: Many repairs may only be done by a certified service technician. You should only perform troubleshooting and simple repairs as authorized in your product documentation, or as directed by the online or telephone service and support team. Damage due to servicing that is not authorized by Dell is not covered by your warranty. Read and follow the safety instructions that came with the product.
1.Push out the edge on one side
2.Hold the physical disk and angle the physical disk out of the
27