Opening The RAID Controller Module
CAUTION: Many repairs may only be done by a certified service technician. You should only perform troubleshooting and simple repairs as authorized in your product documentation, or as directed by the online or telephone service and support team. Damage due to servicing that is not authorized by Dell is not covered by your warranty. Read and follow the safety instructions that came with the product.
1.Remove the RAID controller module from the chassis.
2.Remove the screws from the sides of the RAID controller module.
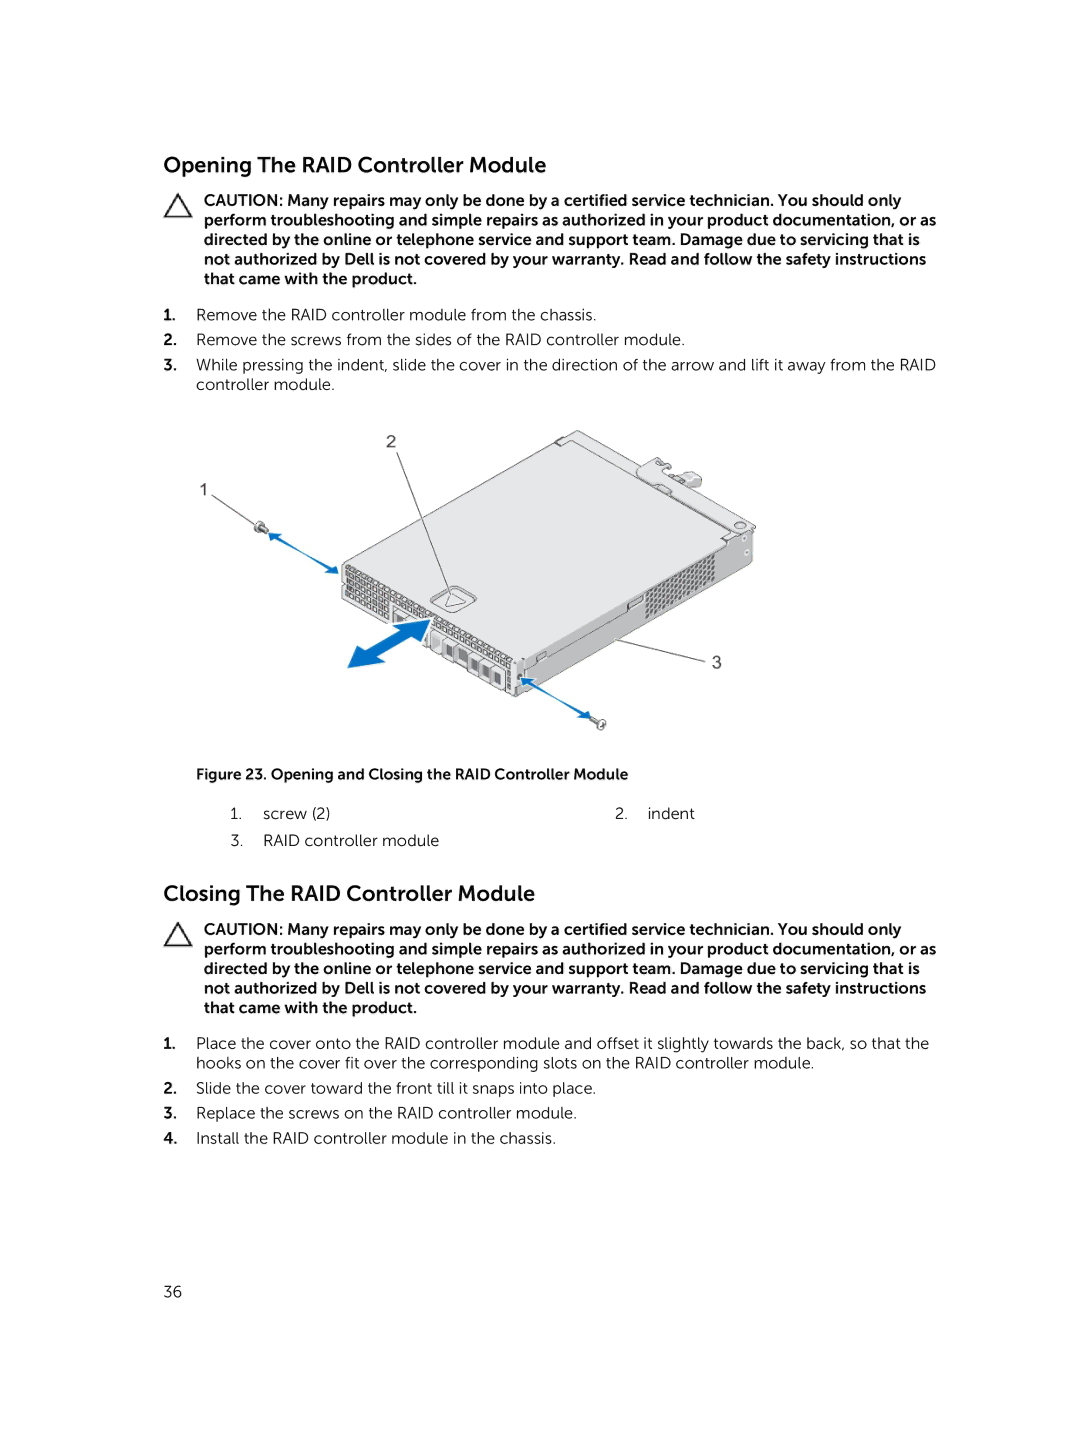
3.While pressing the indent, slide the cover in the direction of the arrow and lift it away from the RAID controller module.
Figure 23. Opening and Closing the RAID Controller Module
1. screw (2) | 2. indent |
3.RAID controller module
Closing The RAID Controller Module
CAUTION: Many repairs may only be done by a certified service technician. You should only perform troubleshooting and simple repairs as authorized in your product documentation, or as directed by the online or telephone service and support team. Damage due to servicing that is not authorized by Dell is not covered by your warranty. Read and follow the safety instructions that came with the product.
1.Place the cover onto the RAID controller module and offset it slightly towards the back, so that the hooks on the cover fit over the corresponding slots on the RAID controller module.
2.Slide the cover toward the front till it snaps into place.
3.Replace the screws on the RAID controller module.
4.Install the RAID controller module in the chassis.
36