Replacing a CD, Zip, or Other External Drive
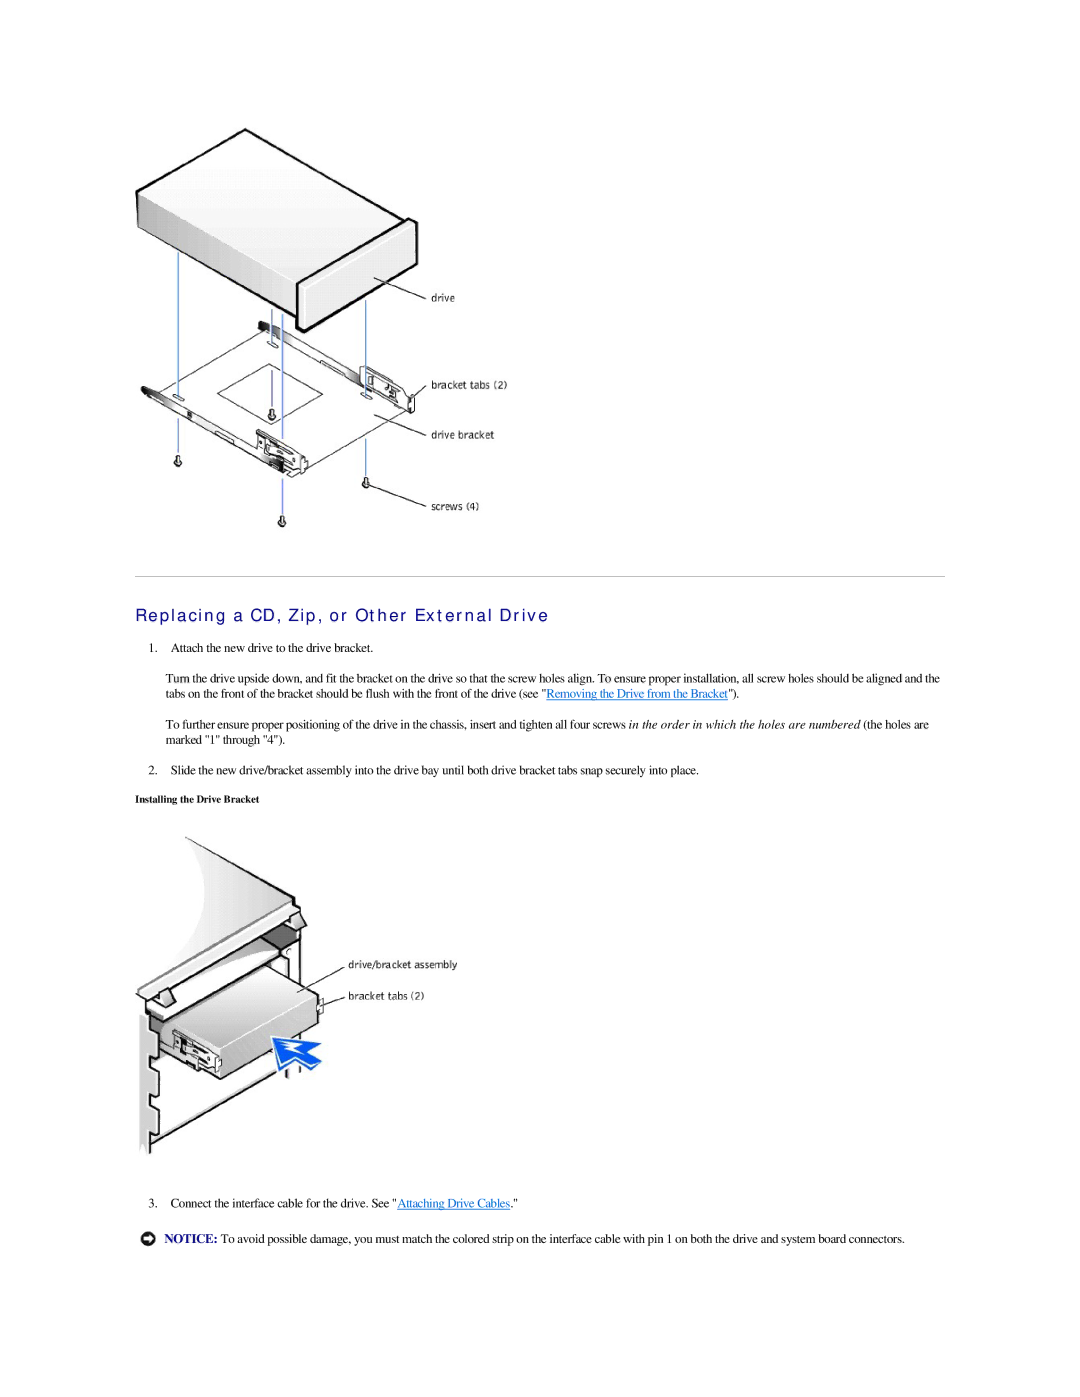
1. Attach the new drive to the drive bracket.
Turn the drive upside down, and fit the bracket on the drive so that the screw holes align. To ensure proper installation, all screw holes should be aligned and the tabs on the front of the bracket should be flush with the front of the drive (see "Removing the Drive from the Bracket").
To further ensure proper positioning of the drive in the chassis, insert and tighten all four screws in the order in which the holes are numbered (the holes are marked "1" through "4").
2. Slide the new drive/bracket assembly into the drive bay until both drive bracket tabs snap securely into place.
Installing the Drive Bracket
3. Connect the interface cable for the drive. See "Attaching Drive Cables."
NOTICE: To avoid possible damage, you must match the colored strip on the interface cable with pin 1 on both the drive and system board connectors.