Back to Contents Page
Front-Panel Inserts
Dell™ OptiPlex™ GX400 Service Manual
Removing
Replacing
Removing Front-Panel Inserts
CAUTION: Before you perform this procedure, see "Precautionary Measures."
1.Turn off the computer and devices, disconnect them from their electrical outlets, wait at least 5 seconds, and then remove the computer cover.
2.Remove the front panel.
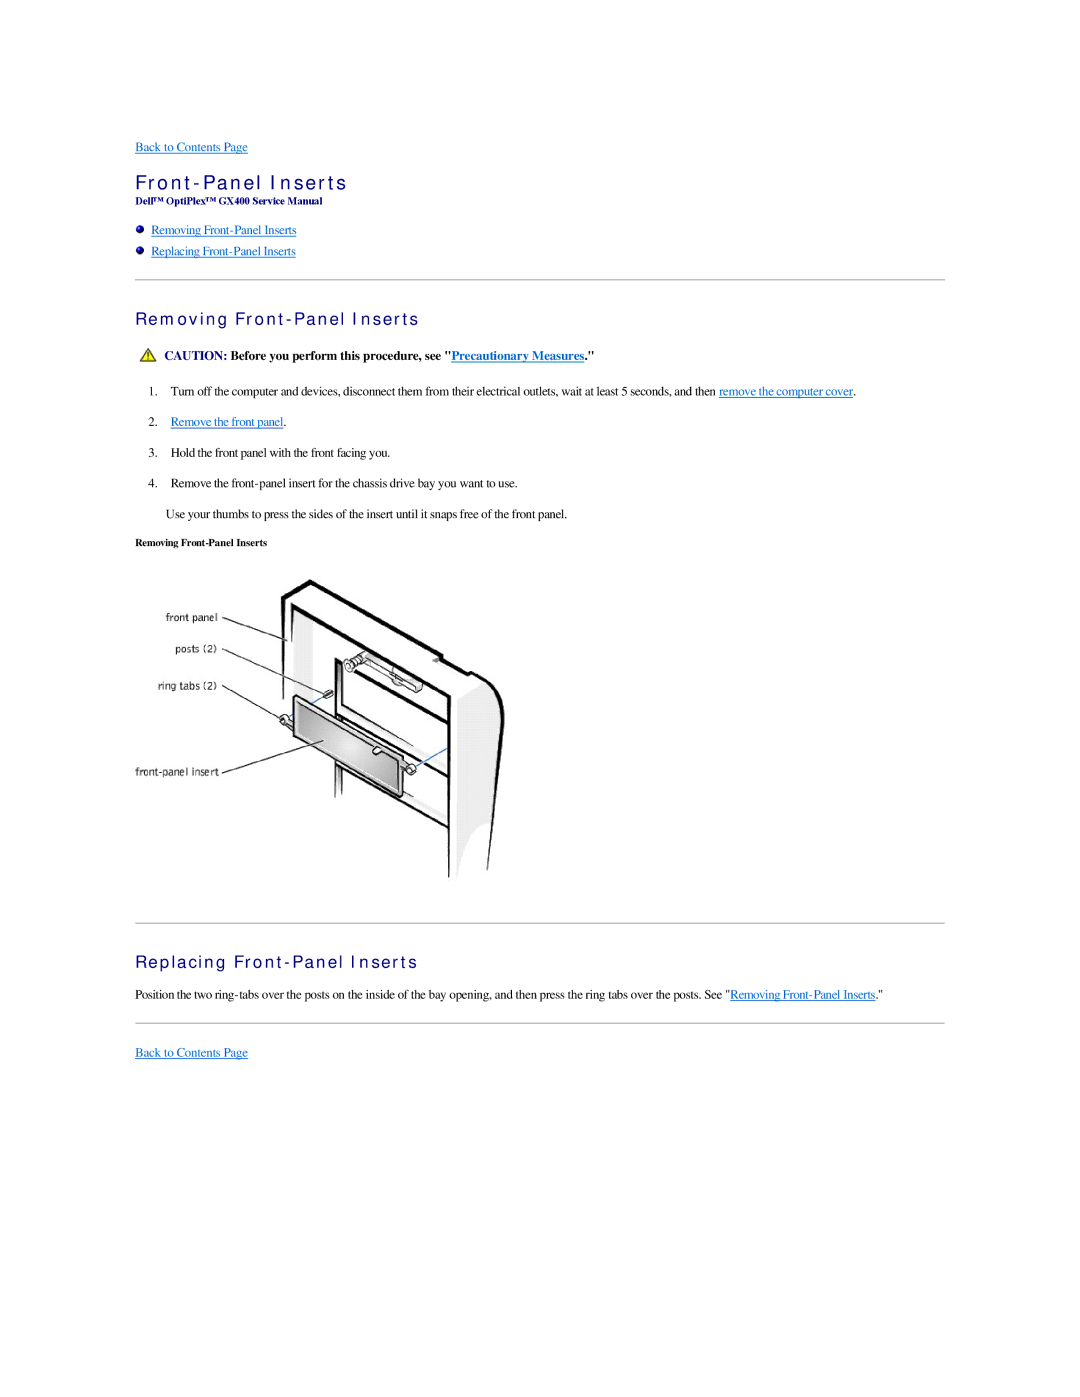
3.Hold the front panel with the front facing you.
4.Remove the
Use your thumbs to press the sides of the insert until it snaps free of the front panel.
Removing
Replacing Front-Panel Inserts
Position the two