Replacing a Hard Drive
1.Slide the drive into one of bracket bays, oriented so that the connectors on the back of the drive will face the interior of the chassis when the bracket is reinstalled. See "Removing a Hard Drive from the Bracket."
NOTE: Orient the drive in the bracket so that its bottom will face the left side of the chassis when the bracket is installed in the chassis.
2.Align the screw hole(s) of the drive and bracket, and secure the drive in the bracket using the screws that came with the upgrade kit.
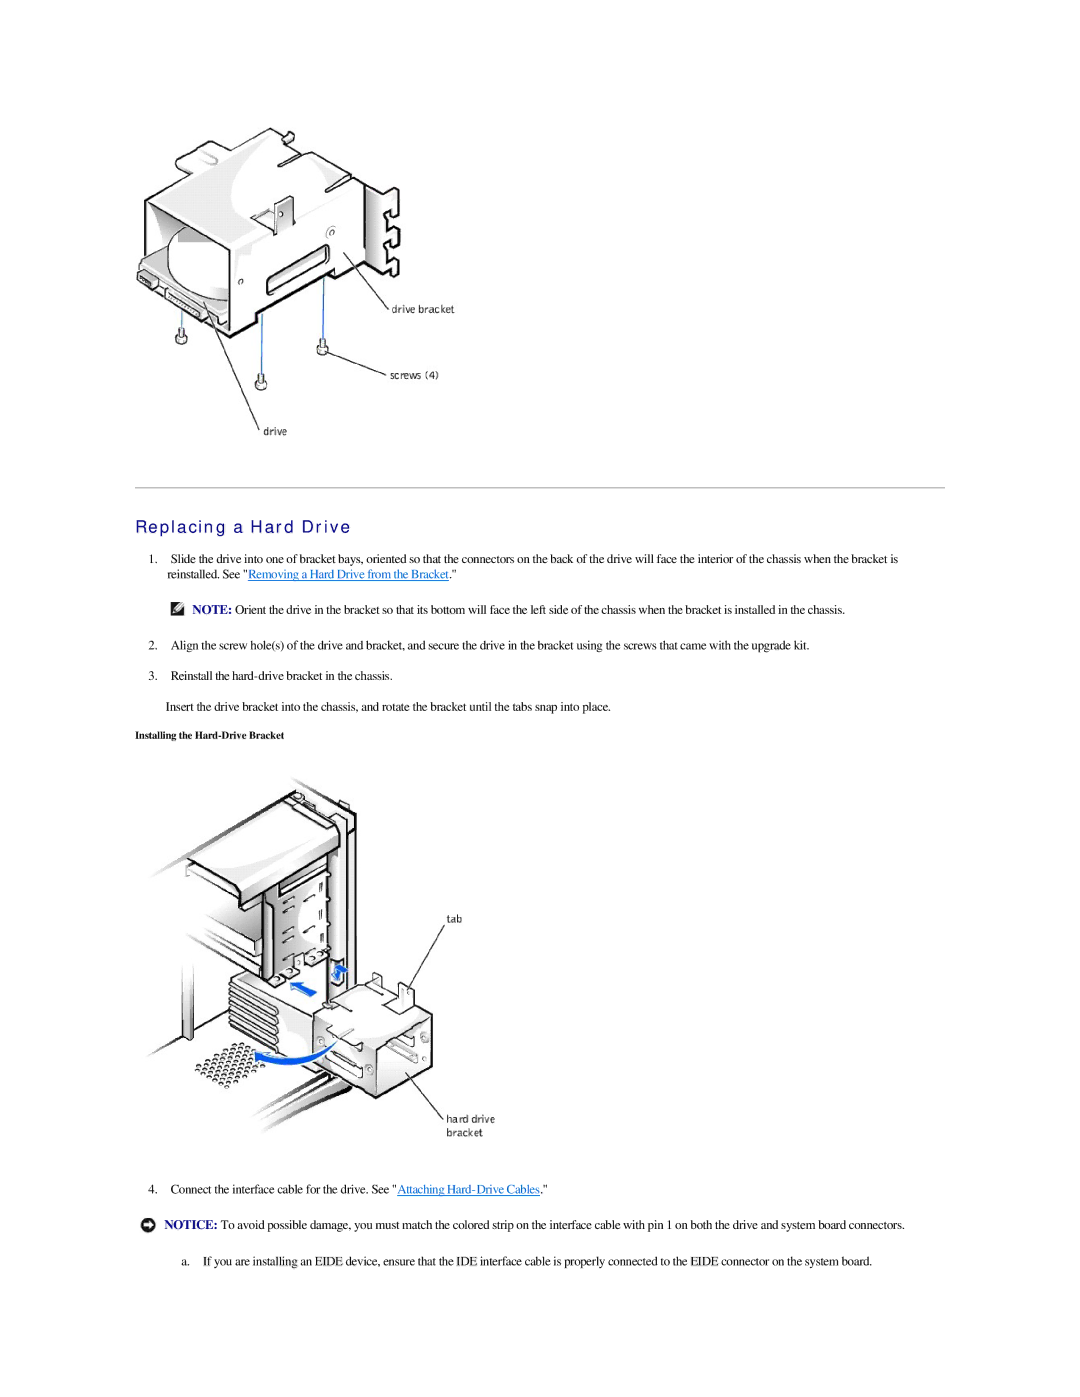
3.Reinstall the
Insert the drive bracket into the chassis, and rotate the bracket until the tabs snap into place.
Installing the
4. Connect the interface cable for the drive. See "Attaching
NOTICE: To avoid possible damage, you must match the colored strip on the interface cable with pin 1 on both the drive and system board connectors.
a. If you are installing an EIDE device, ensure that the IDE interface cable is properly connected to the EIDE connector on the system board.