Back to Contents Page
VRM
Dell™ OptiPlex™ GX400 Service Manual
Removing the VRM
Replacing the VRM
Removing the VRM
CAUTION: Before you perform this procedure, see "Precautionary Measures."
NOTICE: Before disconnecting a device from the computer or removing a component from the system board, verify that the standby power light on the system board has turned off. To locate this light, see "System Board Components."
1.Turn off the computer and devices, disconnect them from their electrical outlets, wait at least 5 seconds, and then remove the computer cover.
2.Rotate the power supply away from the system board.
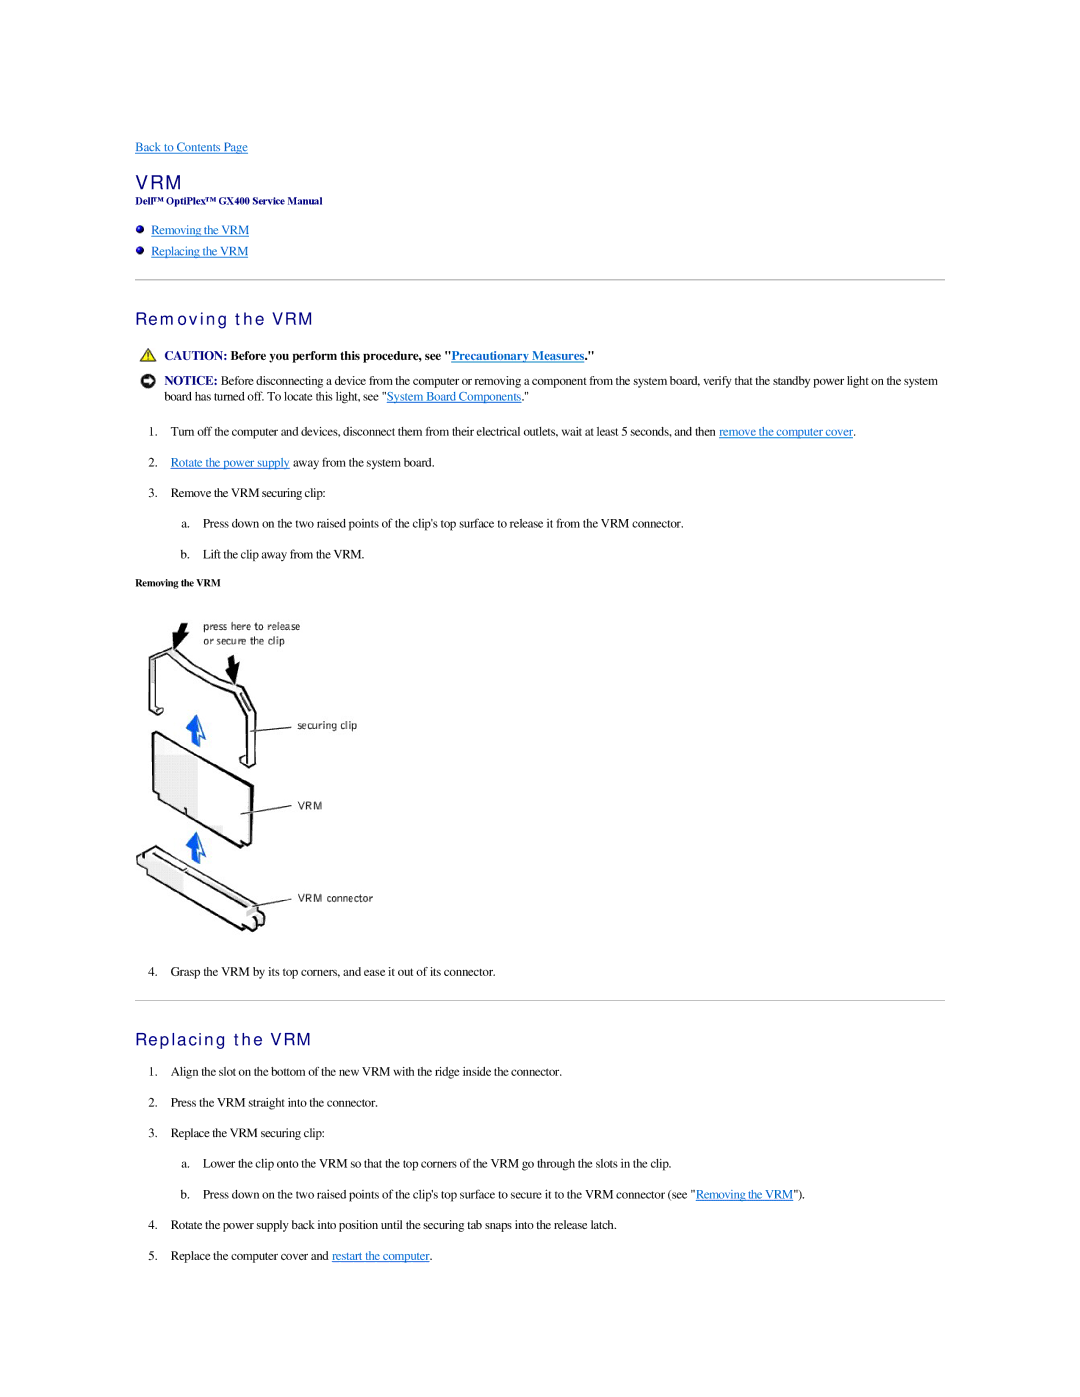
3.Remove the VRM securing clip:
a.Press down on the two raised points of the clip's top surface to release it from the VRM connector.
b.Lift the clip away from the VRM.
Removing the VRM
4. Grasp the VRM by its top corners, and ease it out of its connector.
Replacing the VRM
1.Align the slot on the bottom of the new VRM with the ridge inside the connector.
2.Press the VRM straight into the connector.
3.Replace the VRM securing clip:
a.Lower the clip onto the VRM so that the top corners of the VRM go through the slots in the clip.
b.Press down on the two raised points of the clip's top surface to secure it to the VRM connector (see "Removing the VRM").
4.Rotate the power supply back into position until the securing tab snaps into the release latch.
5.Replace the computer cover and restart the computer.