Replacing the System Board
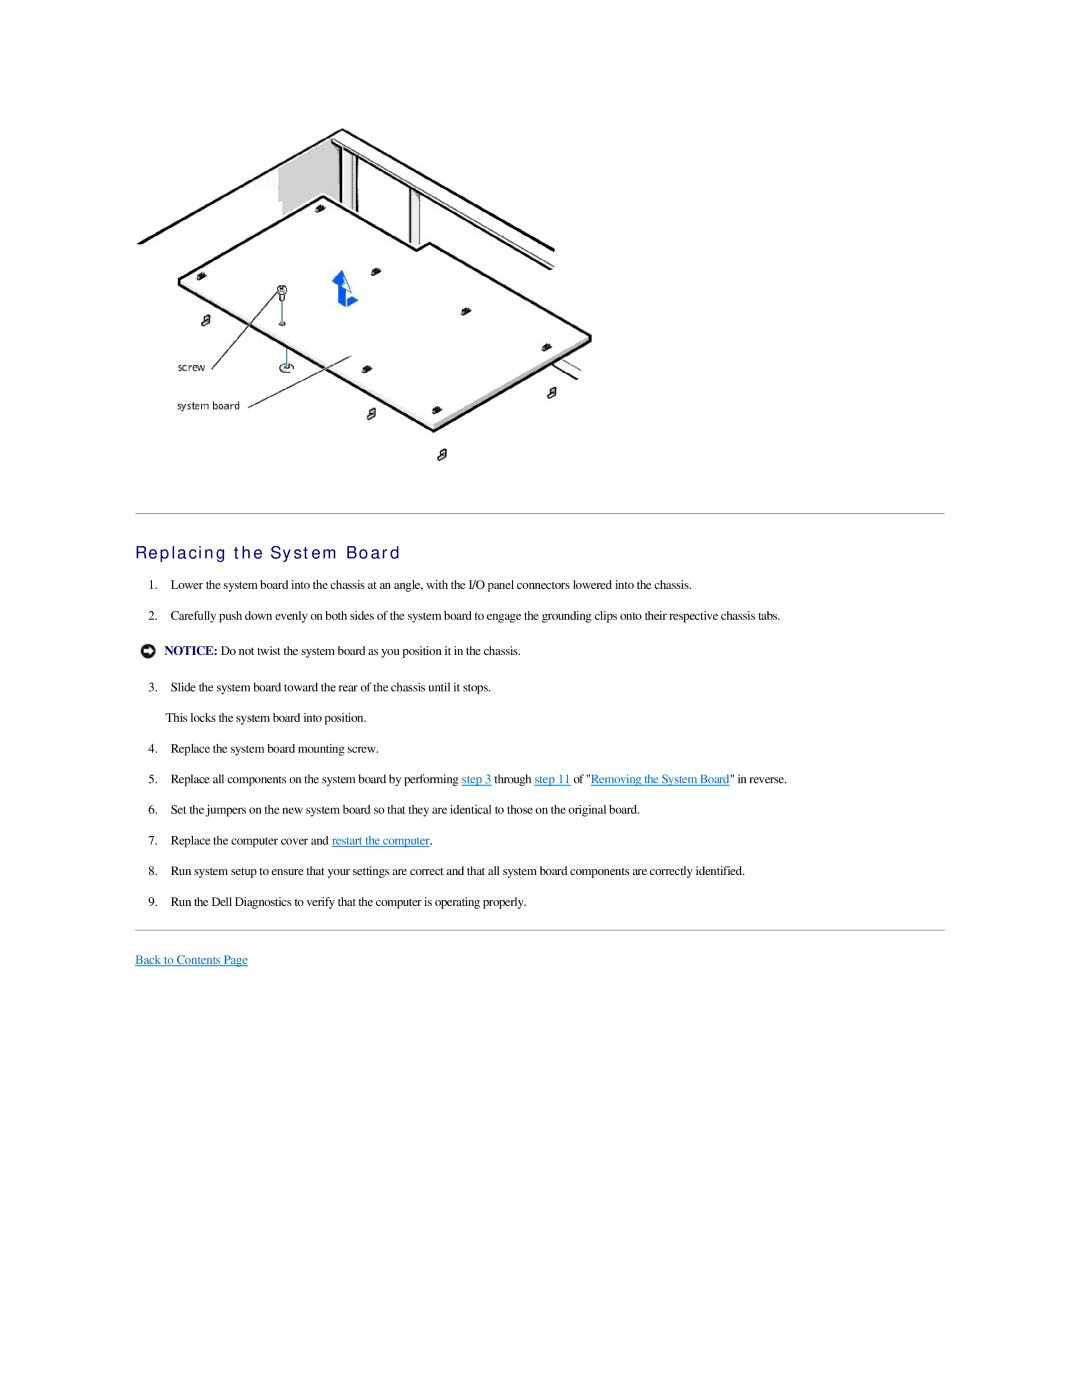
1.Lower the system board into the chassis at an angle, with the I/O panel connectors lowered into the chassis.
2.Carefully push down evenly on both sides of the system board to engage the grounding clips onto their respective chassis tabs.
NOTICE: Do not twist the system board as you position it in the chassis.
3.Slide the system board toward the rear of the chassis until it stops. This locks the system board into position.
4.Replace the system board mounting screw.
5.Replace all components on the system board by performing step 3 through step 11 of "Removing the System Board" in reverse.
6.Set the jumpers on the new system board so that they are identical to those on the original board.
7.Replace the computer cover and restart the computer.
8.Run system setup to ensure that your settings are correct and that all system board components are correctly identified.
9.Run the Dell Diagnostics to verify that the computer is operating properly.
