4.If necessary, disconnect any cables connected to the card.
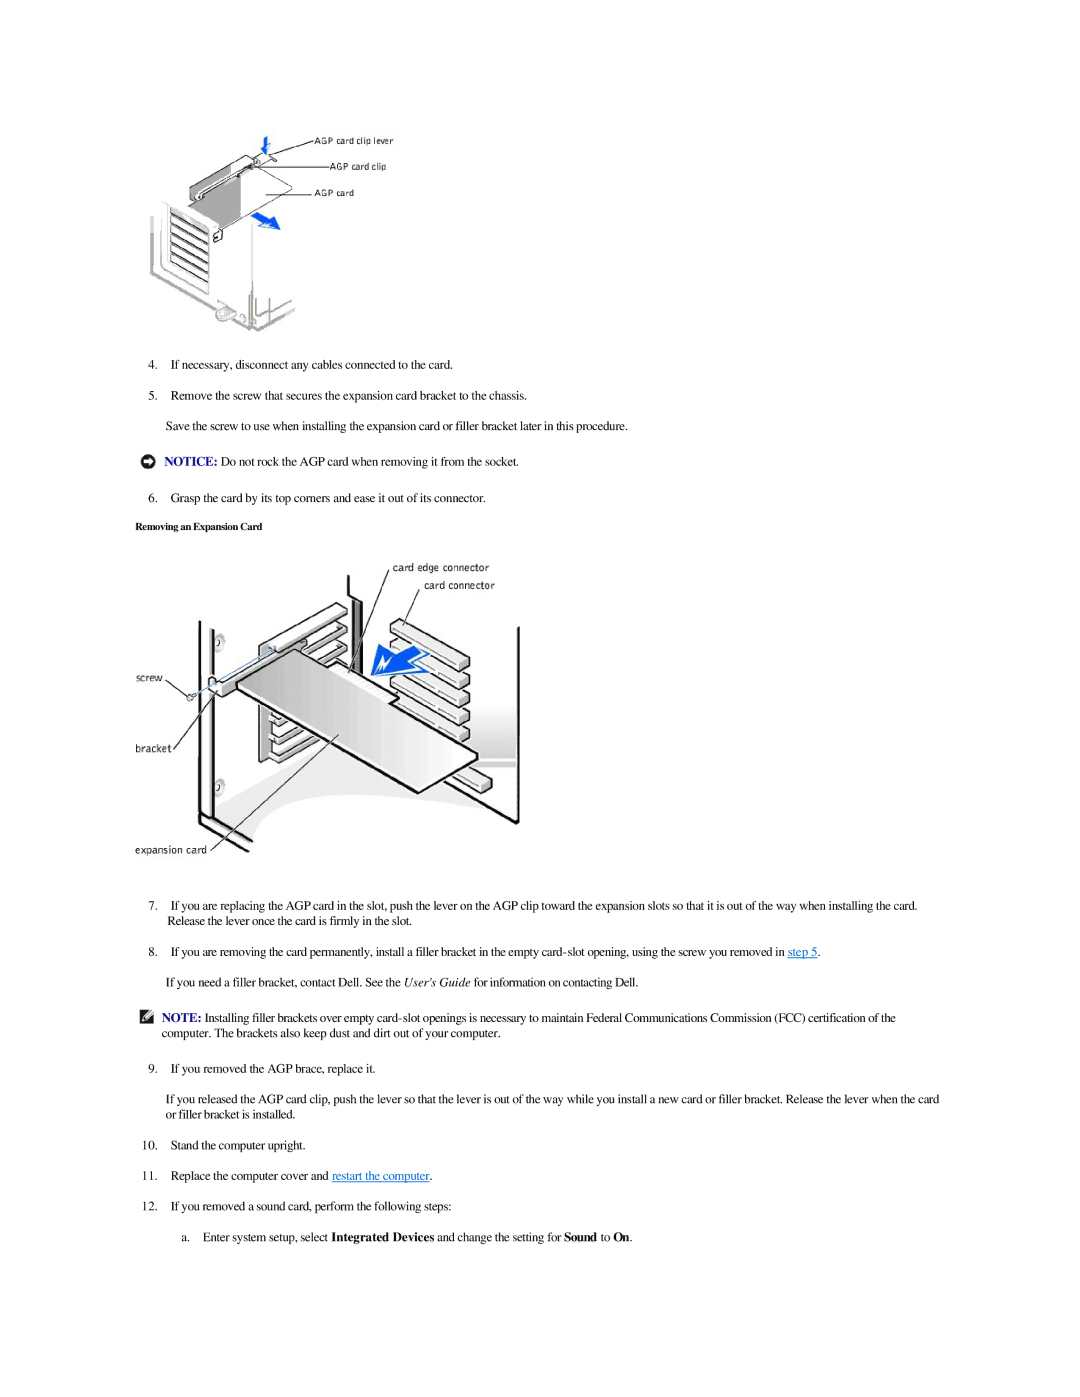
5.Remove the screw that secures the expansion card bracket to the chassis.
Save the screw to use when installing the expansion card or filler bracket later in this procedure.
NOTICE: Do not rock the AGP card when removing it from the socket.
6. Grasp the card by its top corners and ease it out of its connector.
Removing an Expansion Card
7.If you are replacing the AGP card in the slot, push the lever on the AGP clip toward the expansion slots so that it is out of the way when installing the card. Release the lever once the card is firmly in the slot.
8.If you are removing the card permanently, install a filler bracket in the empty
If you need a filler bracket, contact Dell. See the User's Guide for information on contacting Dell.
NOTE: Installing filler brackets over empty
9. If you removed the AGP brace, replace it.
If you released the AGP card clip, push the lever so that the lever is out of the way while you install a new card or filler bracket. Release the lever when the card or filler bracket is installed.
10.Stand the computer upright.
11.Replace the computer cover and restart the computer.
12.If you removed a sound card, perform the following steps:
a. Enter system setup, select Integrated Devices and change the setting for Sound to On.
