Back to Contents Page
System Memory
Dell™ OptiPlex™ GX400 Service Manual
Removing a Memory Module
Replacing a Memory Module
Removing a Memory Module
CAUTION: Before you perform this procedure, see "Precautionary Measures."
CAUTION: RIMMs can get very hot during system operation. Be sure that the RIMMs have had sufficient time to cool before you touch them.
NOTICE: Before disconnecting a device from the computer or removing a component from the system board, verify that the standby power light on the system board has turned off. To locate this light, see "System Board Components."
1.Turn off the computer and devices, disconnect them from their electrical outlets, wait at least 5 seconds, and then remove the computer cover.
2.Lay the computer on its right side.
3.Rotate the power supply away from the system board.
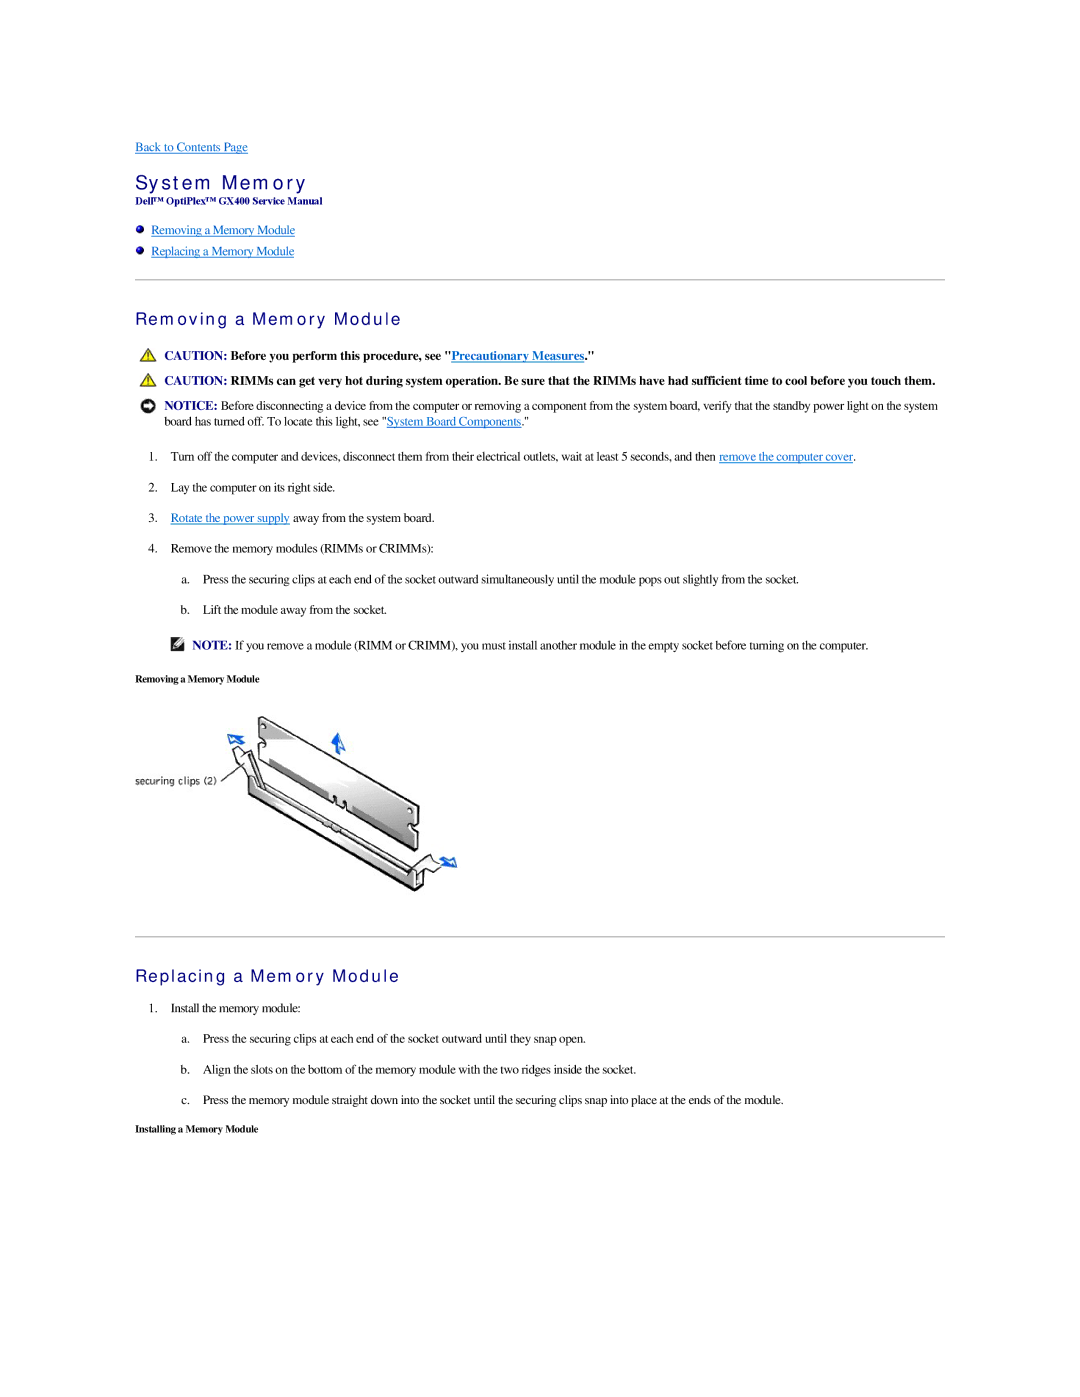
4.Remove the memory modules (RIMMs or CRIMMs):
a.Press the securing clips at each end of the socket outward simultaneously until the module pops out slightly from the socket.
b.Lift the module away from the socket.
NOTE: If you remove a module (RIMM or CRIMM), you must install another module in the empty socket before turning on the computer.
Removing a Memory Module
Replacing a Memory Module
1.Install the memory module:
a.Press the securing clips at each end of the socket outward until they snap open.
b.Align the slots on the bottom of the memory module with the two ridges inside the socket.
c.Press the memory module straight down into the socket until the securing clips snap into place at the ends of the module.
Installing a Memory Module
