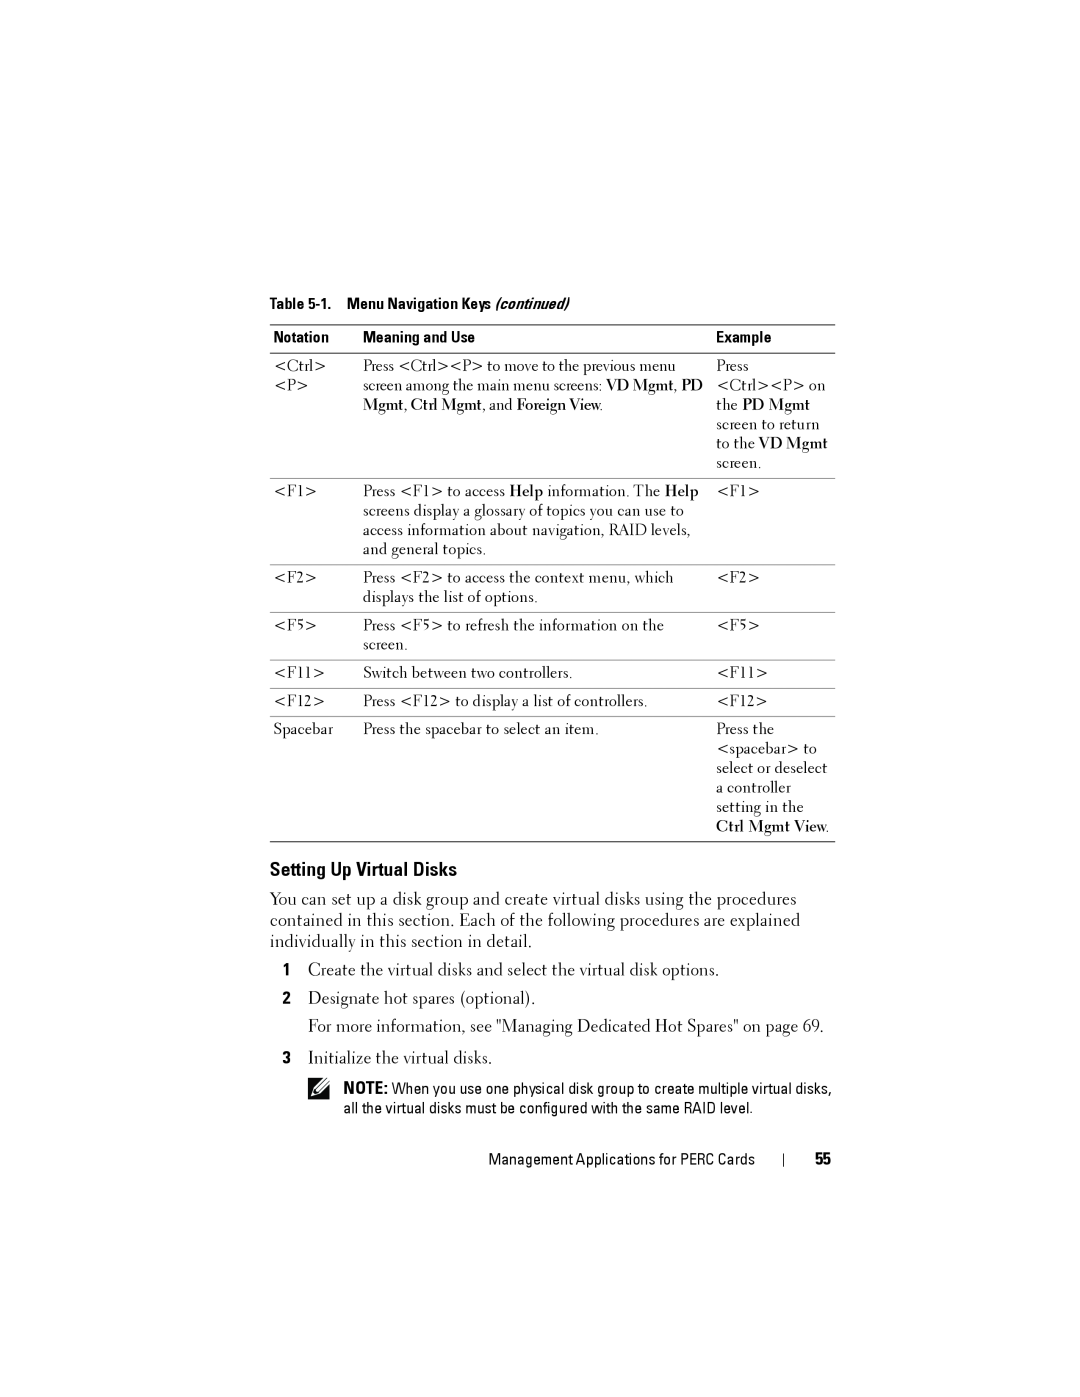
Table
Notation | Meaning and Use | Example |
|
|
|
<Ctrl> | Press <Ctrl><P> to move to the previous menu | Press |
<P> | screen among the main menu screens: VD Mgmt, PD | <Ctrl><P> on |
| Mgmt, Ctrl Mgmt, and Foreign View. | the PD Mgmt |
|
| screen to return |
|
| to the VD Mgmt |
|
| screen. |
|
|
|
<F1> | Press <F1> to access Help information. The Help | <F1> |
| screens display a glossary of topics you can use to |
|
| access information about navigation, RAID levels, |
|
| and general topics. |
|
|
|
|
<F2> | Press <F2> to access the context menu, which | <F2> |
| displays the list of options. |
|
|
|
|
<F5> | Press <F5> to refresh the information on the | <F5> |
| screen. |
|
|
|
|
<F11> | Switch between two controllers. | <F11> |
|
|
|
<F12> | Press <F12> to display a list of controllers. | <F12> |
|
|
|
Spacebar | Press the spacebar to select an item. | Press the |
|
| <spacebar> to |
|
| select or deselect |
|
| a controller |
|
| setting in the |
|
| Ctrl Mgmt View. |
|
|
|
Setting Up Virtual Disks
You can set up a disk group and create virtual disks using the procedures contained in this section. Each of the following procedures are explained individually in this section in detail.
1Create the virtual disks and select the virtual disk options.
2Designate hot spares (optional).
For more information, see "Managing Dedicated Hot Spares" on page 69.
3Initialize the virtual disks.
NOTE: When you use one physical disk group to create multiple virtual disks, all the virtual disks must be configured with the same RAID level.
Management Applications for PERC Cards
55