Español

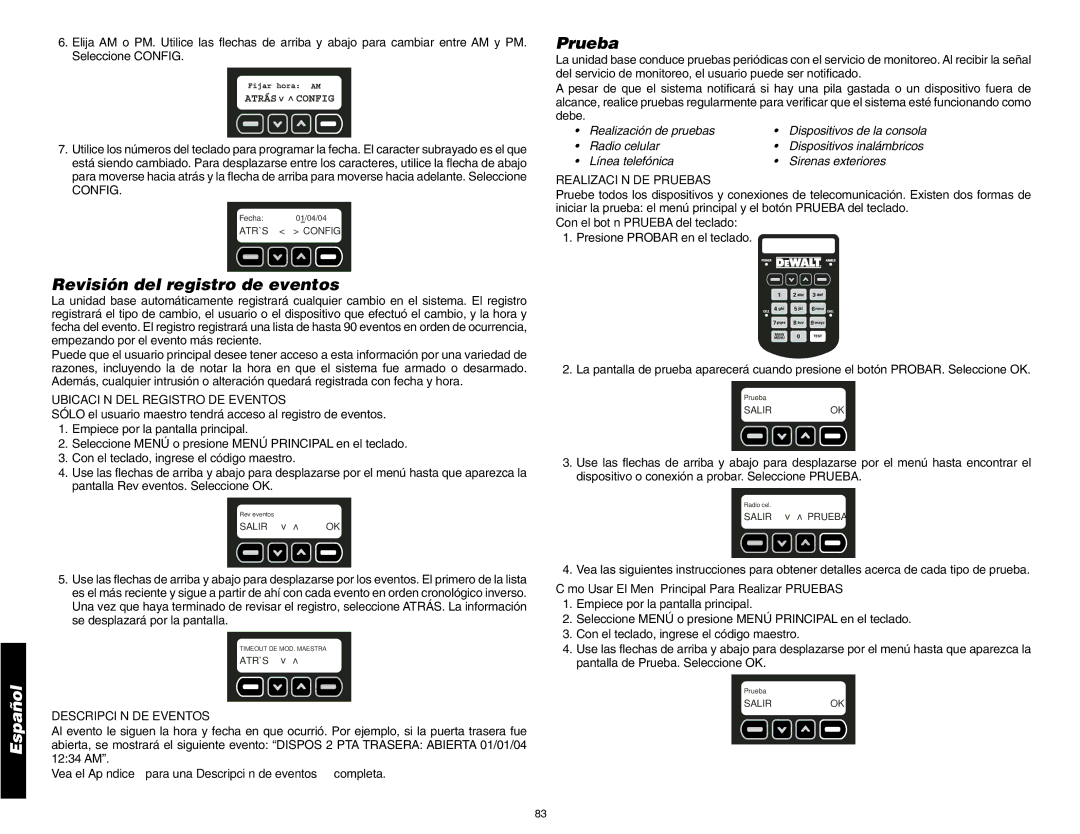
6.Elija AM o PM. Utilice las flechas de arriba y abajo para cambiar entre AM y PM. Seleccione CONFIG.

7.Utilice los números del teclado para programar la fecha. El caracter subrayado es el que está siendo cambiado. Para desplazarse entre los caracteres, utilice la flecha de abajo para moverse hacia atrás y la flecha de arriba para moverse hacia adelante. Seleccione

CONFIG.

Fecha: 01/04/04

ATRÁS < > CONFIG

Revisión del registro de eventos

La unidad base automáticamente registrará cualquier cambio en el sistema. El registro registrará el tipo de cambio, el usuario o el dispositivo que efectuó el cambio, y la hora y fecha del evento. El registro registrará una lista de hasta 90 eventos en orden de ocurrencia, empezando por el evento más reciente.

Puede que el usuario principal desee tener acceso a esta información por una variedad de razones, incluyendo la de notar la hora en que el sistema fue armado o desarmado. Además, cualquier intrusión o alteración quedará registrada con fecha y hora.

UBICACIÓN DEL REGISTRO DE EVENTOS

SÓLO el usuario maestro tendrá acceso al registro de eventos.

1.Empiece por la pantalla principal.

2.Seleccione MENÚ o presione MENÚ PRINCIPAL en el teclado.

3.Con el teclado, ingrese el código maestro.

4.Use las flechas de arriba y abajo para desplazarse por el menú hasta que aparezca la pantalla Rev eventos. Seleccione OK.

Rev eventos

SALIROK

5.Use las flechas de arriba y abajo para desplazarse por los eventos. El primero de la lista es el más reciente y sigue a partir de ahí con cada evento en orden cronológico inverso. Una vez que haya terminado de revisar el registro, seleccione ATRÁS. La información se desplazará por la pantalla.

TIMEOUT DE MOD. MAESTRA

ATRÁS

DESCRIPCIÓN DE EVENTOS

Al evento le siguen la hora y fecha en que ocurrió. Por ejemplo, si la puerta trasera fue abierta, se mostrará el siguiente evento: “DISPOS 2 PTA TRASERA: ABIERTA 01/01/04 12:34 AM”.

Vea el Apéndice para una Descripción de eventos completa.

Prueba

La unidad base conduce pruebas periódicas con el servicio de monitoreo. Al recibir la señal del servicio de monitoreo, el usuario puede ser notificado.

A pesar de que el sistema notificará si hay una pila gastada o un dispositivo fuera de alcance, realice pruebas regularmente para verificar que el sistema esté funcionando como debe.

Realización de pruebas

• Dispositivos de la consola

Radio celular

Dispositivos inalámbricos

Línea telefónica

Sirenas exteriores

REALIZACIÓN DE PRUEBAS

Pruebe todos los dispositivos y conexiones de telecomunicación. Existen dos formas de iniciar la prueba: el menú principal y el botón PRUEBA del teclado.

Con el botón PRUEBA del teclado:

1. Presione PROBAR en el teclado.

2. La pantalla de prueba aparecerá cuando presione el botón PROBAR. Seleccione OK.

Prueba

SALIROK

3.Use las flechas de arriba y abajo para desplazarse por el menú hasta encontrar el dispositivo o conexión a probar. Seleccione PRUEBA.

Radio cel.

SALIR PRUEBA

4. Vea las siguientes instrucciones para obtener detalles acerca de cada tipo de prueba.

Cómo Usar El Menú Principal Para Realizar PRUEBAS

1.Empiece por la pantalla principal.

2.Seleccione MENÚ o presione MENÚ PRINCIPAL en el teclado.

3.Con el teclado, ingrese el código maestro.

4.Use las flechas de arriba y abajo para desplazarse por el menú hasta que aparezca la pantalla de Prueba. Seleccione OK.

Prueba

SALIROK

83

Page 90
Image 90
DeWalt DS200, DS100 Revisión del registro de eventos, Prueba, Ubicación DEL Registro DE Eventos, Descripción DE Eventos

DS100, DS200 specifications

DeWalt has long been recognized as a leader in the power tool industry, and its DS200 and DS100 models continue this tradition by offering innovative features and reliable performance. Both models are designed with contractors and DIY enthusiasts in mind, providing durability and efficiency in various applications.

The DeWalt DS200 is a dual-speed, heavy-duty job site radio designed to withstand the rigors of construction environments. It boasts an impressive 20V MAX lithium-ion battery compatibility, allowing for extended battery life and convenience on the job site. One of the main features of the DS200 is its Bluetooth connectivity, enabling users to stream music directly from their smartphones or tablets. This added functionality allows for a more enjoyable work environment, fostering motivation and focus.

The sound quality of the DS200 is exceptional, featuring high-performance speakers and a digital sound processing system. Its rugged exterior is designed to protect it against dust and moisture, making it highly suitable for outdoor use. The DS200 also features a built-in USB port, allowing users to charge their devices while on the go. Additionally, its integrated hooks and available carrying handle offer enhanced portability, enabling easy transportation from one job site to another.

On the other hand, the DeWalt DS100 is a more compact and lightweight option, perfect for those seeking a portable audio solution without compromising on sound quality. The DS100 also supports 20V MAX lithium-ion batteries, ensuring compatibility and extending battery runtime. With its integrated Bluetooth technology, users can easily connect their devices and enjoy crisp audio performance.

The DS100's design prioritizes convenience, featuring a durable carry strap and a compact size that allows it to fit comfortably in small spaces. Despite its smaller stature, the DS100 does not sacrifice sound quality, providing rich audio capable of filling a room.

Both models exemplify DeWalt's commitment to quality and innovation. With their robust designs and advanced technologies, the DS200 and DS100 cater to the needs of modern users, making them essential tools for both professional contractors and home improvement enthusiasts. Whether in the workshop or on the job site, these audio solutions enhance productivity and elevate the working experience.