DVS-36 & DVS-42 FRAMING AND FINISHING (continued)
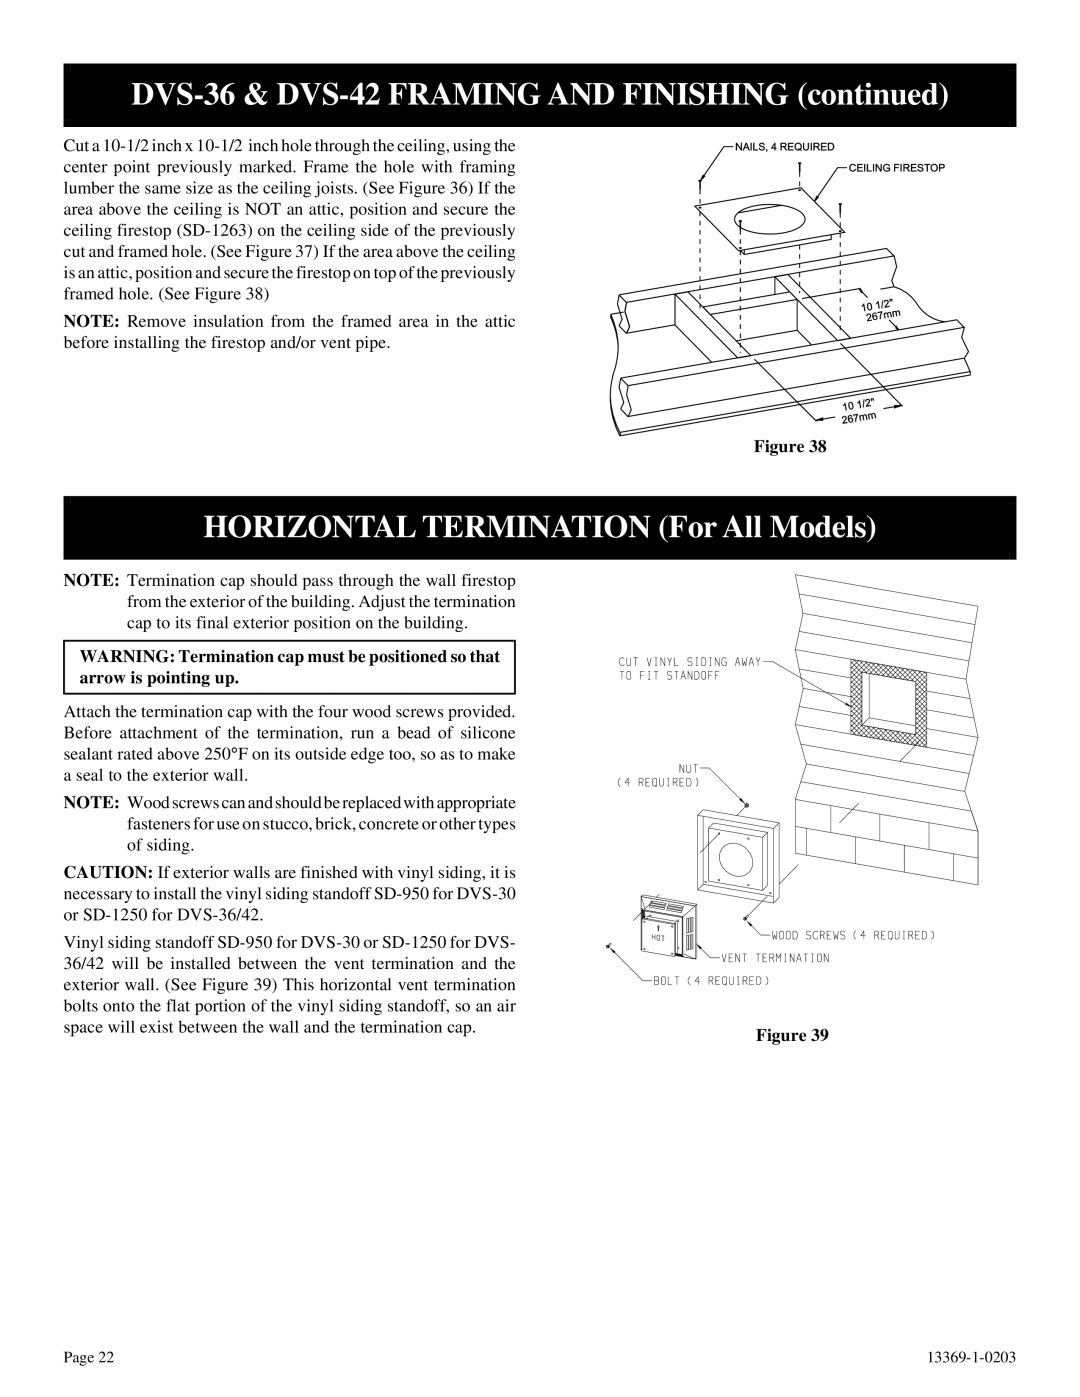
Cut a
NOTE: Remove insulation from the framed area in the attic before installing the firestop and/or vent pipe.
NAILS, 4 REQUIRED
CEILING FIRESTOP
| " |
10 | 1/2 |
267mm | |
| " | |
10 | 1/2 | |
m | ||
| ||
267m | ||
Figure 38
HORIZONTAL TERMINATION (For All Models)
NOTE: Termination cap should pass through the wall firestop from the exterior of the building. Adjust the termination cap to its final exterior position on the building.
WARNING: Termination cap must be positioned so that arrow is pointing up.
Attach the termination cap with the four wood screws provided. Before attachment of the termination, run a bead of silicone sealant rated above 250° F on its outside edge too, so as to make a seal to the exterior wall.
NOTE: Wood screws can and should be replaced with appropriate fasteners for use on stucco, brick, concrete or other types of siding.
CAUTION: If exterior walls are finished with vinyl siding, it is necessary to install the vinyl siding standoff
Vinyl siding standoff |
|
36/42 will be installed between the vent termination and the |
|
exterior wall. (See Figure 39) This horizontal vent termination |
|
bolts onto the flat portion of the vinyl siding standoff, so an air |
|
space will exist between the wall and the termination cap. | Figure 39 |
|
Page 22 |