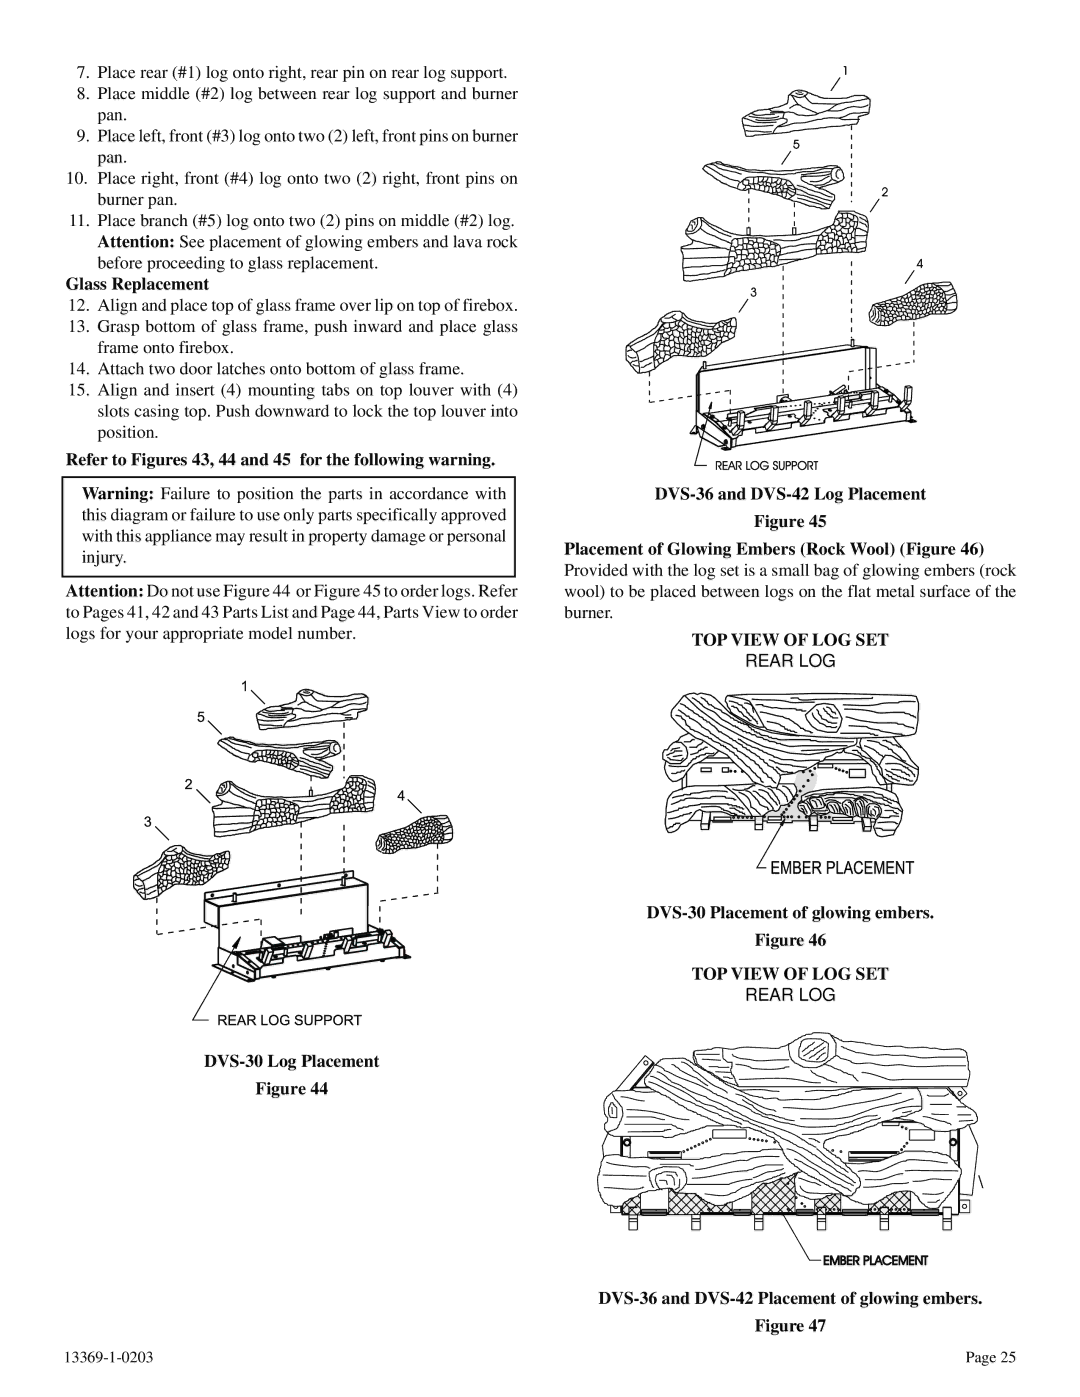
7.Place rear (#1) log onto right, rear pin on rear log support.
8.Place middle (#2) log between rear log support and burner pan.
9.Place left, front (#3) log onto two (2) left, front pins on burner pan.
10.Place right, front (#4) log onto two (2) right, front pins on burner pan.
11.Place branch (#5) log onto two (2) pins on middle (#2) log. Attention: See placement of glowing embers and lava rock before proceeding to glass replacement.
Glass Replacement
12.Align and place top of glass frame over lip on top of firebox.
13.Grasp bottom of glass frame, push inward and place glass frame onto firebox.
14.Attach two door latches onto bottom of glass frame.
15.Align and insert (4) mounting tabs on top louver with (4) slots casing top. Push downward to lock the top louver into position.
Refer to Figures 43, 44 and 45 for the following warning.
Warning: Failure to position the parts in accordance with this diagram or failure to use only parts specifically approved with this appliance may result in property damage or personal injury.
Attention: Do not use Figure 44 or Figure 45 to order logs. Refer to Pages 41, 42 and 43 Parts List and Page 44, Parts View to order logs for your appropriate model number.
Figure 44
Figure 45
Placement of Glowing Embers (Rock Wool) (Figure 46)
Provided with the log set is a small bag of glowing embers (rock wool) to be placed between logs on the flat metal surface of the burner.
TOP VIEW OF LOG SET
REAR LOG
DVS-30 Placement of glowing embers.
Figure 46
TOP VIEW OF LOG SET
REAR LOG
\
DVS-36 and DVS-42 Placement of glowing embers.
Figure 47
Page 25 |