Adjusting the height of the base
If you wish to adjust the height, please read the following points before you start.
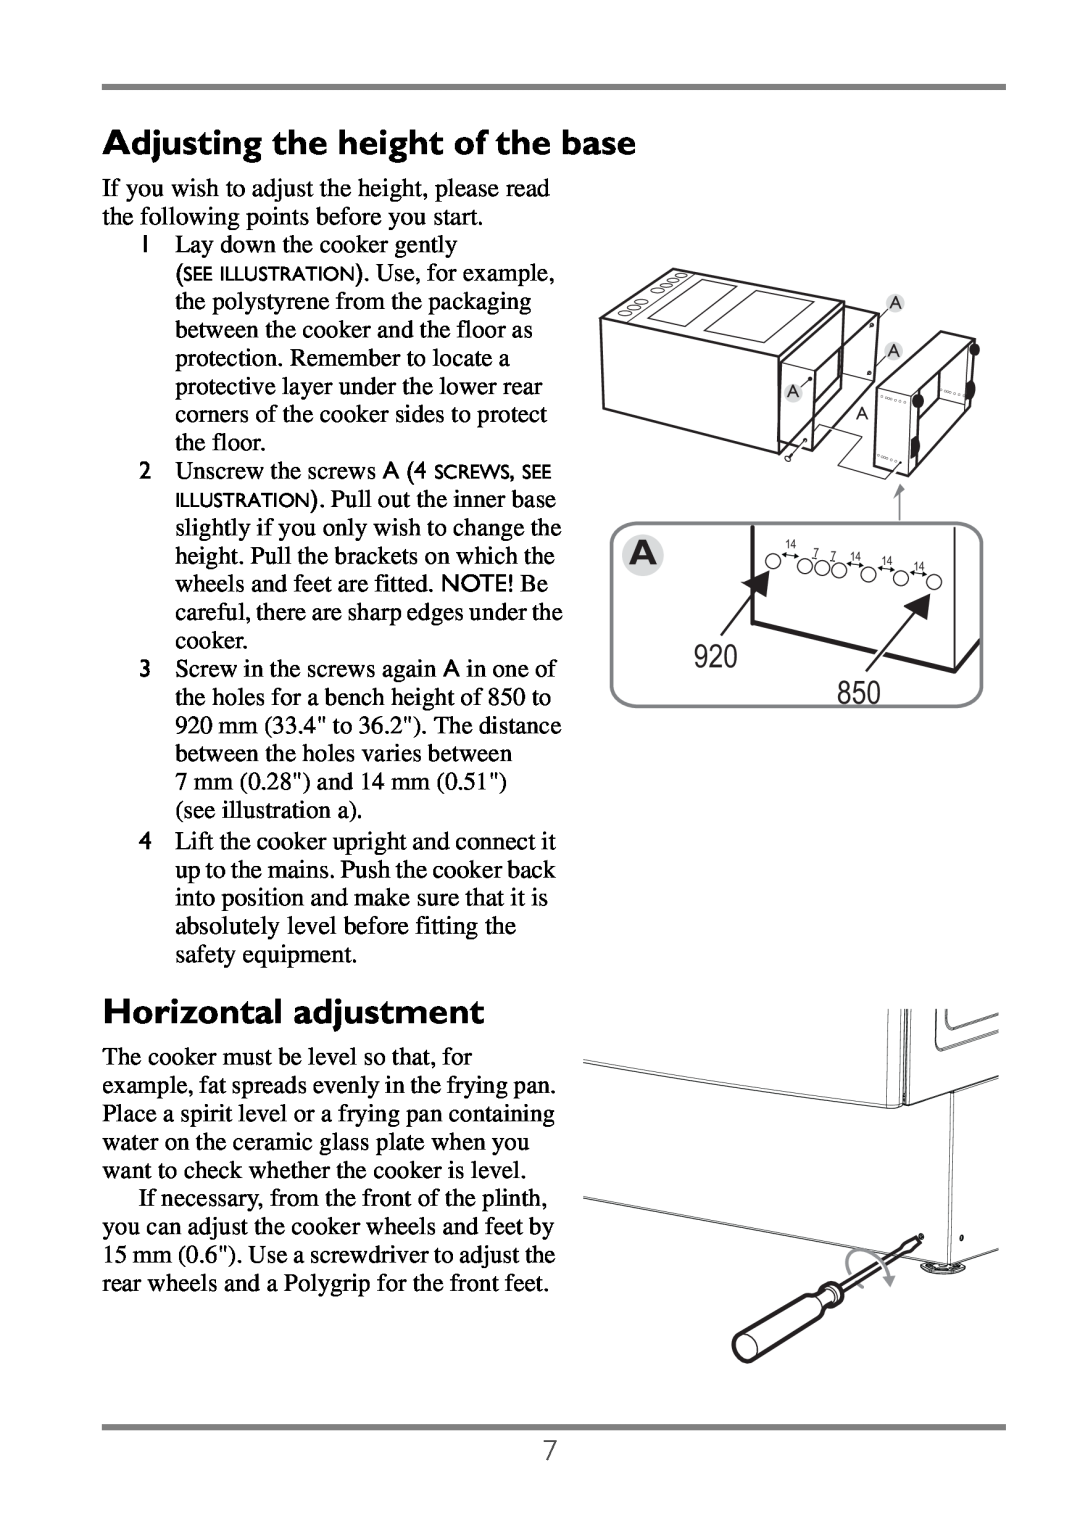
1 Lay down the cooker gently |
| |
(SEE ILLUSTRATION). Use, for example, |
| |
the polystyrene from the packaging |
| |
between the cooker and the floor as |
| |
protection. Remember to locate a |
| |
protective layer under the lower rear |
| |
corners of the cooker sides to protect |
| |
the floor. |
| |
2 Unscrew the screws A (4 SCREWS, SEE |
| |
ILLUSTRATION). Pull out the inner base |
| |
slightly if you only wish to change the | A | |
height. Pull the brackets on which the | ||
wheels and feet are fitted. NOTE! Be |
| |
careful, there are sharp edges under the |
| |
cooker. | 920 | |
3 Screw in the screws again A in one of | ||
| ||
the holes for a bench height of 850 to |
| |
920 mm (33.4" to 36.2"). The distance |
| |
between the holes varies between |
| |
7 mm (0.28") and 14 mm (0.51") |
| |
(see illustration a). |
| |
4 Lift the cooker upright and connect it |
| |
up to the mains. Push the cooker back |
| |
into position and make sure that it is |
| |
absolutely level before fitting the |
| |
safety equipment. |
| |
Horizontal adjustment |
| |
The cooker must be level so that, for |
| |
example, fat spreads evenly in the frying pan. |
| |
Place a spirit level or a frying pan containing |
| |
water on the ceramic glass plate when you |
| |
want to check whether the cooker is level. |
| |
If necessary, from the front of the plinth, |
| |
you can adjust the cooker wheels and feet by |
| |
15 mm (0.6"). Use a screwdriver to adjust the |
| |
rear wheels and a Polygrip for the front feet. |
|
A
A
A ![]()
A
14 | 7 | 7 | 14 |
|
|
| 14 | 14 | |||
|
| ||||
|
|
|
| ||
|
|
|
|
|
850
7