Connecting Sony
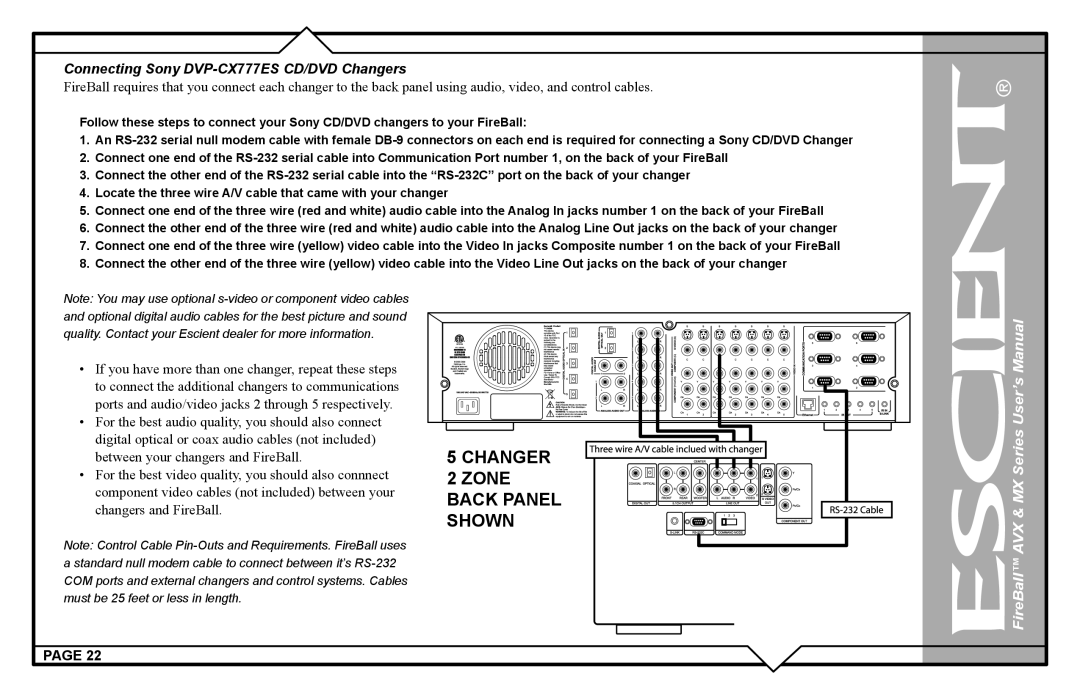
FireBall requires that you connect each changer to the back panel using audio, video, and control cables.
Follow these steps to connect your Sony CD/DVD changers to your FireBall:
1.An
2.Connect one end of the
3.Connect the other end of the
4.Locate the three wire A/V cable that came with your changer
5.Connect one end of the three wire (red and white) audio cable into the Analog In jacks number 1 on the back of your FireBall
6.Connect the other end of the three wire (red and white) audio cable into the Analog Line Out jacks on the back of your changer
7.Connect one end of the three wire (yellow) video cable into the Video In jacks Composite number 1 on the back of your FireBall
8.Connect the other end of the three wire (yellow) video cable into the Video Line Out jacks on the back of your changer
Note: You may use optional
•If you have more than one changer, repeat these steps to connect the additional changers to communications ports and audio/video jacks 2 through 5 respectively.
•For the best audio quality, you should also connect digital optical or coax audio cables (not included) between your changers and FireBall.
•For the best video quality, you should also connnect component video cables (not included) between your changers and FireBall.
Note: Control Cable
5CHANGER
2 ZONE BACK PANEL SHOWN
![]() FireBall™ AVX & MX Series User’s Manual
FireBall™ AVX & MX Series User’s Manual
PAGE 22
