Installation and Operation
Mounting the Scaler
Tabletop/desktop placement
For tabletop or desktop placement only, install the
Rack mounting
1. If feet were installed on the bottom of the DVS 204, remove them.
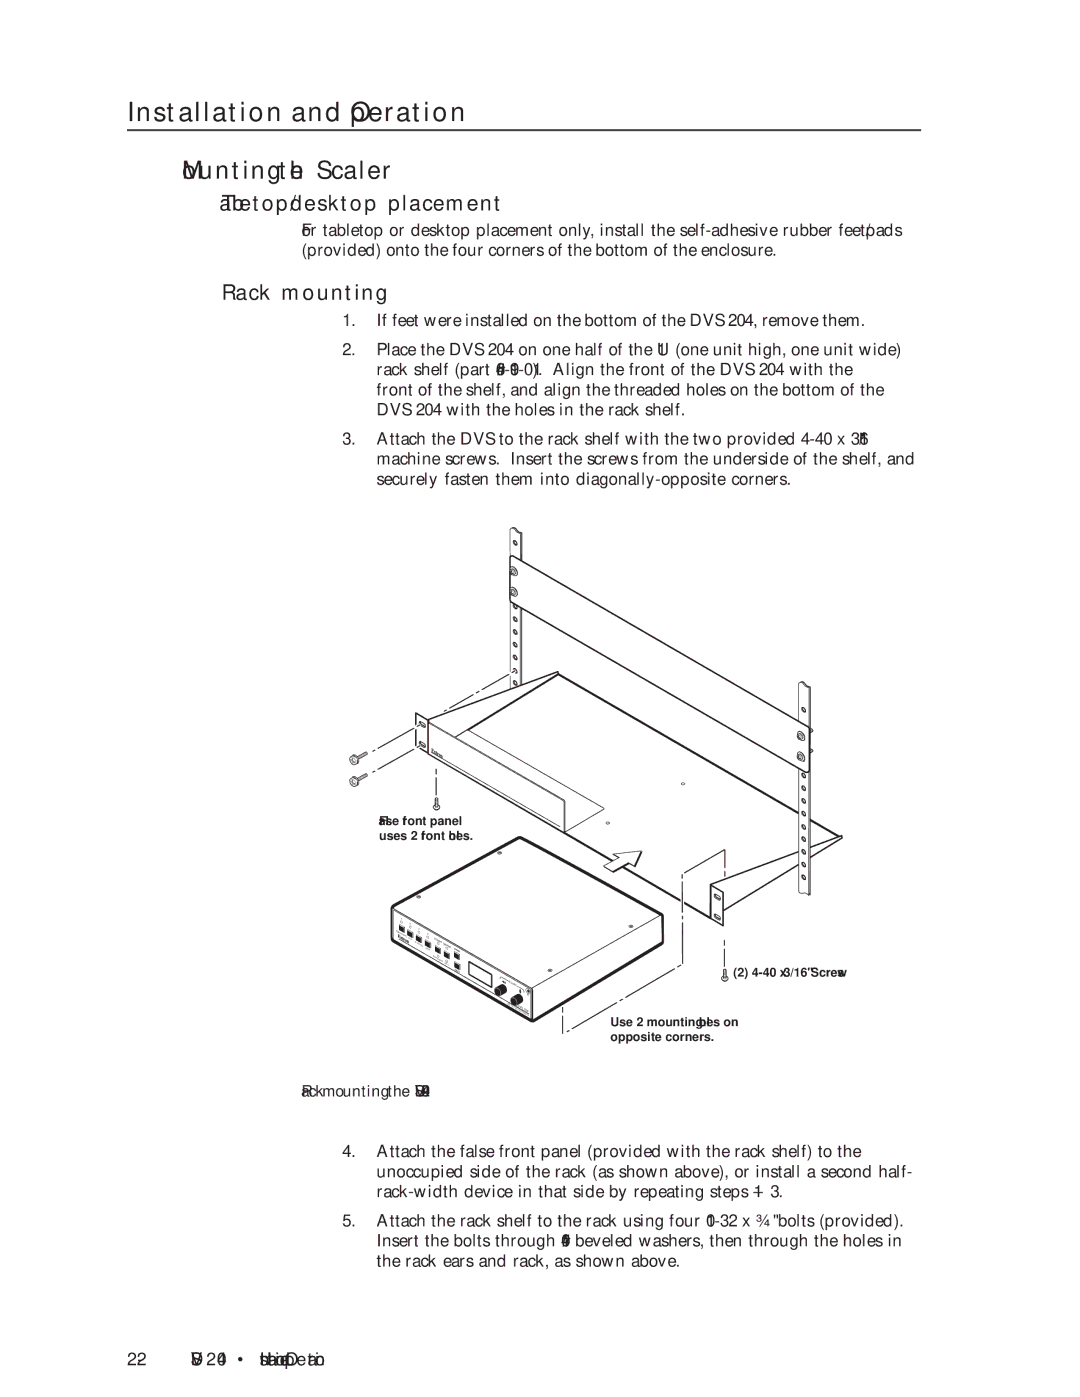
2. Place the DVS 204 on one half of the 1U (one unit high, one unit wide) rack shelf (part
3. Attach the DVS to the rack shelf with the two provided
False front panel uses 2 front holes.
1 |
|
|
|
| 2 |
|
|
COMPOSITE | 3 |
|
|
4 |
|
| |
| YUV | COL/TNT |
|
| CENTER | ||
| IDEO |
| |
| RGB |
| MENU |
|
| BRT/C |
|
|
| ONT | SIZE |
|
|
| |
|
|
| NEXT |
ADJ |
|
|
|
UST |
|
| |
|
|
| IR |
DIG | DVS |
| |
ITAL V | 204 | ||
| IDEO |
| |
|
| SCALER | |
Rack mounting the DVS 204
![]() (2)
(2)
Use 2 mounting holes on opposite corners.
4. Attach the false front panel (provided with the rack shelf) to the unoccupied side of the rack (as shown above), or install a second half-
5. Attach the rack shelf to the rack using four
