Operation, cont’d
If the +dB and
1. | If one or more input LEDs are lit AND the +dB LED is lit, press and | ||
| release the | button repeatedly until the | |
| LED goes out. Count the button presses. In Example 4, assume a value | ||
| of +8 dB. It will take three presses of the | button for the Input 1 LED | |
| to go out. |
|
|
| If one or more input LEDs are lit AND the | ||
| release the | button repeatedly until the | |
| LED goes out. Count the button presses. |
| |
| If the +dB LED is lit and NO input LEDs are lit, press and release the | ||
| button repeatedly until the +dB and | ||
| dB. Count the button presses. |
| |
| If the | ||
| button repeatedly until the +dB and | ||
| dB. Count the button presses. |
| |
2. | Return to the original audio level setting by pressing and releasing the | ||
| or button (the opposite of the button you pushed in step 1) the | ||
| same number of steps you pushed the opposite arrow button in step 1. | ||
| In Example 4, this means pushing the | button three times. | |
3. | Add the dB value indicated by the | ||
| input LEDs lit = 0 dB) and either: |
| |
| The number of button presses from 0 dB or, | ||
| The number of button presses from when the | ||
| LED lit. In Example 4, Input 1 LED (6 dB) + 2 presses (2 dB) = 8 dB. | ||
4. | The lit +dB or | ||
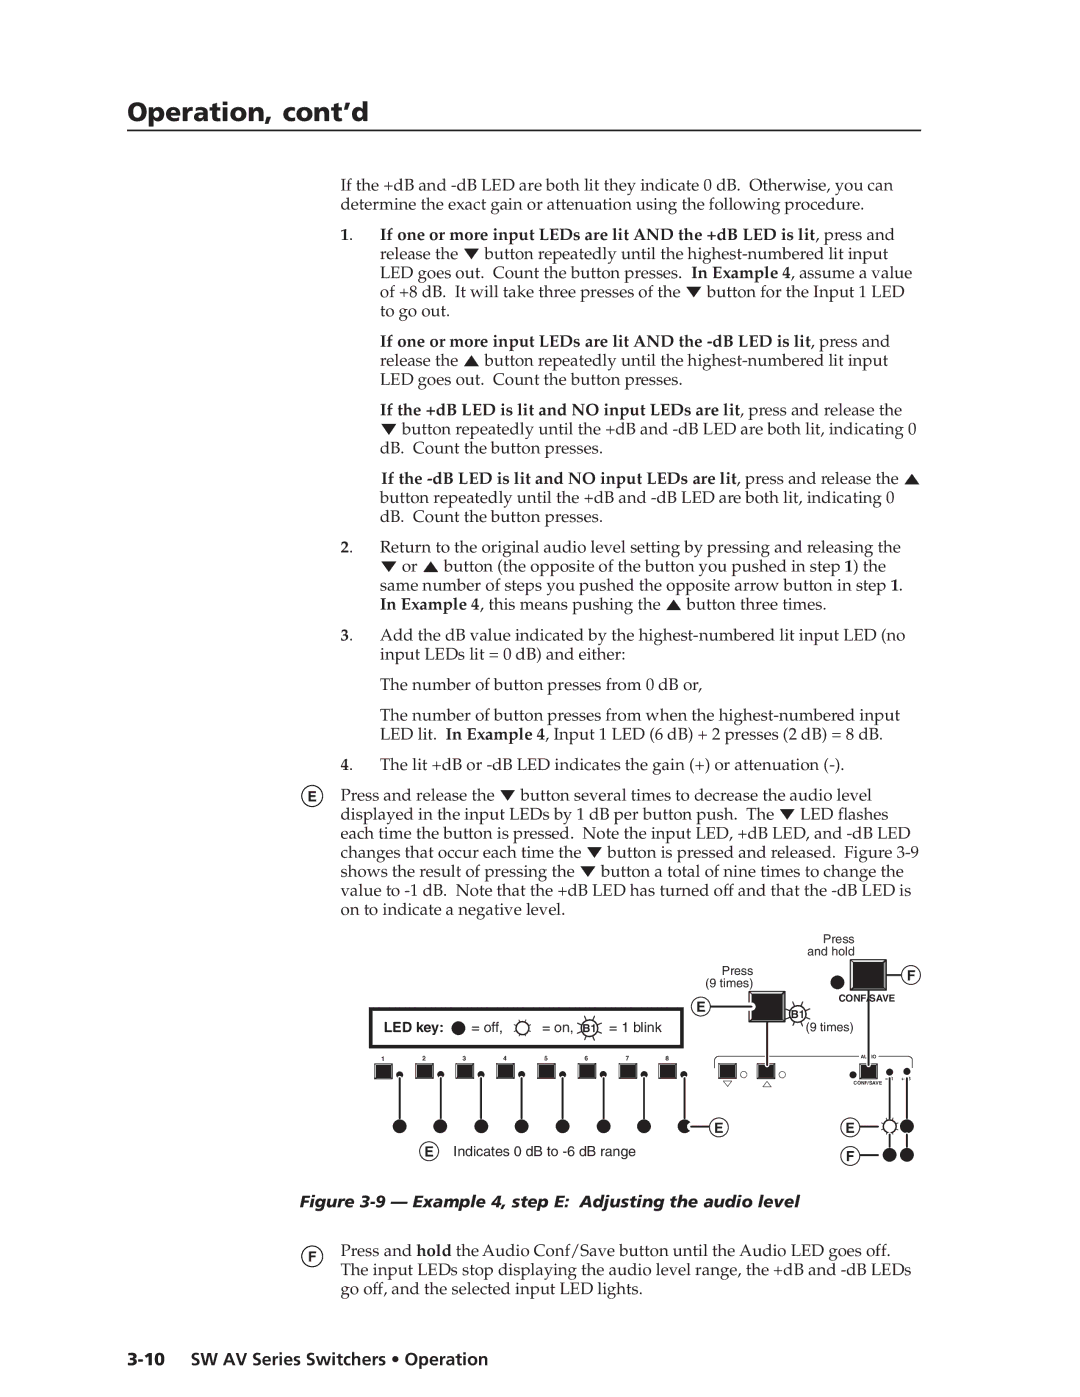
EPress and release the ![]() button several times to decrease the audio level displayed in the input LEDs by 1 dB per button push. The
button several times to decrease the audio level displayed in the input LEDs by 1 dB per button push. The ![]() LED flashes each time the button is pressed. Note the input LED, +dB LED, and
LED flashes each time the button is pressed. Note the input LED, +dB LED, and ![]() button is pressed and released. Figure
button is pressed and released. Figure ![]() button a total of nine times to change the value to
button a total of nine times to change the value to
Press and hold
Press (9 times)
F
|
|
|
|
|
|
|
| E | CONF/SAVE |
|
|
|
|
|
|
|
| B1 | |
LED key: |
| = off, | = on, |
| = 1 blink |
|
| ||
| B1 |
|
| (9 times) | |||||
1 | 2 | 3 | 4 | 5 | 6 | 7 | 8 |
| AUDIO |
|
| ||||||||
+dB | |
CONF/SAVE |
|
E | E |
E Indicates 0 dB to | F |
|
Figure 3-9 — Example 4, step E: Adjusting the audio level
FPress and hold the Audio Conf/Save button until the Audio LED goes off. The input LEDs stop displaying the audio level range, the +dB and