Installation — Stage 1
Stage 1
For instructions on the type of installation you are planning, proceed to one of the pages listed below:
•Drop ceiling — page 2-4
•Junction box — page 2-6
•Wall or other hard surface — page 2-7
This stage consists of installing the pieces of hardware shown below.
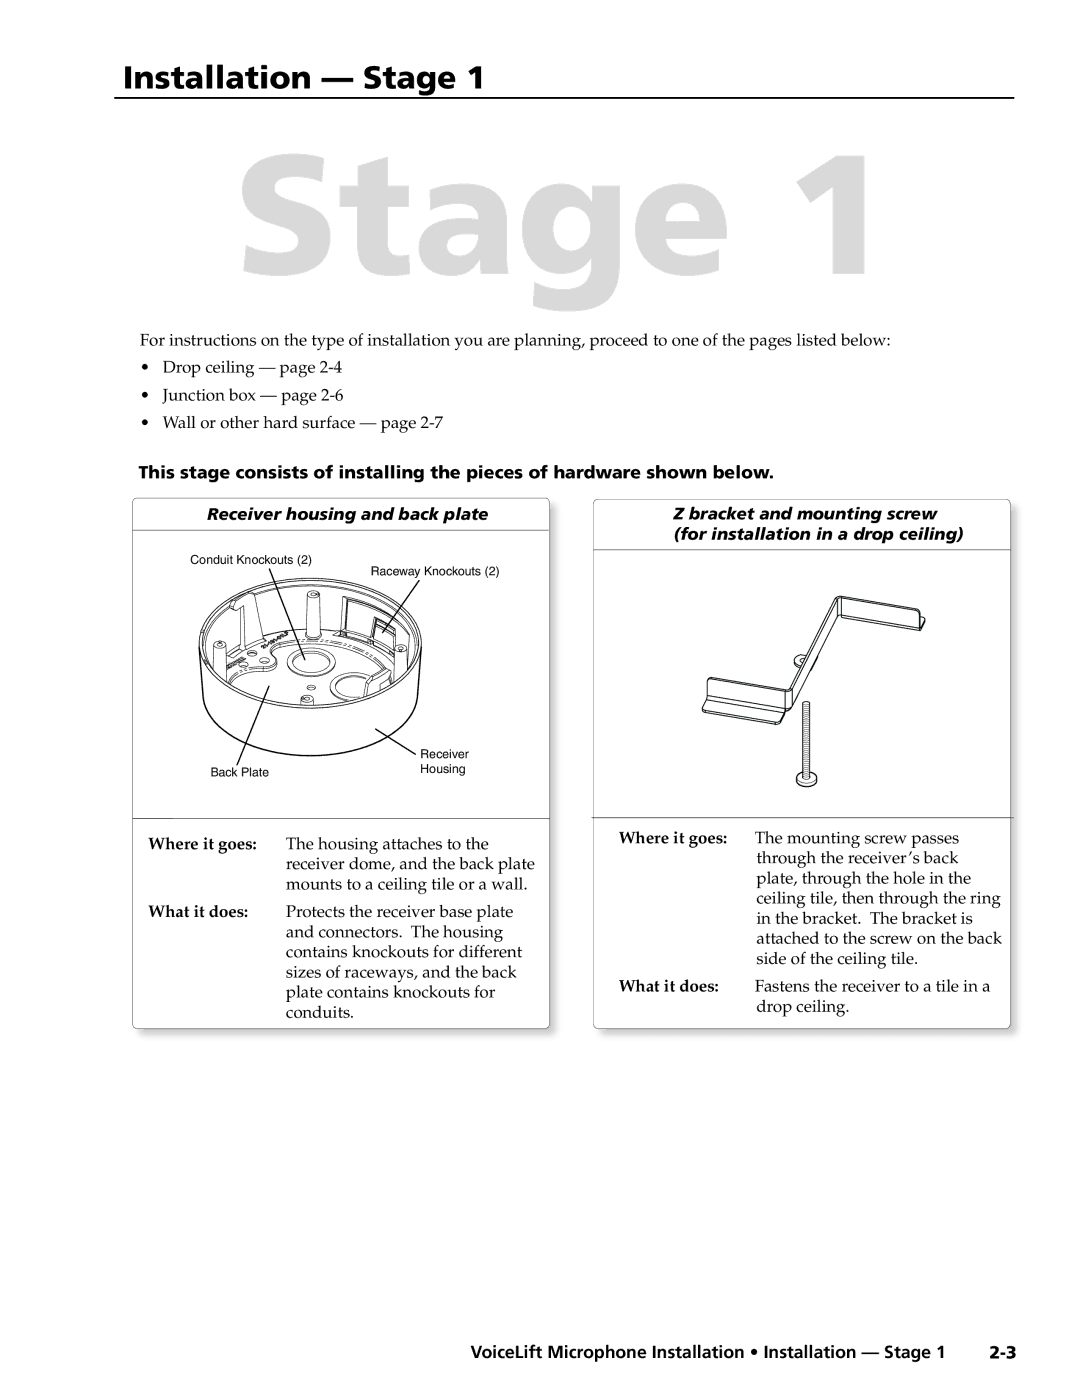
Receiver housing and back plate |
| Z bracket and mounting screw | |
|
| (for installation in a drop ceiling) | |
Conduit Knockouts (2) | |||
|
| ||
|
| ||
Raceway Knockouts (2) |
|
|
| Receiver |
Back Plate | Housing |
|
Where it goes: The housing attaches to the receiver dome, and the back plate mounts to a ceiling tile or a wall.
What it does: Protects the receiver base plate and connectors. The housing contains knockouts for different sizes of raceways, and the back plate contains knockouts for conduits.
Where it goes: The mounting screw passes through the receiver’s back plate, through the hole in the ceiling tile, then through the ring in the bracket. The bracket is attached to the screw on the back side of the ceiling tile.
What it does: Fastens the receiver to a tile in a
drop ceiling.
VoiceLift Microphone Installation • Installation — Stage 1 |