Installation — Stage 1, cont’d
Installing the Receiver in a Drop Ceiling
1.Cut a hole in the ceiling tile.
a.Remove the ceiling tile in which the receiver will be installed.
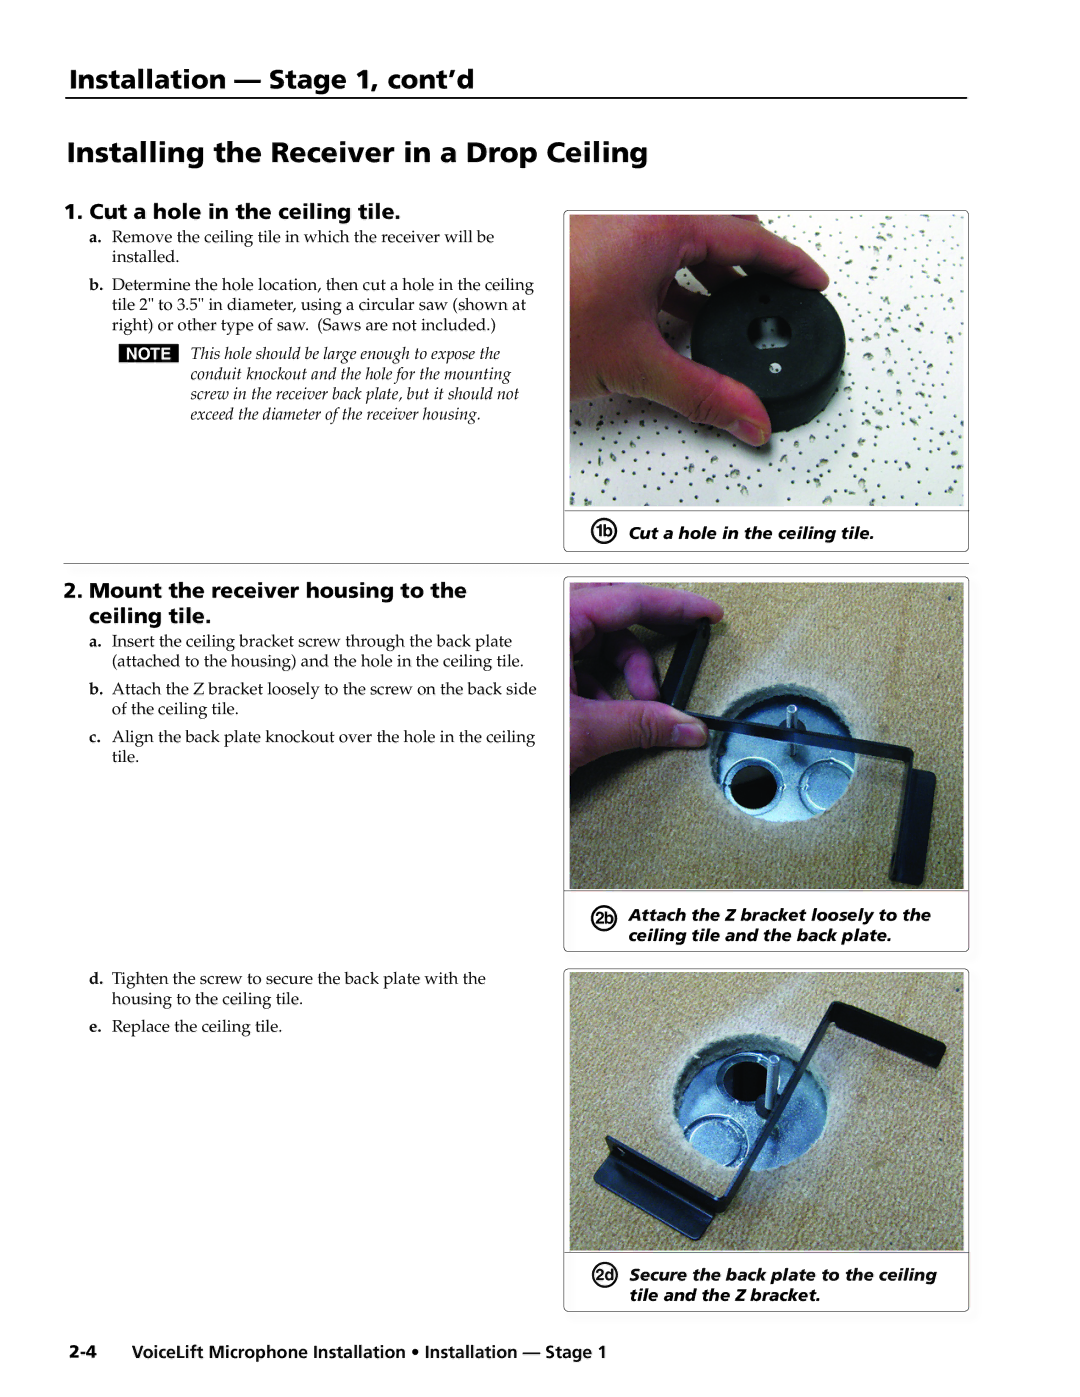
b.Determine the hole location, then cut a hole in the ceiling tile 2" to 3.5" in diameter, using a circular saw (shown at right) or other type of saw. (Saws are not included.)
NThis hole should be large enough to expose the conduit knockout and the hole for the mounting screw in the receiver back plate, but it should not exceed the diameter of the receiver housing.
Å Cut a hole in the ceiling tile.
2.Mount the receiver housing to the ceiling tile.
a.Insert the ceiling bracket screw through the back plate (attached to the housing) and the hole in the ceiling tile.
b.Attach the Z bracket loosely to the screw on the back side of the ceiling tile.
c.Align the back plate knockout over the hole in the ceiling tile.
É Attach the Z bracket loosely to the
ceiling tile and the back plate.
d.Tighten the screw to secure the back plate with the housing to the ceiling tile.
e.Replace the ceiling tile.
