Rip Cutting with Rip Fence

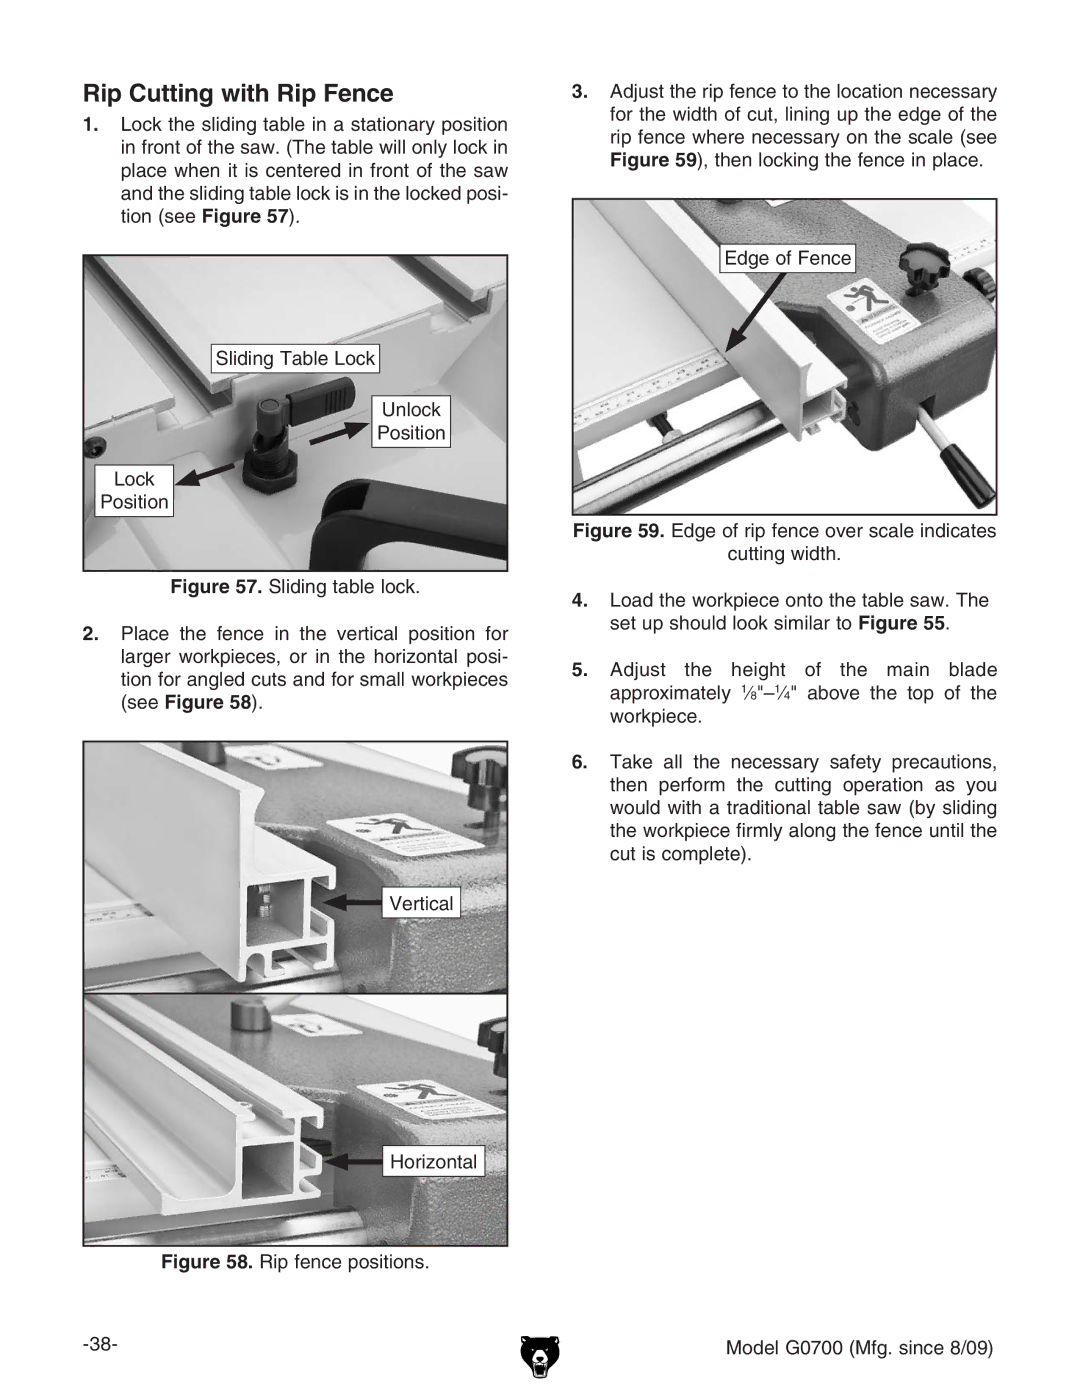
1.Lock the sliding table in a stationary position in front of the saw. (The table will only lock in place when it is centered in front of the saw and the sliding table lock is in the locked posi- tion (see Figure 57).

Sliding Table Lock

Unlock

Position

Lock

Position

Figure 57. Sliding table lock.

2.Place the fence in the vertical position for larger workpieces, or in the horizontal posi- tion for angled cuts and for small workpieces (see Figure 58).

Vertical

Horizontal

Figure 58. Rip fence positions.

-38-

3.Adjust the rip fence to the location necessary for the width of cut, lining up the edge of the rip fence where necessary on the scale (see Figure 59), then locking the fence in place.

Edge of Fence

Figure 59. Edge of rip fence over scale indicates

cutting width.

4.Load the workpiece onto the table saw. The set up should look similar to Figure 55.

5.Adjust the height of the main blade approximately 18"–14" above the top of the workpiece.

6.Take all the necessary safety precautions, then perform the cutting operation as you would with a traditional table saw (by sliding the workpiece firmly along the fence until the cut is complete).

Model G0700 (Mfg. since 8/09)

Page 40
Image 40
Grizzly G0700 owner manual Rip Cutting with Rip Fence