Sliding Table |
| Squaring Miter |
Adjustment |
| Fence to Blade |
|
|
|
|
|
|
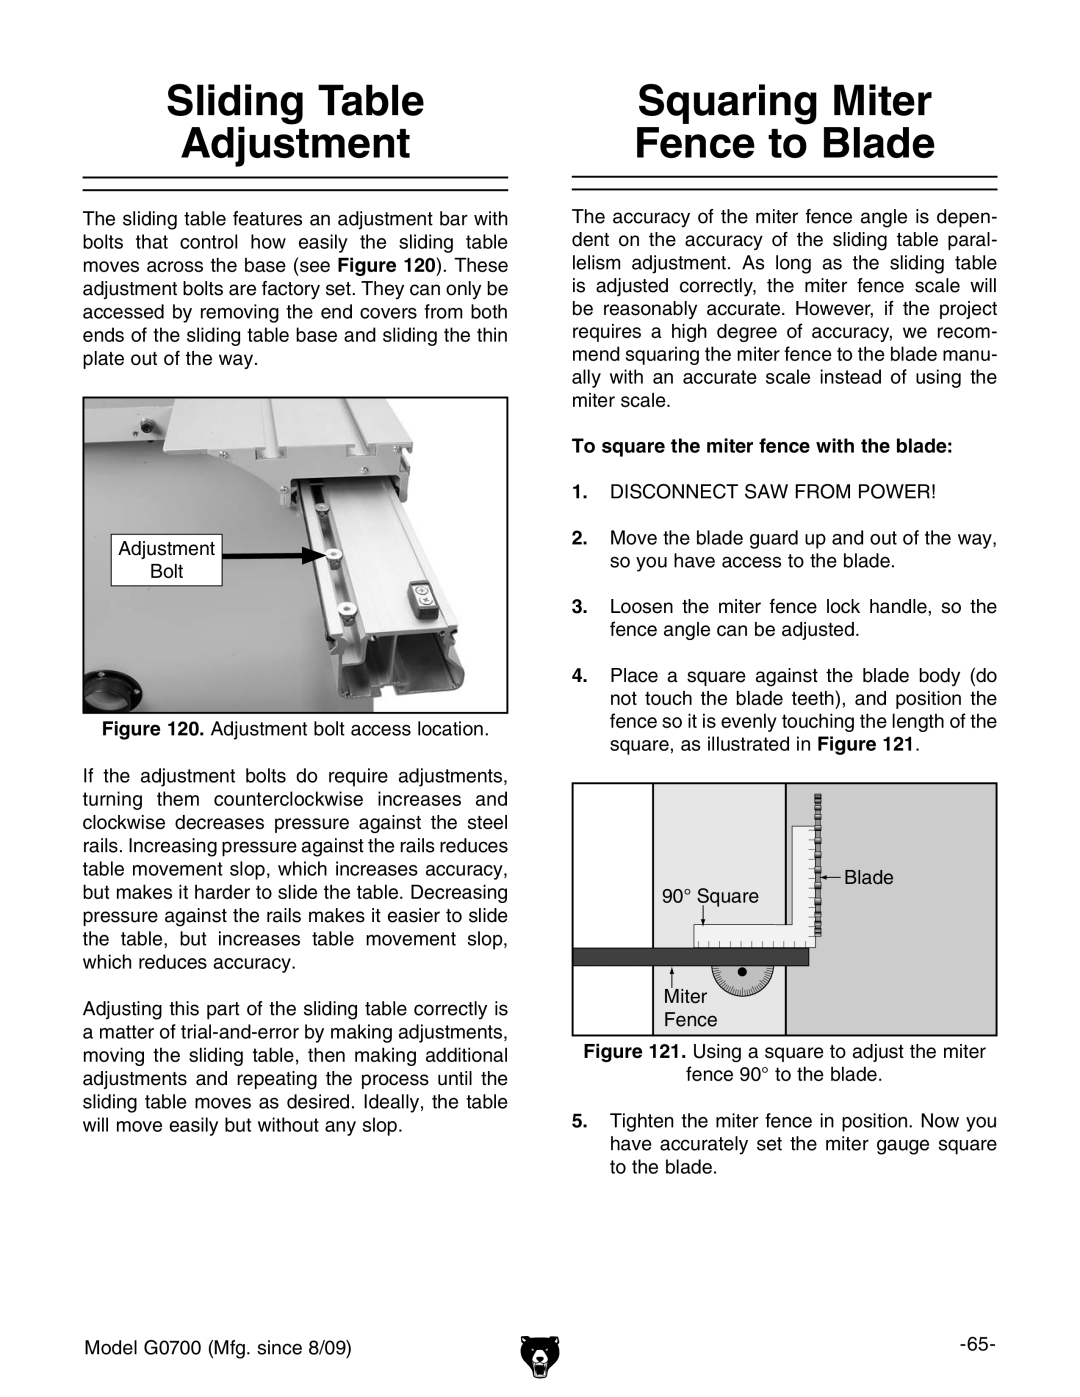
The sliding table features an adjustment bar with bolts that control how easily the sliding table moves across the base (see Figure 120). These adjustment bolts are factory set. They can only be accessed by removing the end covers from both ends of the sliding table base and sliding the thin plate out of the way.
Adjustment
Bolt
Figure 120. Adjustment bolt access location.
If the adjustment bolts do require adjustments, turning them counterclockwise increases and clockwise decreases pressure against the steel rails. Increasing pressure against the rails reduces table movement slop, which increases accuracy, but makes it harder to slide the table. Decreasing pressure against the rails makes it easier to slide the table, but increases table movement slop, which reduces accuracy.
Adjusting this part of the sliding table correctly is a matter of trial-and-error by making adjustments, moving the sliding table, then making additional adjustments and repeating the process until the sliding table moves as desired. Ideally, the table will move easily but without any slop.
Model G0700 (Mfg. since 8/09)
The accuracy of the miter fence angle is depen- dent on the accuracy of the sliding table paral- lelism adjustment. As long as the sliding table is adjusted correctly, the miter fence scale will be reasonably accurate. However, if the project requires a high degree of accuracy, we recom- mend squaring the miter fence to the blade manu- ally with an accurate scale instead of using the miter scale.
To square the miter fence with the blade:
1.DISCONNECT SAW FROM POWER!
2.Move the blade guard up and out of the way, so you have access to the blade.
3.Loosen the miter fence lock handle, so the fence angle can be adjusted.
4.Place a square against the blade body (do not touch the blade teeth), and position the fence so it is evenly touching the length of the square, as illustrated in Figure 121.
![]()
![]() Blade
Blade
90° Square
Miter ![]()
Fence
