Changing Jaw Set
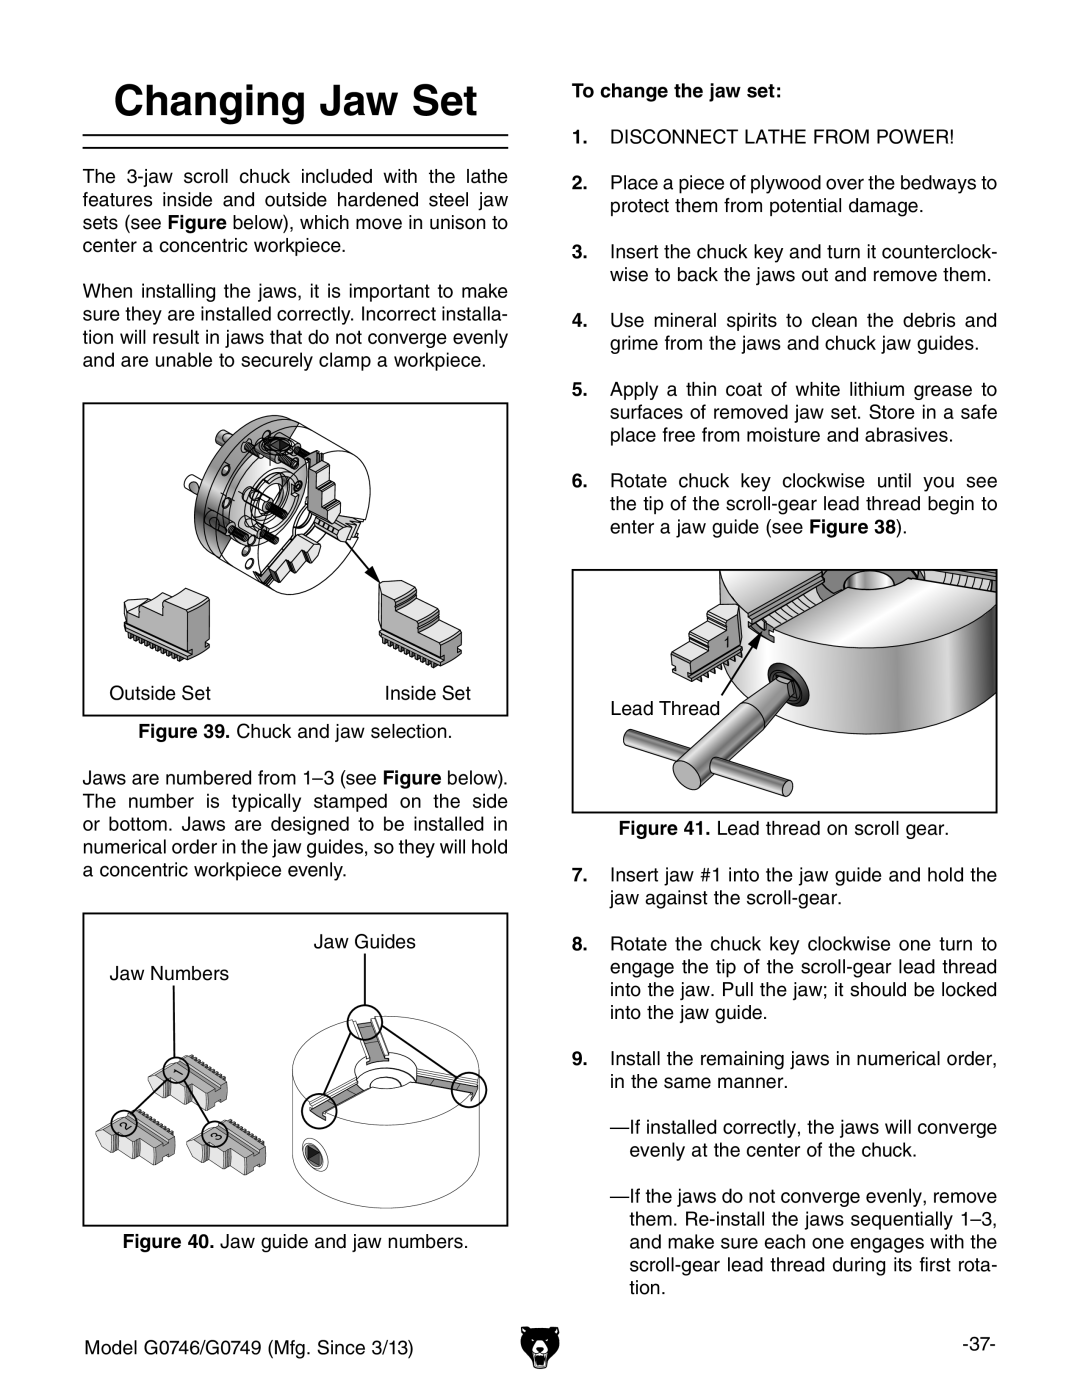
the
When installing the jaws, it is important to make sure they are installed correctly. incorrect installa- tion will result in jaws that do not converge evenly and are unable to securely clamp a workpiece.
Outside Set | Inside Set |
Figure 39. Chuck and jaw selection.
Jaws are numbered from 1–3 (see figure below). the number is typically stamped on the side or bottom. Jaws are designed to be installed in numerical order in the jaw guides, so they will hold a concentric workpiece evenly.
| Jaw Guides |
Jaw Numbers | |
| 1 |
2 | 3 |
| |
Figure 40. Jaw guide and jaw numbers.
Model G0746/G0749 (Mfg. Since 3/13)
To change the jaw set:
1.disCoNNECt lathE FroM poWEr!
2.place a piece of plywood over the bedways to protect them from potential damage.
3.insert the chuck key and turn it counterclock- wise to back the jaws out and remove them.
4.Use mineral spirits to clean the debris and grime from the jaws and chuck jaw guides.
5.apply a thin coat of white lithium grease to surfaces of removed jaw set. store in a safe place free from moisture and abrasives.
6.rotate chuck key clockwise until you see the tip of the
1 |
Lead Thread |
