Changing Gears
Changing gears on the Model G4015Z is straight forward. Refer to the label found inside of the Lower Belt Guard for proper gear selection while following the example below. We will be changing the gears to those that would be used to set the machine for a 0.002" per revolution feed rate. These instructions assume that all of the gears need to be changed. The number of teeth are stamped on each gear. To begin:
1.Unplug the machine.
2.Remove the nuts on the end of the shafts for gears A and D.
3.Loosen the cap screw at the bottom of the gear support arm and allow the arm to rotate downward as in Figure 39.
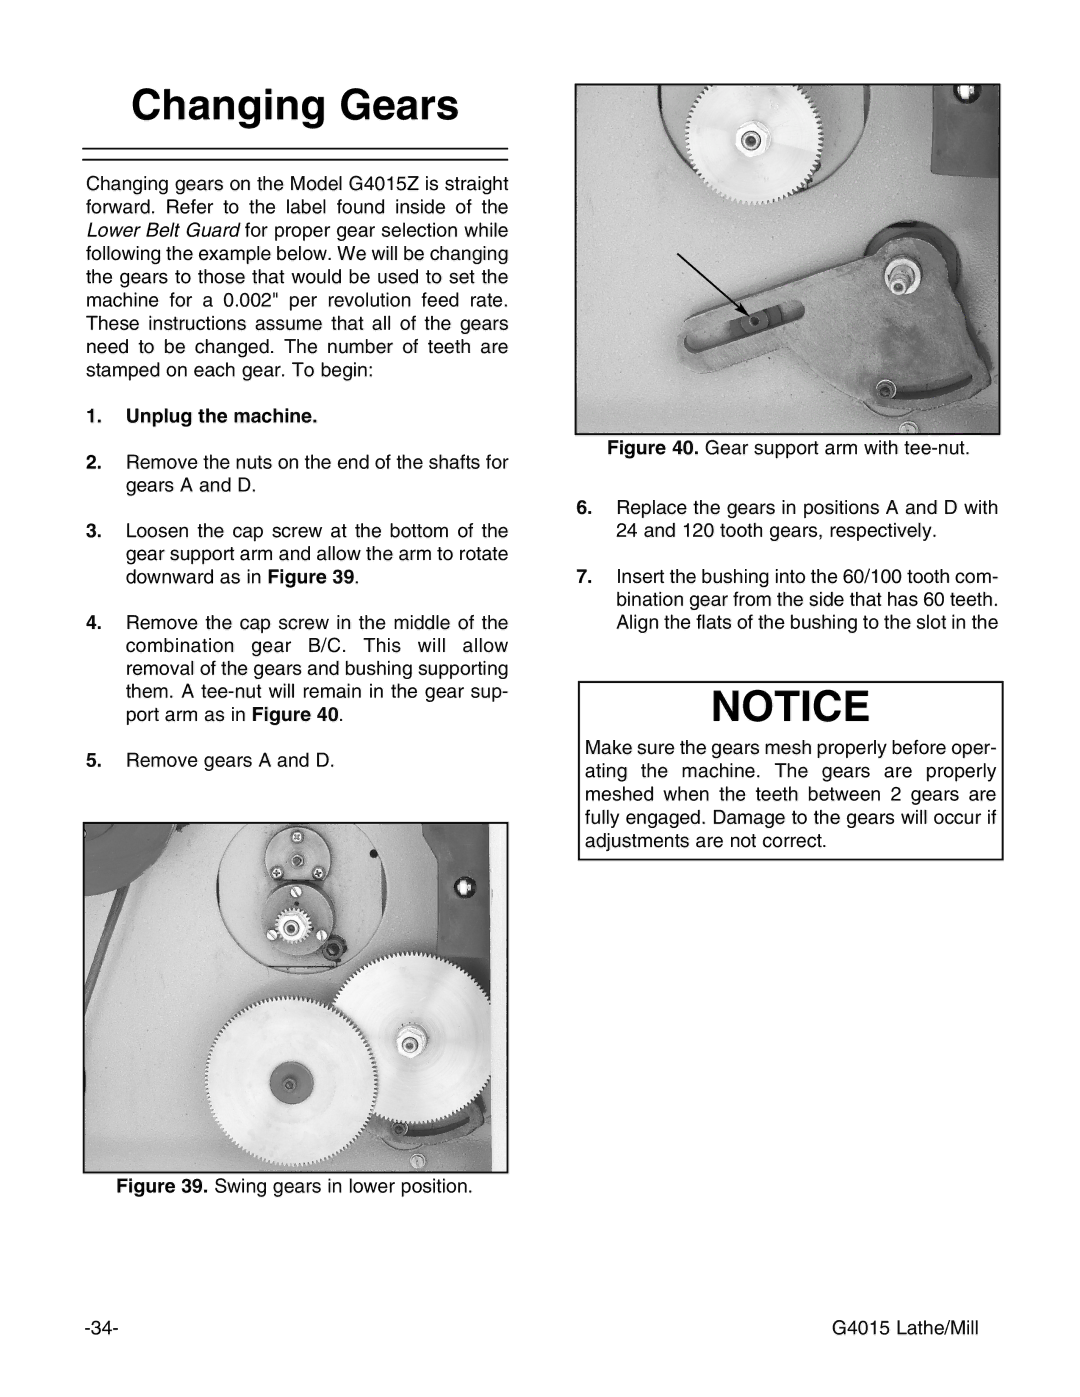
4.Remove the cap screw in the middle of the combination gear B/C. This will allow removal of the gears and bushing supporting them. A
5.Remove gears A and D.
Figure 39. Swing gears in lower position.
Figure 40. Gear support arm with tee-nut.
6.Replace the gears in positions A and D with 24 and 120 tooth gears, respectively.
7.Insert the bushing into the 60/100 tooth com- bination gear from the side that has 60 teeth. Align the flats of the bushing to the slot in the
NOTICE
Make sure the gears mesh properly before oper- ating the machine. The gears are properly meshed when the teeth between 2 gears are fully engaged. Damage to the gears will occur if adjustments are not correct.
G4015 Lathe/Mill |
