3654 Portable H2/N2 Analyzer - Operating Instructions | 21 of 66 |
|
|
To end automatic storage, put the instrument into standby (by pressing the POWER key) while it is in normal measurement mode and not while it is in the process of automatically storing data. Switching ON again without holding down the STO button returns the instrument to measurement mode.
Note:
If you accidentally interrupt the automatic data storage by switching off the instrument while it is in the process of storing a value, and you then attempt to download the stored values by the WIN3654 program, you will get a Windows Checksum Error message, and you will not be able to view the measurement data. If this happens, go back to the instrument and manually log one more value (described in “Manual Data Acquisition” ). You can then download your original set of values to your PC.
2.3.2 Manual Data Acquisition
Note:
You cannot store measurement data manually if the instrument has already been set up to store the data automatically.
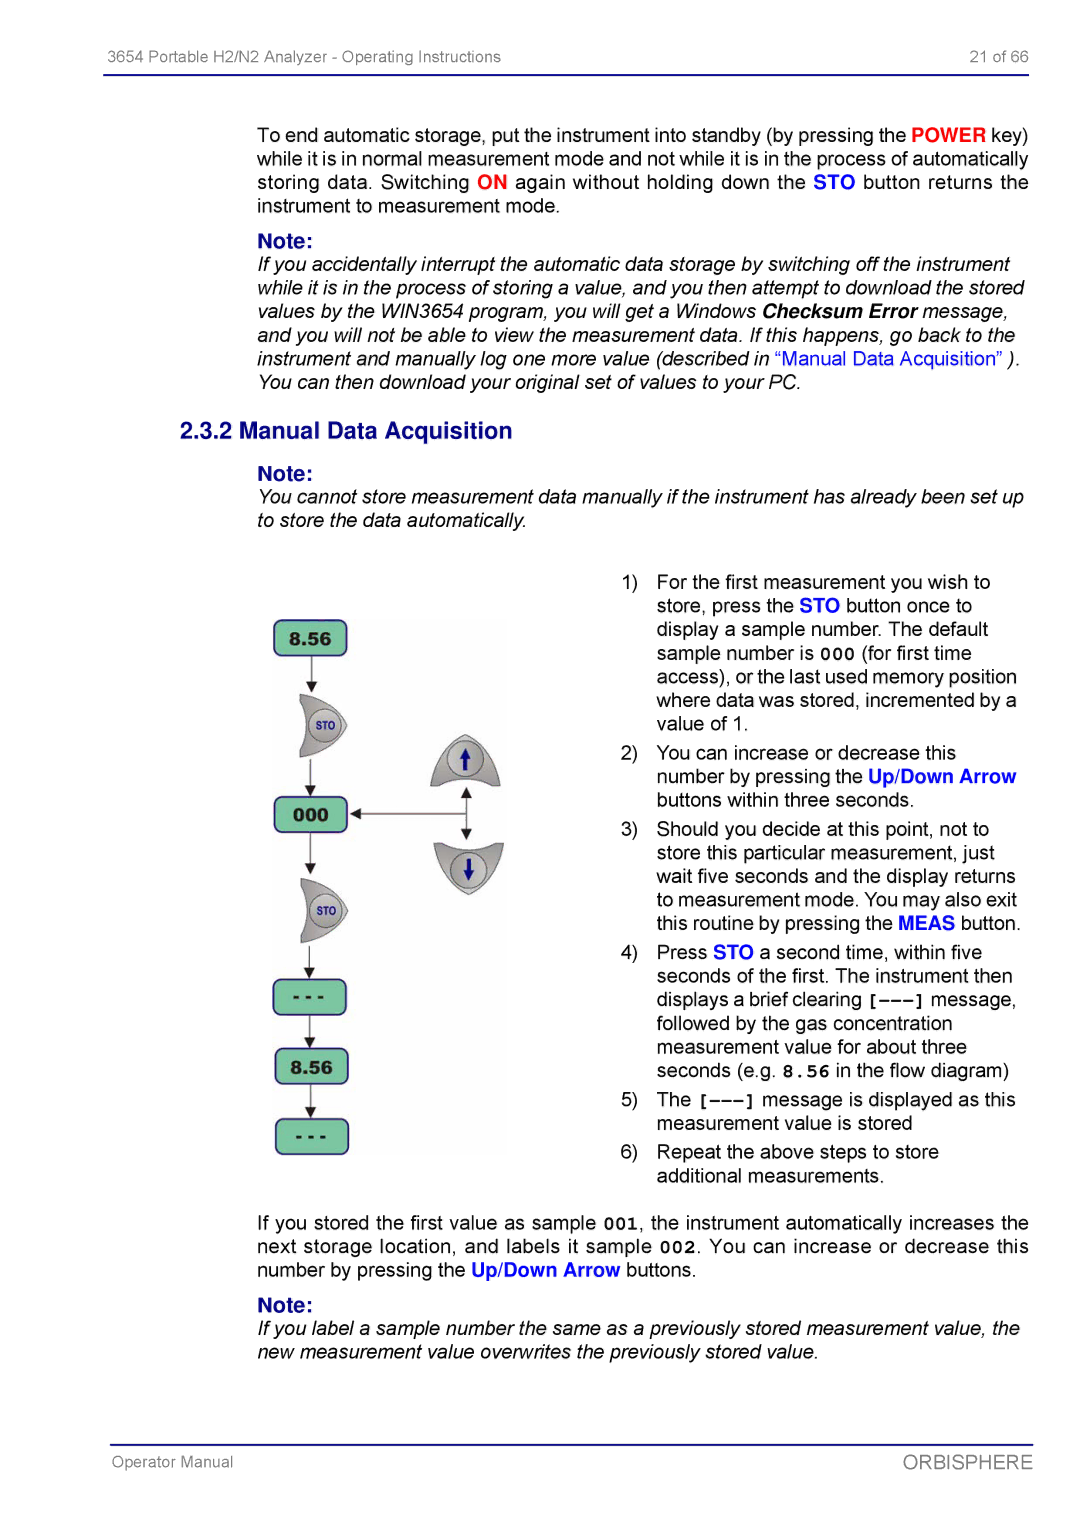
1) For the first measurement you wish to store, press the STO button once to display a sample number. The default sample number is 000 (for first time access), or the last used memory position where data was stored, incremented by a value of 1.
2) You can increase or decrease this number by pressing the Up/Down Arrow buttons within three seconds.
3) Should you decide at this point, not to store this particular measurement, just wait five seconds and the display returns to measurement mode. You may also exit this routine by pressing the MEAS button.
4) Press STO a second time, within five seconds of the first. The instrument then displays a brief clearing
5) The
6) Repeat the above steps to store additional measurements.
If you stored the first value as sample 001, the instrument automatically increases the next storage location, and labels it sample 002. You can increase or decrease this number by pressing the Up/Down Arrow buttons.
Note:
If you label a sample number the same as a previously stored measurement value, the new measurement value overwrites the previously stored value.
Operator Manual | ORBISPHERE |