F. Positioning the Logs | Log Assembly: |
|
|
If the gas logs have been factory installed they should not need to be positioned. If the logs have been packaged separately, refer to the following instructions.
STEP 1.
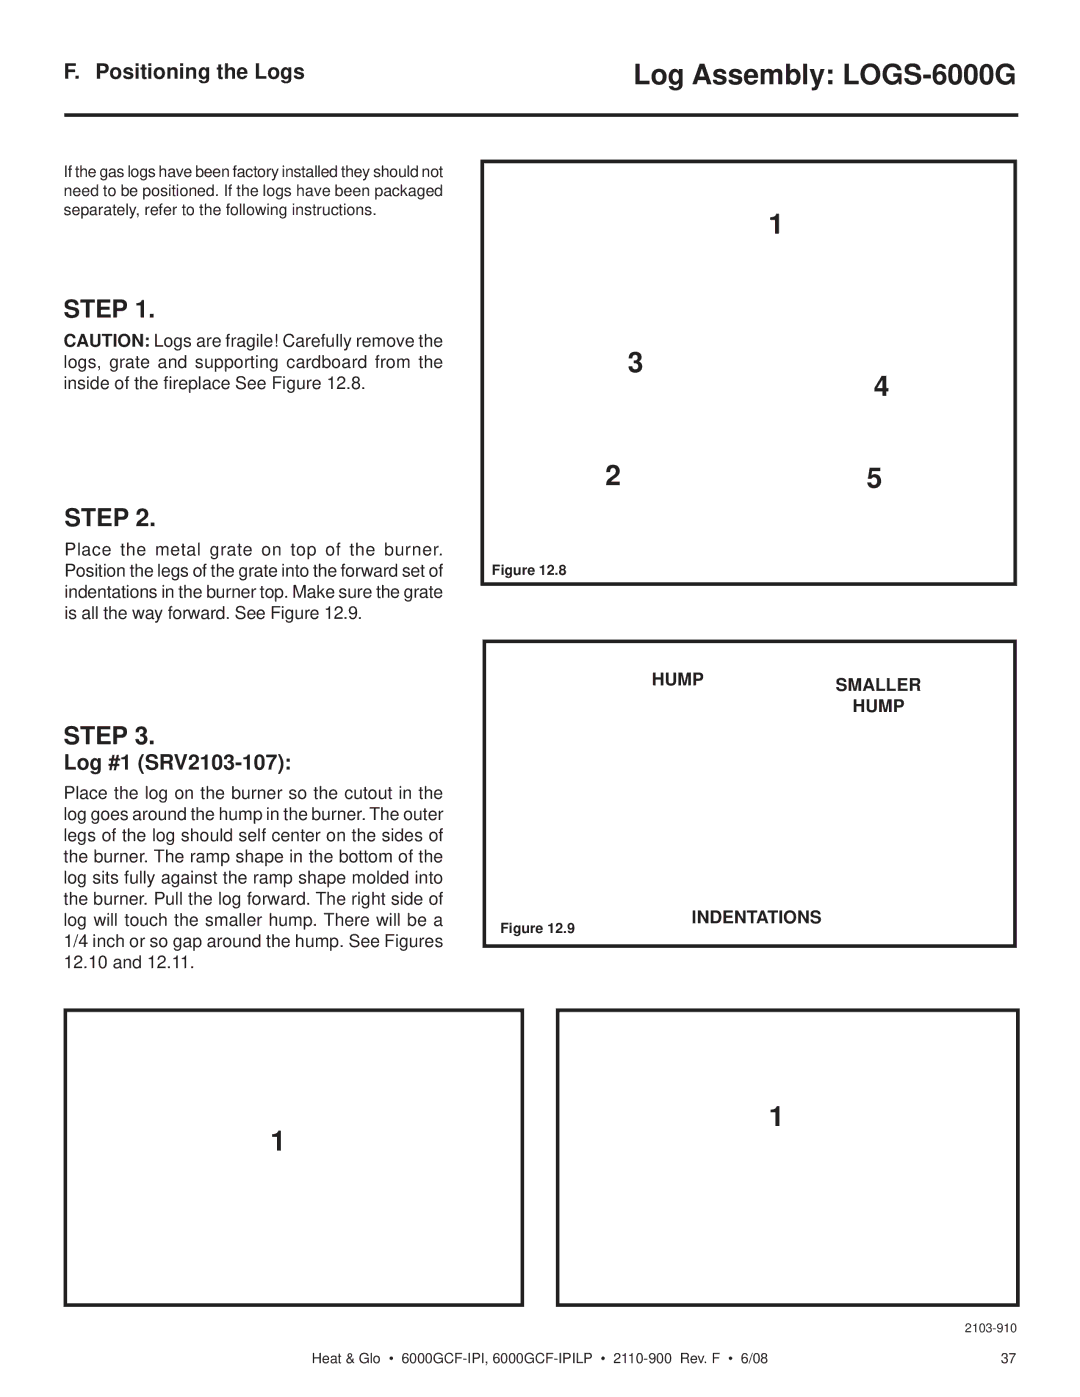
CAUTION: Logs are fragile! Carefully remove the logs, grate and supporting cardboard from the inside of the fireplace See Figure 12.8.
STEP 2.
Place the metal grate on top of the burner. Position the legs of the grate into the forward set of indentations in the burner top. Make sure the grate is all the way forward. See Figure 12.9.
STEP 3.
1
3
4
25
Figure 12.8
HUMP | SMALLER |
| HUMP |
Log #1 (SRV2103-107):
Place the log on the burner so the cutout in the log goes around the hump in the burner. The outer legs of the log should self center on the sides of the burner. The ramp shape in the bottom of the log sits fully against the ramp shape molded into the burner. Pull the log forward. The right side of log will touch the smaller hump. There will be a 1/4 inch or so gap around the hump. See Figures 12.10 and 12.11.
Í
Figure 12.9
INDENTATIONS
1
Figure 12.10 Front View
1
Figure 12.11 Top View
Heat & Glo • | 37 |