Troubleshooting information
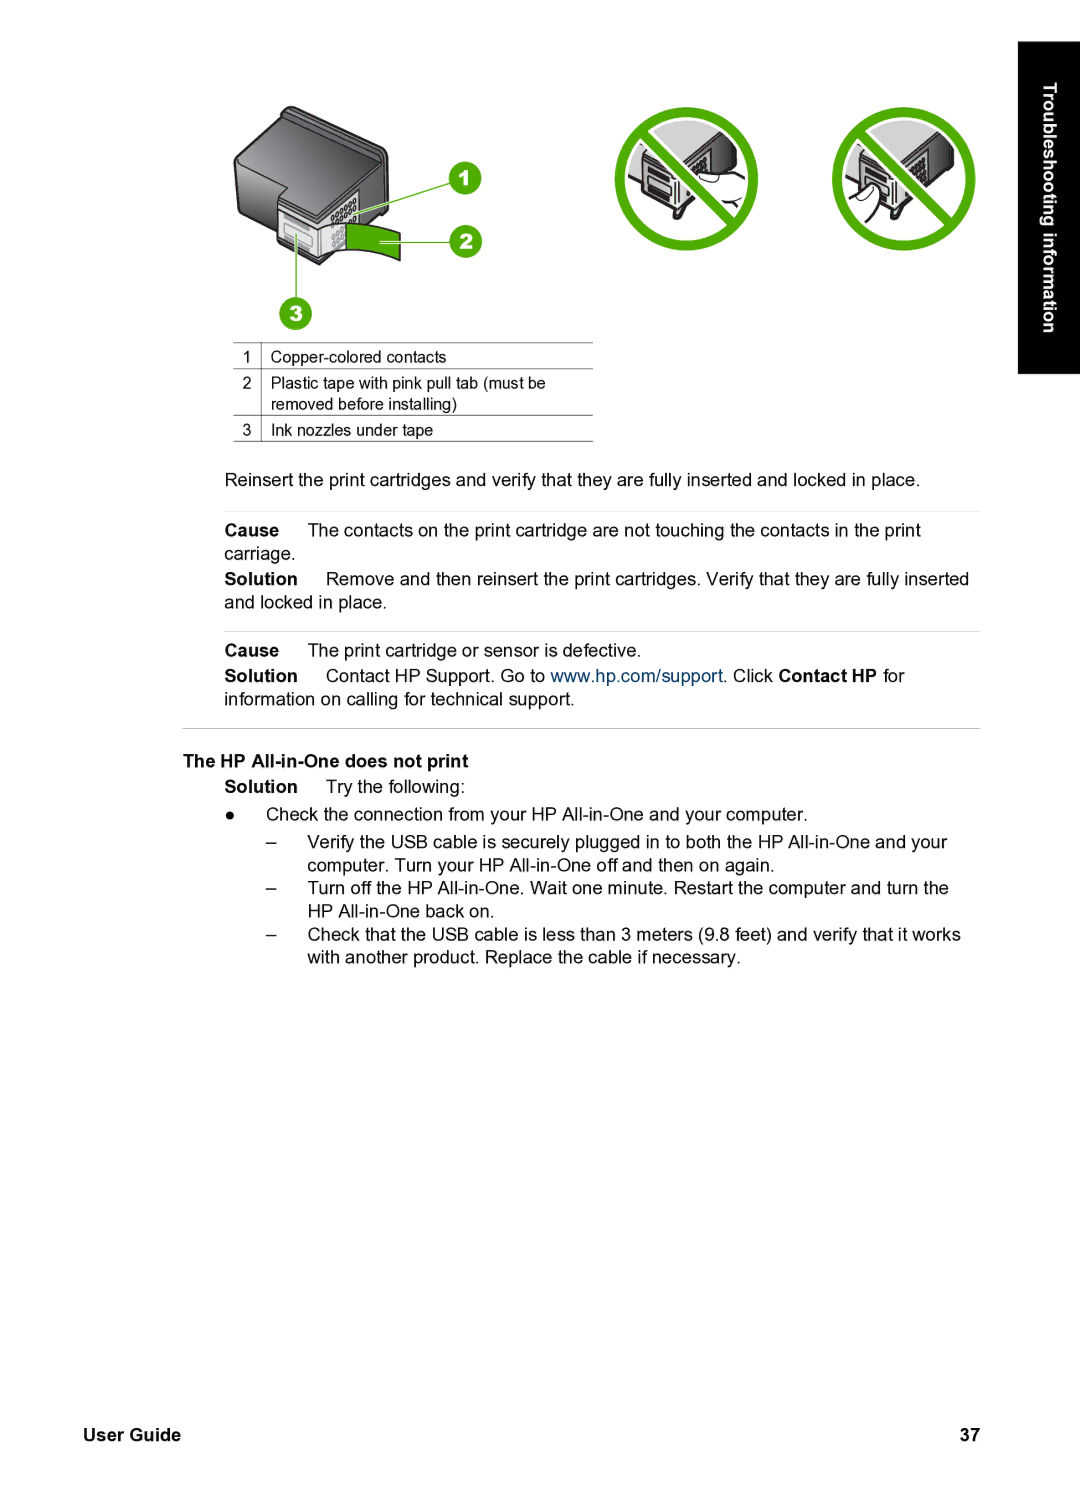
1![]()
2Plastic tape with pink pull tab (must be removed before installing)
3![]() Ink nozzles under tape
Ink nozzles under tape
Reinsert the print cartridges and verify that they are fully inserted and locked in place.
Cause The contacts on the print cartridge are not touching the contacts in the print carriage.
Solution Remove and then reinsert the print cartridges. Verify that they are fully inserted and locked in place.
Cause The print cartridge or sensor is defective.
Solution Contact HP Support. Go to www.hp.com/support. Click Contact HP for information on calling for technical support.
The HP All-in-One does not print
Solution Try the following:
●Check the connection from your HP
–Verify the USB cable is securely plugged in to both the HP
–Turn off the HP
–Check that the USB cable is less than 3 meters (9.8 feet) and verify that it works with another product. Replace the cable if necessary.
User Guide | 37 |