Clean the print cartridges
Use this feature of your HP Image Zone software when the
If copy or print quality still seems poor after you clean the print cartridges, try cleaning the print cartridge contacts before replacing the affected print cartridge. For information on cleaning the print cartridge contacts, see Clean the print cartridge contacts or around the ink nozzles. For information on replacing the print cartridges, see Replace the print cartridges.
Clean the print cartridge contacts or around the ink nozzles
If the Check Print Cartridge light remains on after you have cleaned and removed and reinserted the print cartridge you may need to clean the print cartridge contacts.
If ink streaks and smudges appear on your printed pages, debris might be on the print cartridge. You can clean around the nozzles to remove this debris.
Make sure you have the following materials available:
●Dry foam rubber swabs,
●Distilled, filtered, or bottled water (tap water might contain contaminants that can damage the print cartridges).
Caution Do not touch the
1.Turn on the HP
2.After the print carriage has moved to the center, unplug the power cord from the back of the HP
3.Remove the print cartridge.
Caution Do not remove both print cartridges at the same time. Remove and clean each print cartridge one at a time so the ink does not dry on the nozzles. Do not leave a print cartridge outside the HP
4.Dip a clean foam rubber swab into distilled water and squeeze any excess water from it.
5.Hold the print cartridge by its sides or place it on a piece of paper with the ink nozzles facing up.
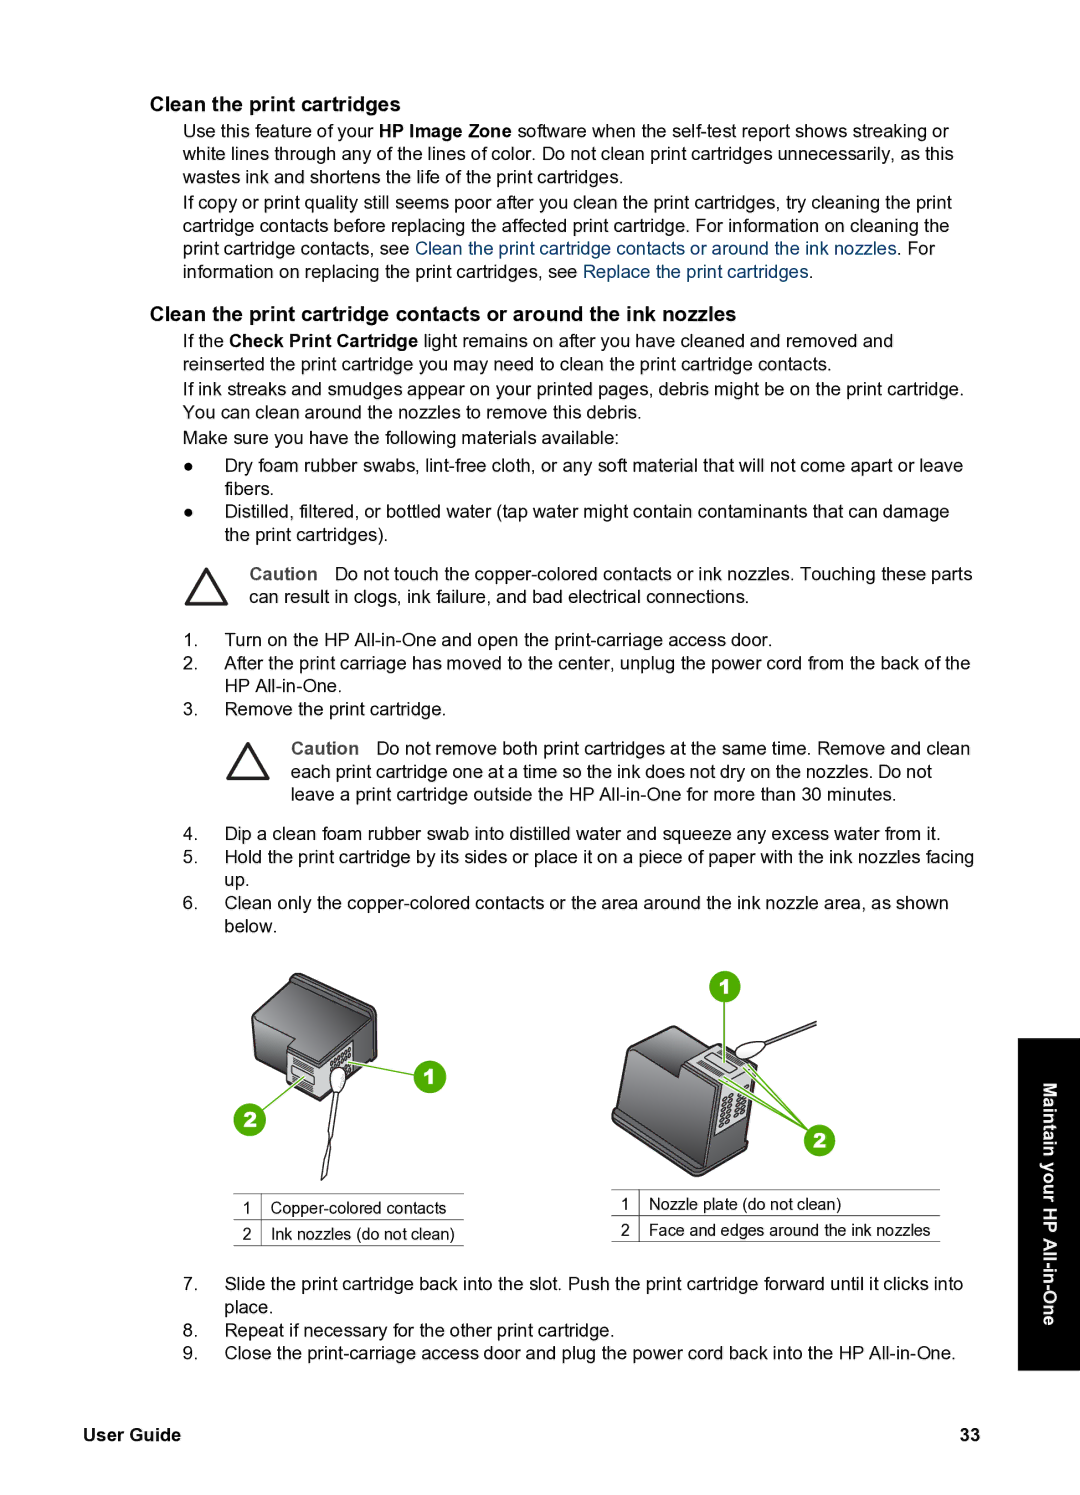
6.Clean only the
1 | 1 | Nozzle plate (do not clean) | |
2 | Ink nozzles (do not clean) | 2 | Face and edges around the ink nozzles |
7.Slide the print cartridge back into the slot. Push the print cartridge forward until it clicks into place.
8.Repeat if necessary for the other print cartridge.
9.Close the
Maintain your HP
User Guide | 33 |
