Chapter 1
Printer parts
Front of printer
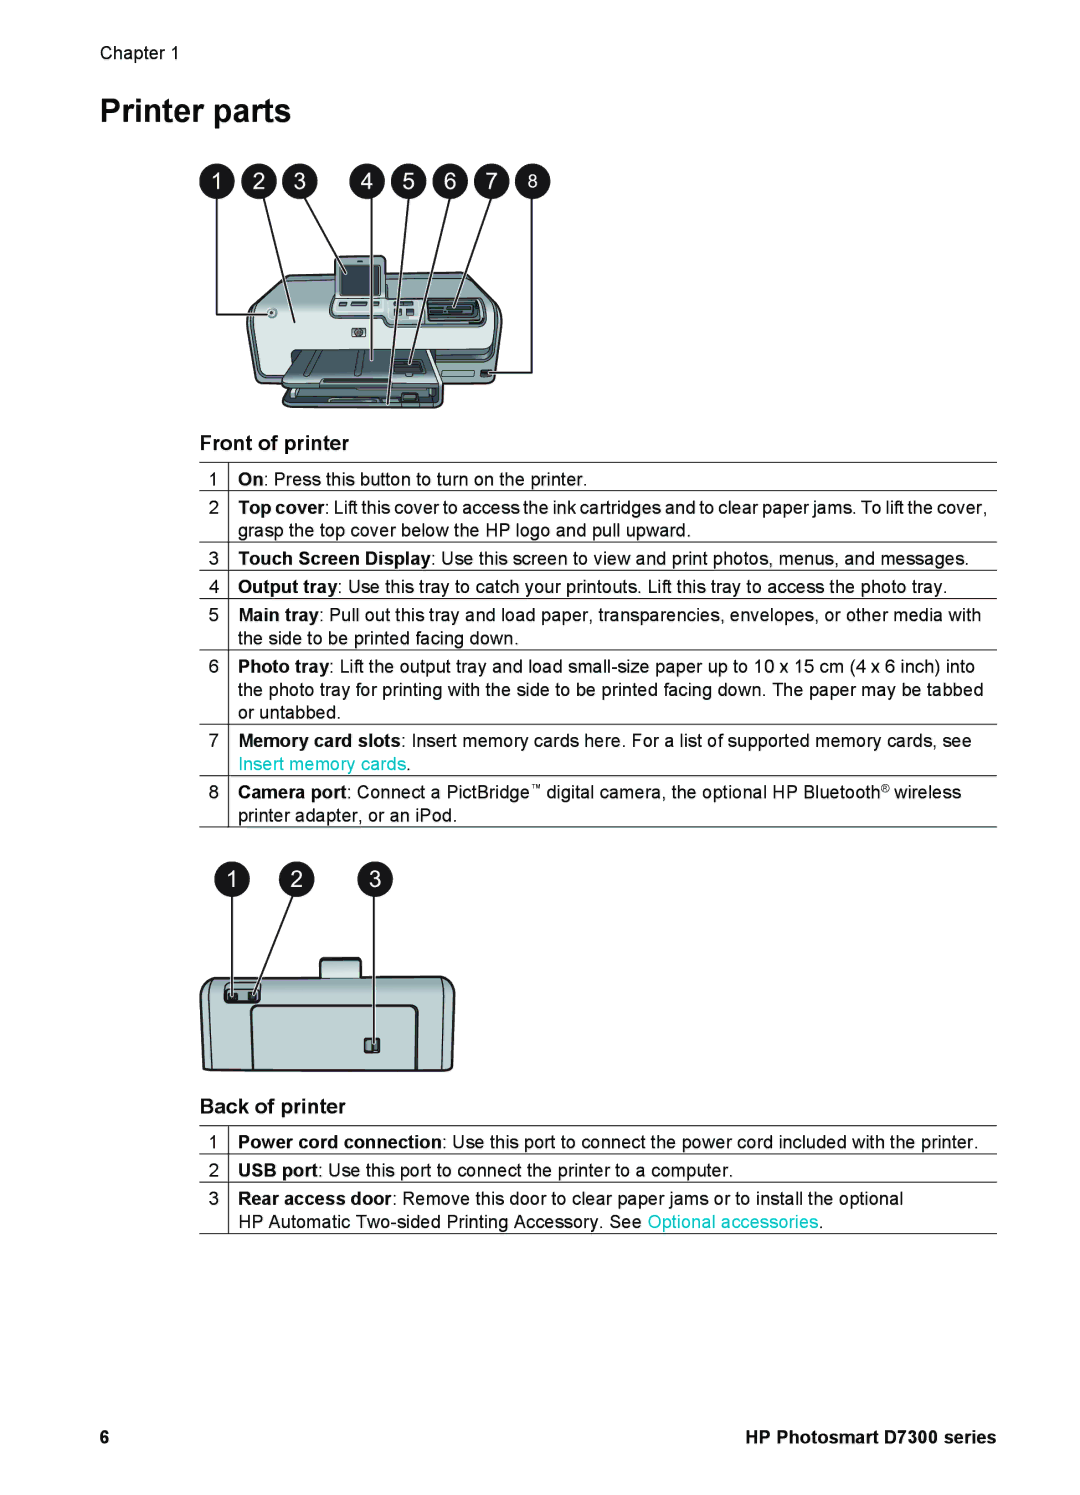
1On: Press this button to turn on the printer.
2Top cover: Lift this cover to access the ink cartridges and to clear paper jams. To lift the cover, grasp the top cover below the HP logo and pull upward.
3Touch Screen Display: Use this screen to view and print photos, menus, and messages.
4Output tray: Use this tray to catch your printouts. Lift this tray to access the photo tray.
5Main tray: Pull out this tray and load paper, transparencies, envelopes, or other media with the side to be printed facing down.
6Photo tray: Lift the output tray and load
7Memory card slots: Insert memory cards here. For a list of supported memory cards, see Insert memory cards.
8Camera port: Connect a PictBridge™ digital camera, the optional HP Bluetooth® wireless printer adapter, or an iPod.
Back of printer
1Power cord connection: Use this port to connect the power cord included with the printer.
2USB port: Use this port to connect the printer to a computer.
3Rear access door: Remove this door to clear paper jams or to install the optional HP Automatic
6 | HP Photosmart D7300 series |
