.1/ Headphone jack
This jack provides audio output to the headphones.
.2/ Volume control
This dial controls the headphone volume.
.3/ | CD | tray |
|
|
|
|
|
|
|
|
|
|
|
|
|
|
|
This | tray | is | where | you | load | and | unload | a | CD. |
|
|
|
|
|
|
| |
.4/ | Busy | indicator |
|
|
|
|
|
|
|
|
|
|
|
|
| ||
This | light | comes |
| on | when | the | drive | reads | from, | writes to, | or | plays | a | CD. | |||
.5/ |
| hole |
|
|
|
|
|
|
|
|
|
|
|
|
| ||
This | hole | provides | access | to | the | eject | mechanism | to | remove | a | CD | from | the | drive. | |||
.6/ | Eject/Load | button |
|
|
|
|
|
|
|
|
|
|
|
|
| ||
This | button | opens | and | closes | the CD | tray | when | you | push | it. |
|
|
| ||||
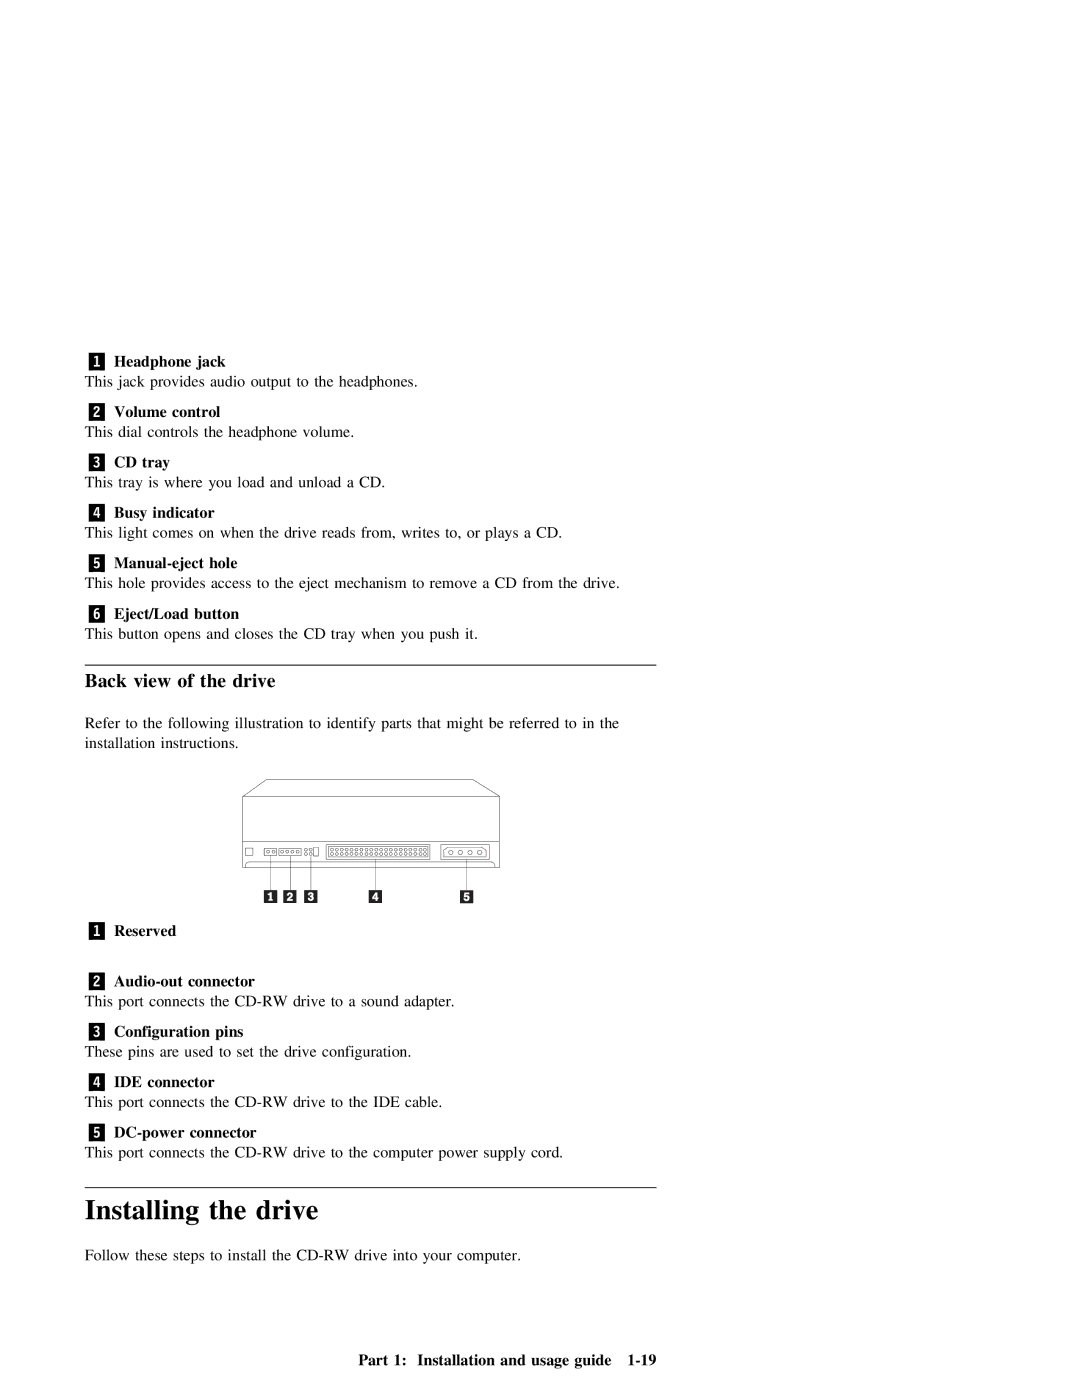
Back | view | of | the | drive | |
Refer | to | the | following | illustration to identify parts that might be referred to in the | |
installation | instructions. |
| |||
.1/ Reserved
.2/
This port connects the
.3/ Configuration pins
These pins are used to set the drive configuration.
.4/ IDE connector
This port connects the
.5/ DC-power connector
This port connects the
Installing the drive
Follow these steps to install the