1. Press the Eject/Load button.
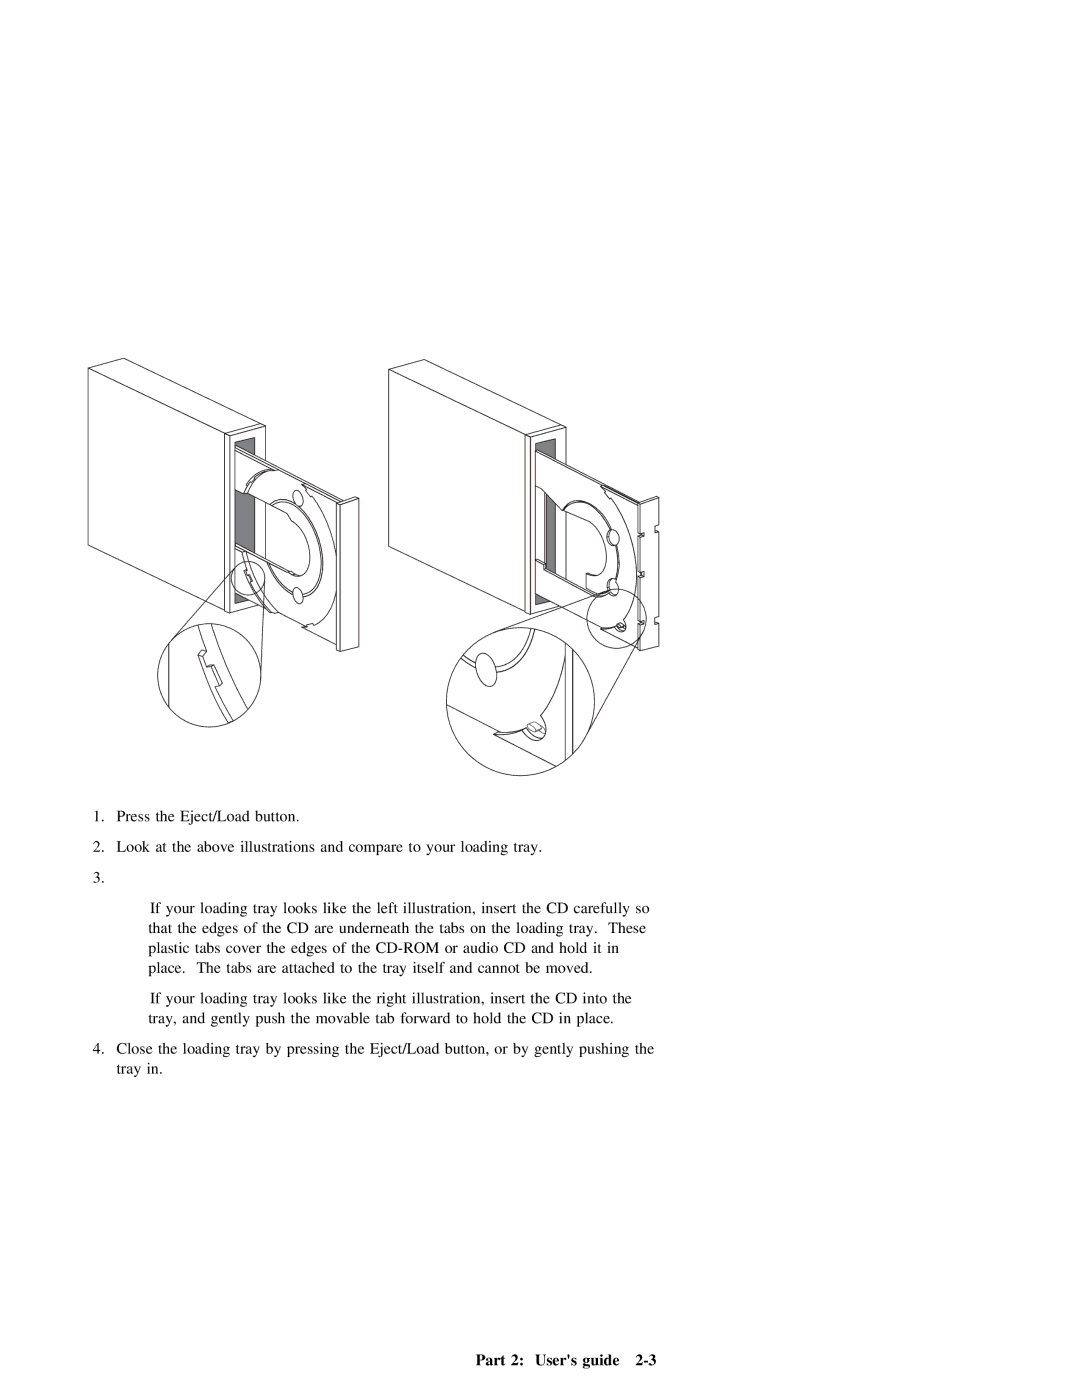
2. | Look | at | the | above | illustrations | and | compare | to | your | loading | tray. |
|
|
|
| ||||||
3. |
|
|
|
|
|
|
|
|
|
|
|
|
|
|
|
|
|
|
|
| |
|
| If | your | loading | tray | looks | like | the | left | illustration, | insert | the | CD | carefully so | |||||||
|
| that |
| the | edges | of | the | CD | are | underneath | the | tabs | on |
| the | loading | tray. | These | |||
|
| plastic | tabs | cover | the | edges of | the | CD | and | hold | it | in |
| ||||||||
|
| place. | The | tabs | are | attached | to | the | tray | itself | and | cannot | be | moved. |
| ||||||
|
| If | your | loading | tray | looks | like | the | right | illustration, | insert | the | CD | into | the | ||||||
|
| tray, | and | gently | push | the | movable tab forward | to | hold |
| the | CD | in | place. |
| ||||||
4. | Close | the | loading | tray | by | pressing | the | Eject/Load | button, | or | by | gently | pushing | the | |||||||
| tray | in. |
|
|
|
|
|
|
|
|
|
|
|
|
|
|
|
|
|
| |
Part 2: User's guide |