Connecting a Computer
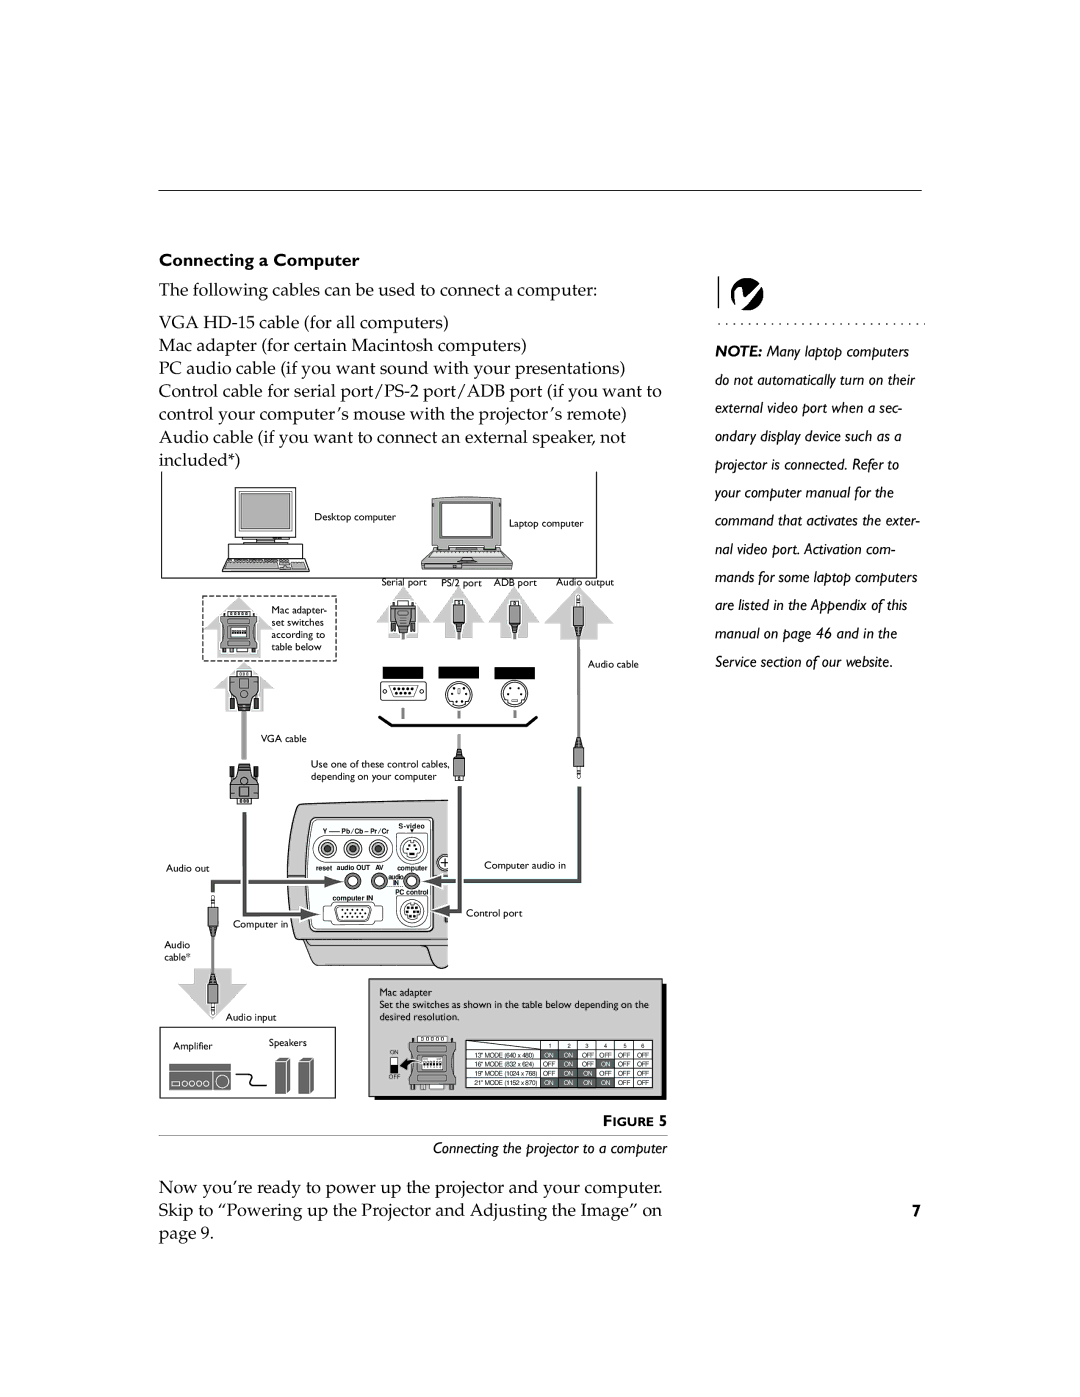
The following cables can be used to connect a computer:
VGA
Mac adapter (for certain Macintosh computers)
PC audio cable (if you want sound with your presentations) Control cable for serial
Desktop computer
Laptop computer
|
|
|
Serial port PS/2 port ADB port | Audio output | |
Mac adapter- set switches according to table below
Audio cable
VGA cable
Use one of these control cables, depending on your computer ![]()
NOTE: Many laptop computers do not automatically turn on their external video port when a sec- ondary display device such as a projector is connected. Refer to your computer manual for the command that activates the exter- nal video port. Activation com- mands for some laptop computers are listed in the Appendix of this manual on page 46 and in the Service section of our website.
Audio out
Computer in
Audio cable*
videoS-video Y ![]()
reset audio OUT AV computer
audio
IN
PC control
computer IN
Computer audio in
Control port
Audio input
AmplifierSpeakers
Mac adapter
Set the switches as shown in the table below depending on the desired resolution.
|
|
|
|
|
|
|
|
|
|
|
|
| |
|
|
|
|
|
|
| 1 | 2 | 3 | 4 | 5 | 6 | |
ON | 13" MODE (640 x 480) | ON | ON | OFF | OFF | OFF | OFF | ||||||
|
|
| ON DIP |
|
|
|
|
|
|
|
| ||
16" MODE (832 x 624) | OFF | ON | OFF | ON | OFF | OFF | |||||||
|
| 1 2 3 4 5 6 |
| ||||||||||
|
|
|
|
|
| 19" MODE (1024 x 768) | OFF | ON | ON | OFF | OFF | OFF | |
OFF | |||||||||||||
21" MODE (1152 x 870) | ON | ON | ON | ON | OFF | OFF | |||||||
|
|
|
|
|
| ||||||||
|
|
|
|
|
|
|
|
|
|
|
|
| |
FIGURE 5
Connecting the projector to a computer
Now you’re ready to power up the projector and your computer.
Skip to “Powering up the Projector and Adjusting the Image” on7 page 9.
