I n t r o d u c t i o n
2
1
|
|
| 3 |
6 |
| 4 |
|
|
| 12 | |
|
|
| |
|
|
| 5 |
|
| 10 | 11 |
|
|
| |
7 | 9 |
| 13 |
|
| ||
|
|
| |
8 |
|
| 14 |
|
|
|
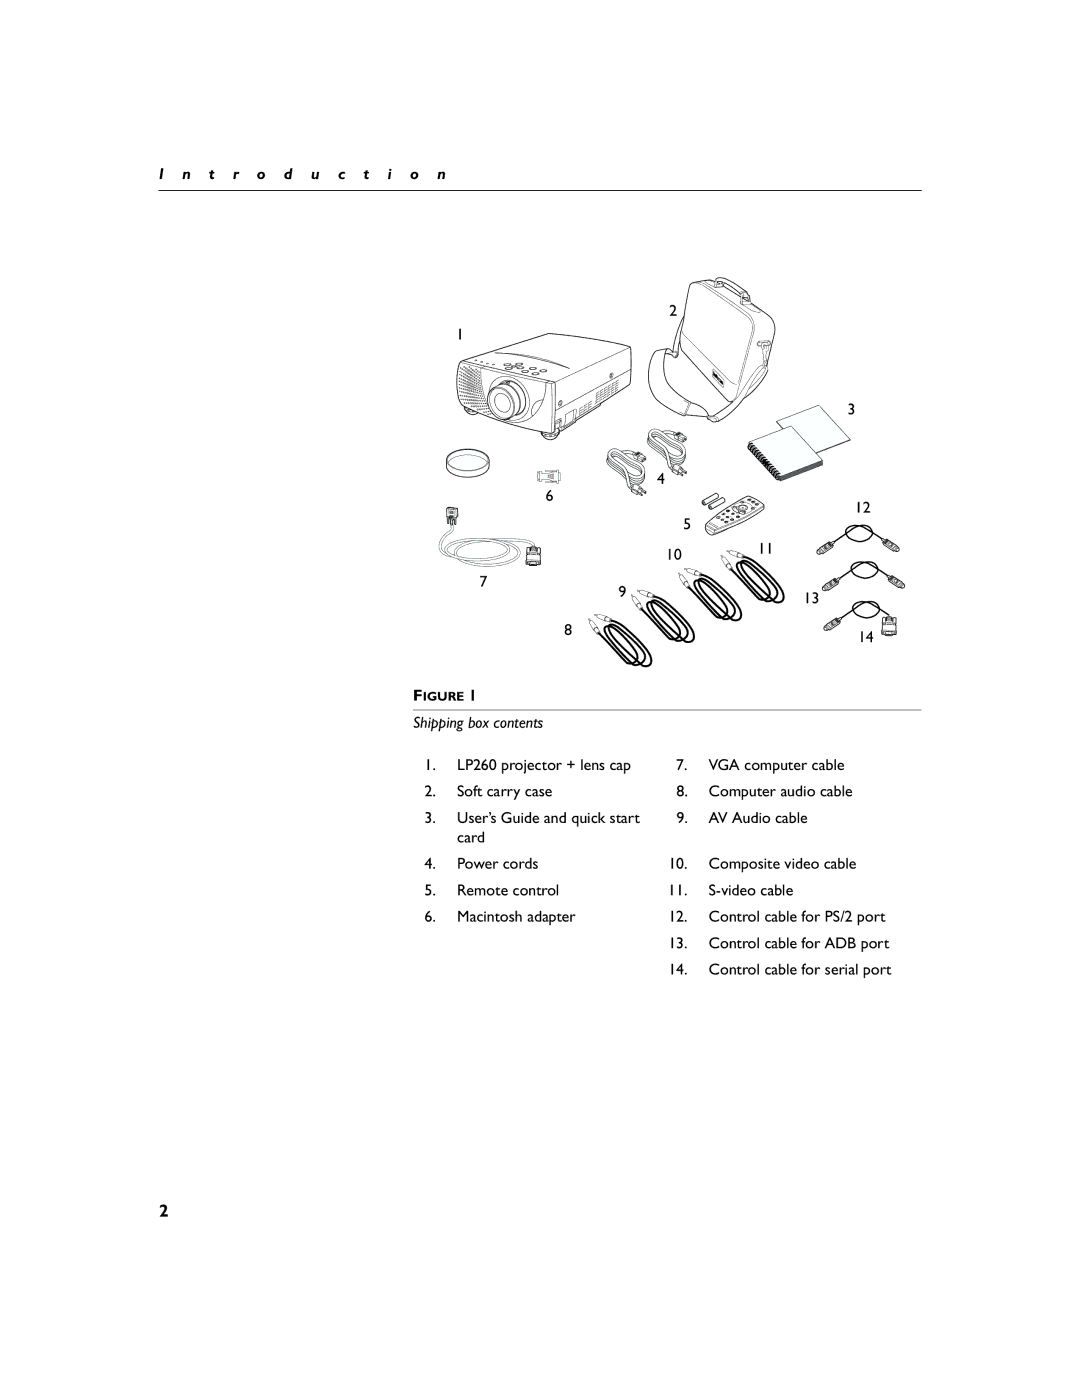
FIGURE 1
Shipping box contents
1. | LP260 projector + lens cap | 7. | VGA computer cable |
2. | Soft carry case | 8. | Computer audio cable |
3. | User’s Guide and quick start | 9. | AV Audio cable |
| card |
|
|
4. | Power cords | 10. | Composite video cable |
5. | Remote control | 11. | |
6. | Macintosh adapter | 12. | Control cable for PS/2 port |
|
| 13. | Control cable for ADB port |
|
| 14. | Control cable for serial port |
2