Installing Red Hat* Enterprise Linux 4*
Intel® Server Board S5000PAL
Adding Partitions
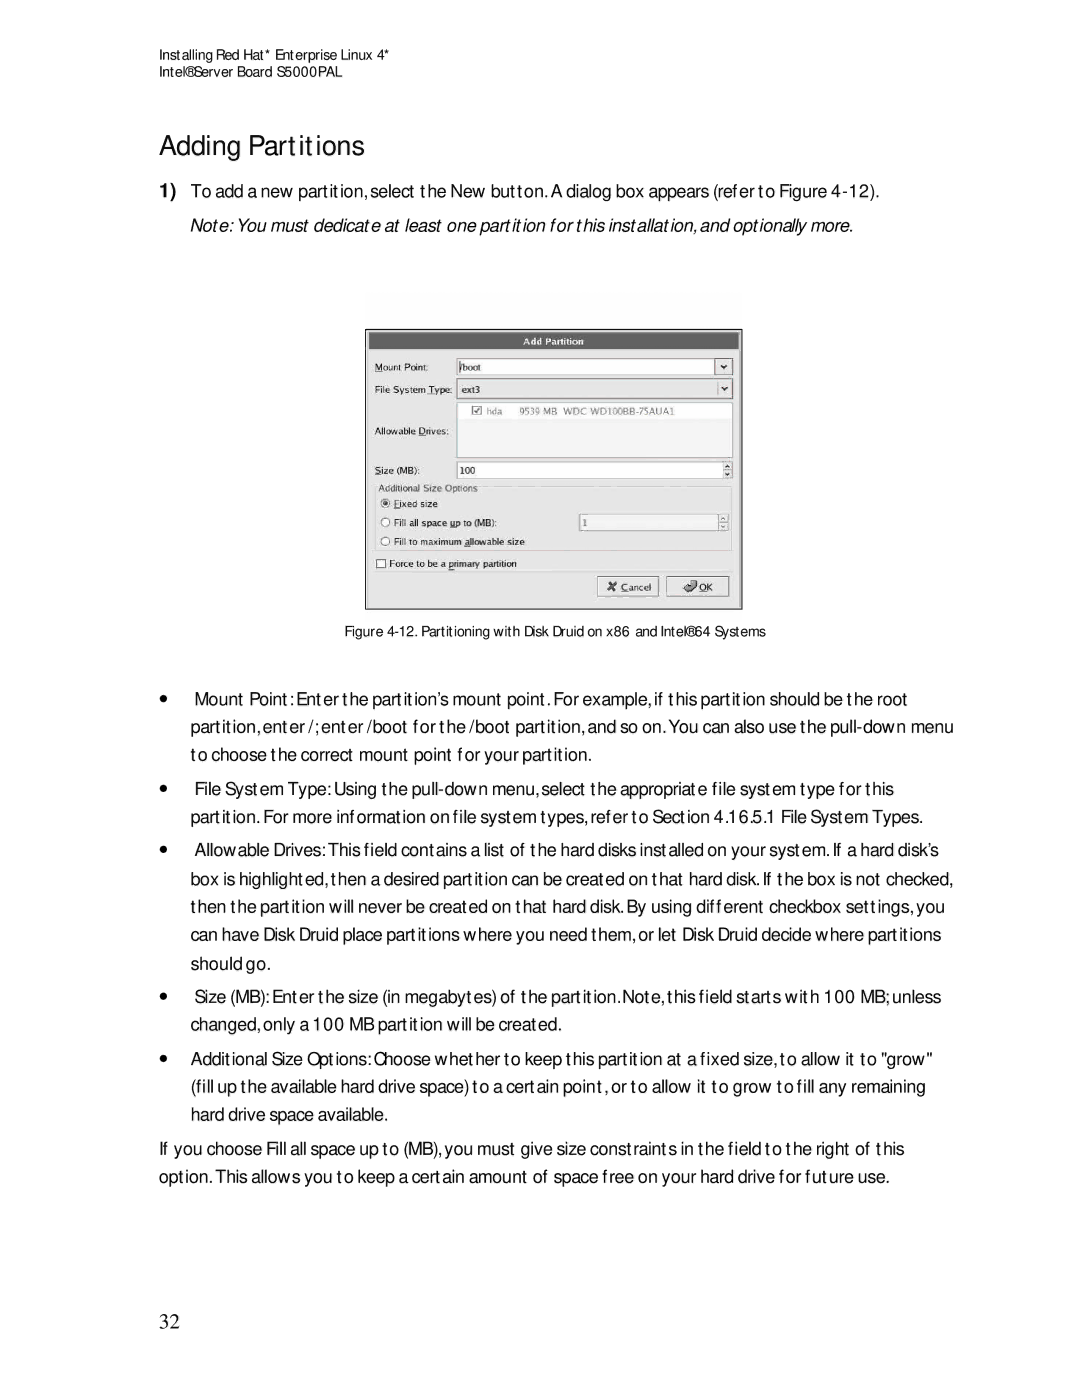
1)To add a new partition, select the New button. A dialog box appears (refer to Figure
Figure 4-12. Partitioning with Disk Druid on x86 and Intel® 64 Systems
∙Mount Point: Enter the partition’s mount point. For example, if this partition should be the root partition, enter /; enter /boot for the /boot partition, and so on. You can also use the
∙File System Type: Using the
∙Allowable Drives: This field contains a list of the hard disks installed on your system. If a hard disk’s box is highlighted, then a desired partition can be created on that hard disk. If the box is not checked, then the partition will never be created on that hard disk. By using different checkbox settings, you can have Disk Druid place partitions where you need them, or let Disk Druid decide where partitions should go.
∙Size (MB): Enter the size (in megabytes) of the partition. Note, this field starts with 100 MB; unless changed, only a 100 MB partition will be created.
∙Additional Size Options: Choose whether to keep this partition at a fixed size, to allow it to "grow" (fill up the available hard drive space) to a certain point, or to allow it to grow to fill any remaining hard drive space available.
If you choose Fill all space up to (MB), you must give size constraints in the field to the right of this option. This allows you to keep a certain amount of space free on your hard drive for future use.
32
