Intel Server Board SE7501CW2 Installation and Integration Guide
Installing the Chassis Feet (Pedestal Mode)
1.If you are installing this server into a rack system, skip these steps and go to “Installing into a Rack (Rack Mode)” below.
2.Move the chassis to the edge of your workbench.
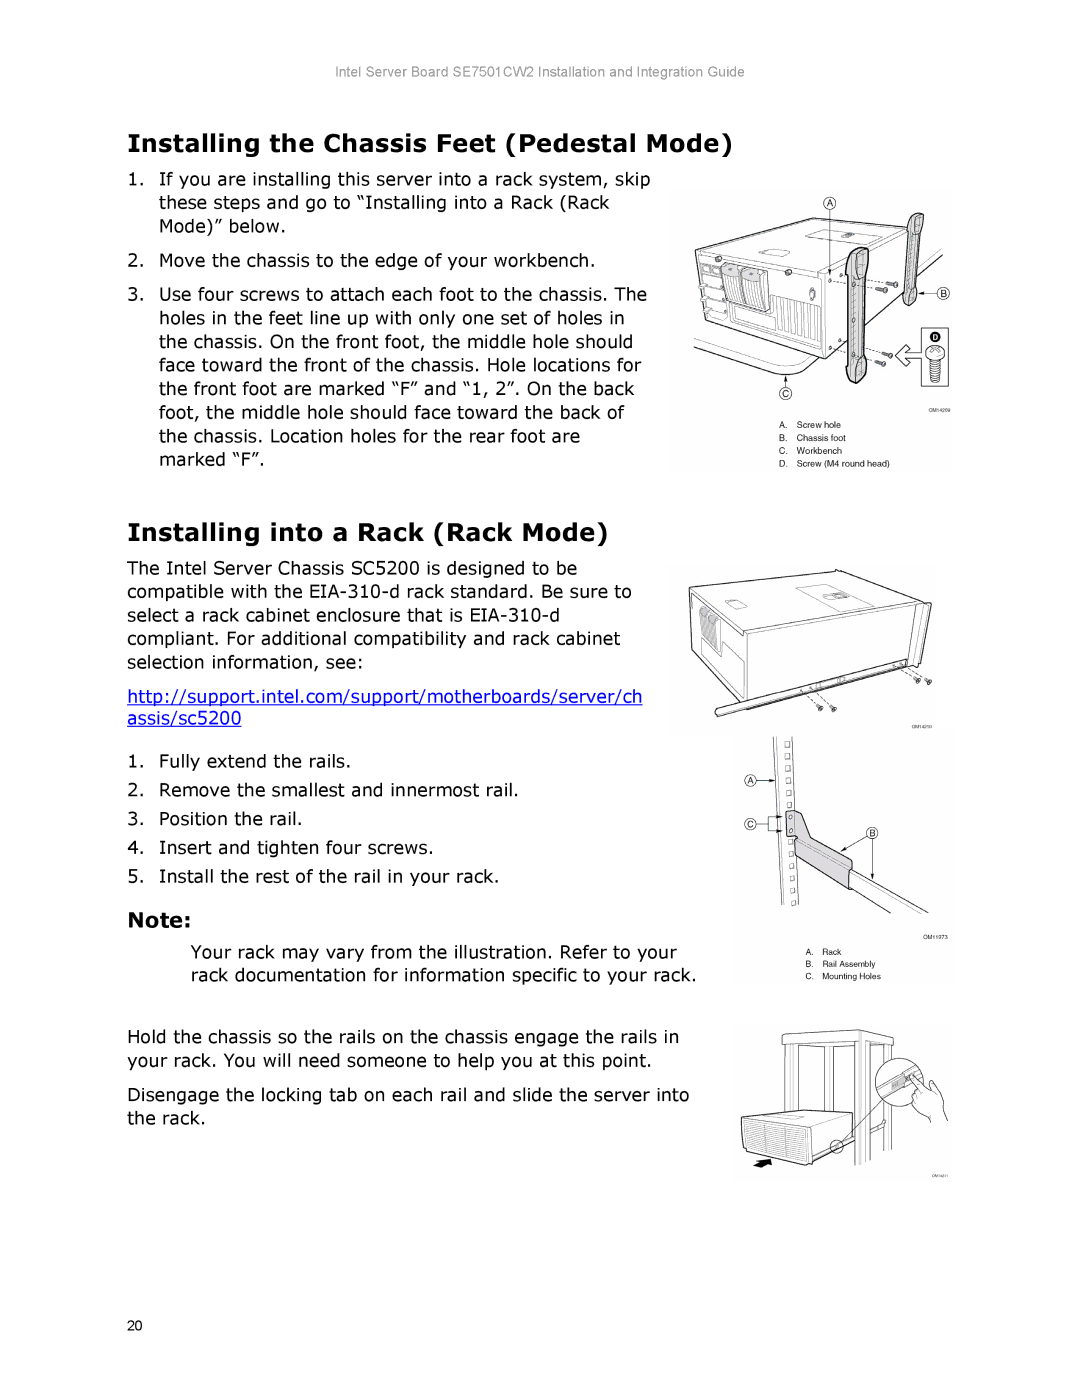
3.Use four screws to attach each foot to the chassis. The holes in the feet line up with only one set of holes in the chassis. On the front foot, the middle hole should face toward the front of the chassis. Hole locations for the front foot are marked “F” and “1, 2”. On the back foot, the middle hole should face toward the back of the chassis. Location holes for the rear foot are marked “F”.
Installing into a Rack (Rack Mode)
The Intel Server Chassis SC5200 is designed to be compatible with the
http://support.intel.com/support/motherboards/server/ch
assis/sc5200
1.Fully extend the rails.
2.Remove the smallest and innermost rail.
3.Position the rail.
4.Insert and tighten four screws.
5.Install the rest of the rail in your rack.
Note:
Your rack may vary from the illustration. Refer to your rack documentation for information specific to your rack.
Hold the chassis so the rails on the chassis engage the rails in your rack. You will need someone to help you at this point.
Disengage the locking tab on each rail and slide the server into the rack.
20
