Intel Server Board SE7501CW2 Installation and Integration Guide
Attaching the Wind Tunnel
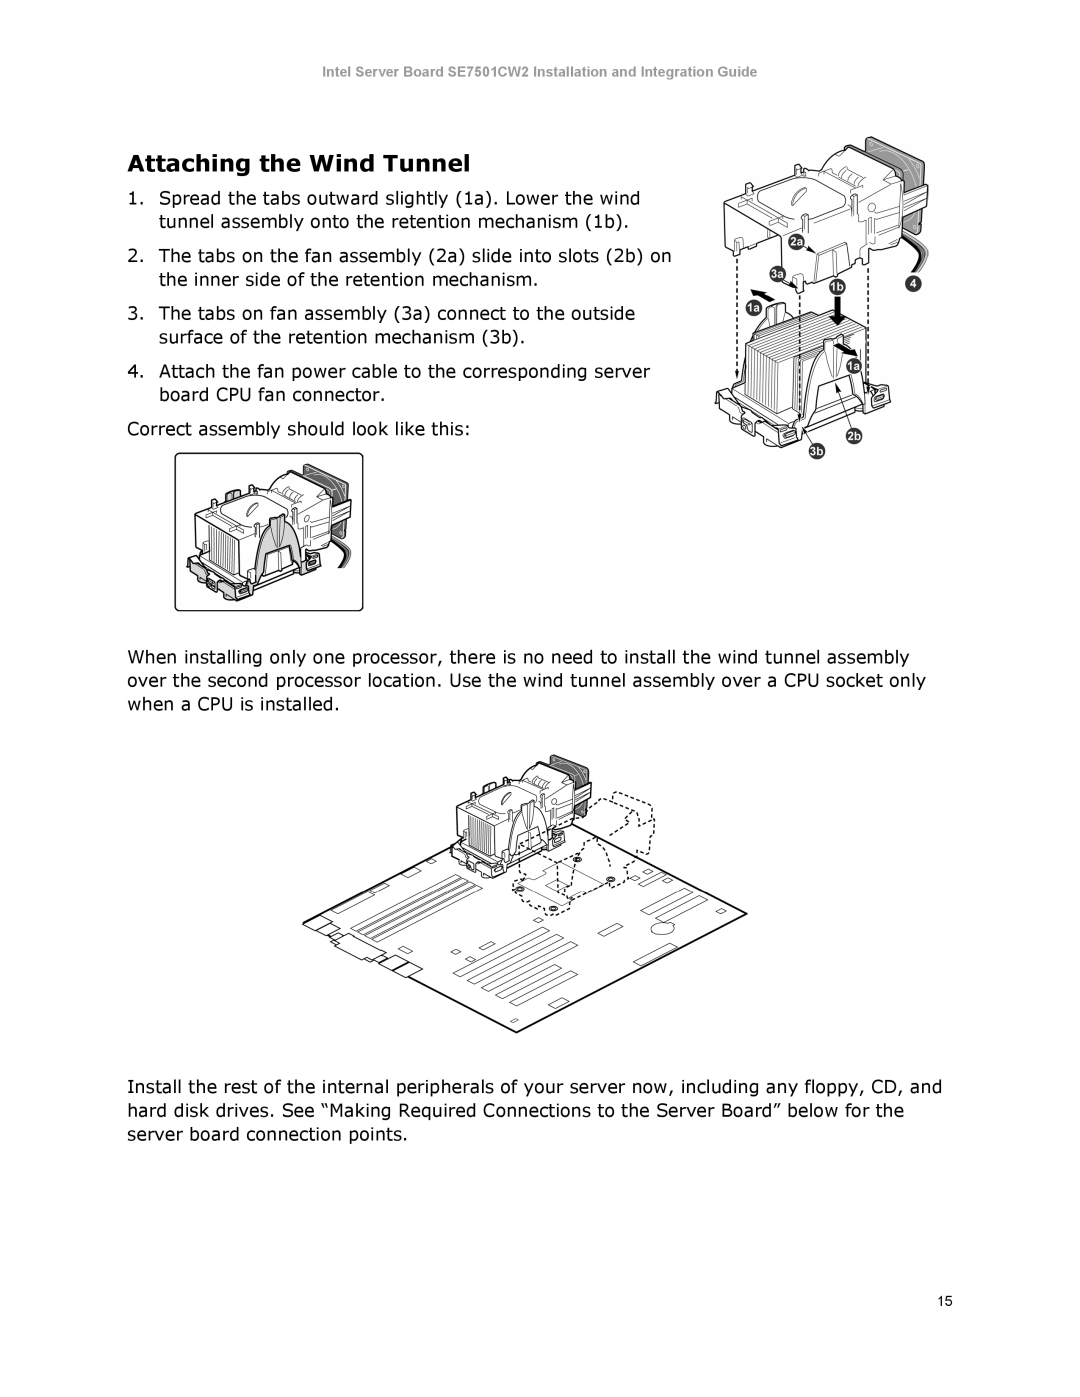
1.Spread the tabs outward slightly (1a). Lower the wind tunnel assembly onto the retention mechanism (1b).
2.The tabs on the fan assembly (2a) slide into slots (2b) on the inner side of the retention mechanism.
3.The tabs on fan assembly (3a) connect to the outside surface of the retention mechanism (3b).
4.Attach the fan power cable to the corresponding server board CPU fan connector.
Correct assembly should look like this:
When installing only one processor, there is no need to install the wind tunnel assembly over the second processor location. Use the wind tunnel assembly over a CPU socket only when a CPU is installed.
Install the rest of the internal peripherals of your server now, including any floppy, CD, and hard disk drives. See “Making Required Connections to the Server Board” below for the server board connection points.
15