Intel Server Board SE7501CW2 Installation and Integration Guide
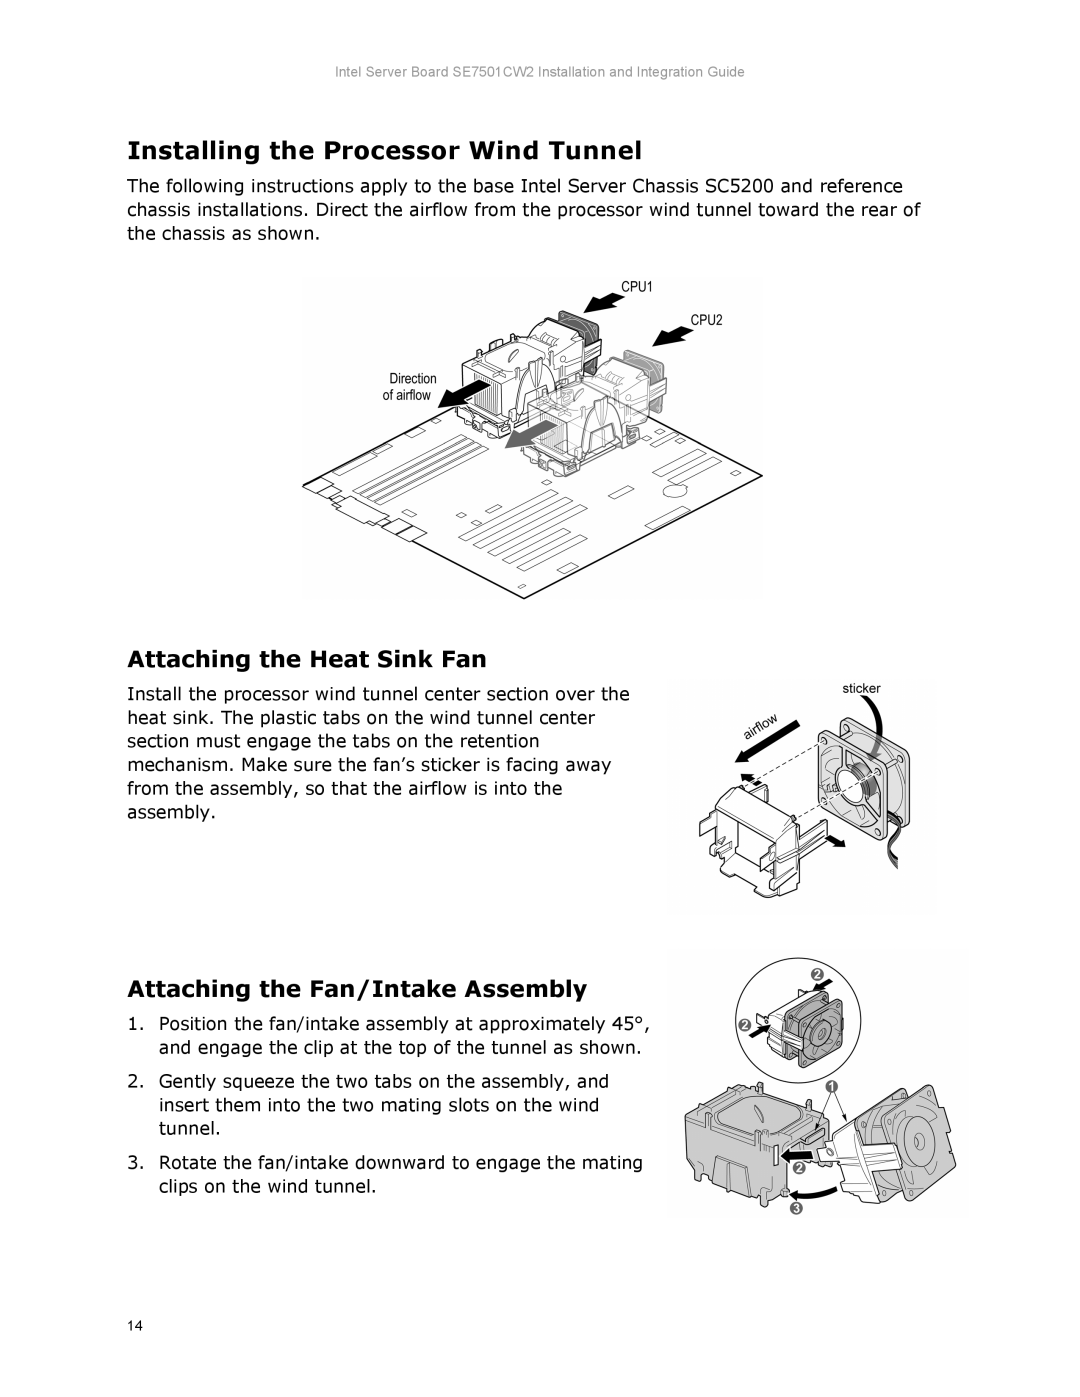
Installing the Processor Wind Tunnel
The following instructions apply to the base Intel Server Chassis SC5200 and reference chassis installations. Direct the airflow from the processor wind tunnel toward the rear of the chassis as shown.
Attaching the Heat Sink Fan
Install the processor wind tunnel center section over the heat sink. The plastic tabs on the wind tunnel center section must engage the tabs on the retention mechanism. Make sure the fan’s sticker is facing away from the assembly, so that the airflow is into the assembly.
Attaching the Fan/Intake Assembly
1.Position the fan/intake assembly at approximately 45°, and engage the clip at the top of the tunnel as shown.
2.Gently squeeze the two tabs on the assembly, and insert them into the two mating slots on the wind tunnel.
3.Rotate the fan/intake downward to engage the mating clips on the wind tunnel.
14