Invacare 1026793 manual Installing/Adjusting the Anti-Tippers, Installing Anti-Tippers

Models: 1026793

1 60
Download 60 pages 35.02 Kb
Page 58
Image 58
Installing/Adjusting the Anti-Tippers

SECTION 9—WHEEL LOCKS/ANTI-TIPPERS

Installing/Adjusting the Anti-Tippers

WARNING

Anti-tippers MUST be fully engaged and spring buttons fully protruding out of adjustment holes BEFORE using the wheelchair.

Anit-tippers MUST be used at all times. when outdoors on wet, soft ground or on gravel surfaces, anti-tippers may not provide the same level of protection against tip over. Extra caution MUST be observed when traversing such surfaces.

Make sure the anti-tipper wheels are pointing towards the ground/floor BEFORE using the wheelchair.

Installing Anti-Tippers

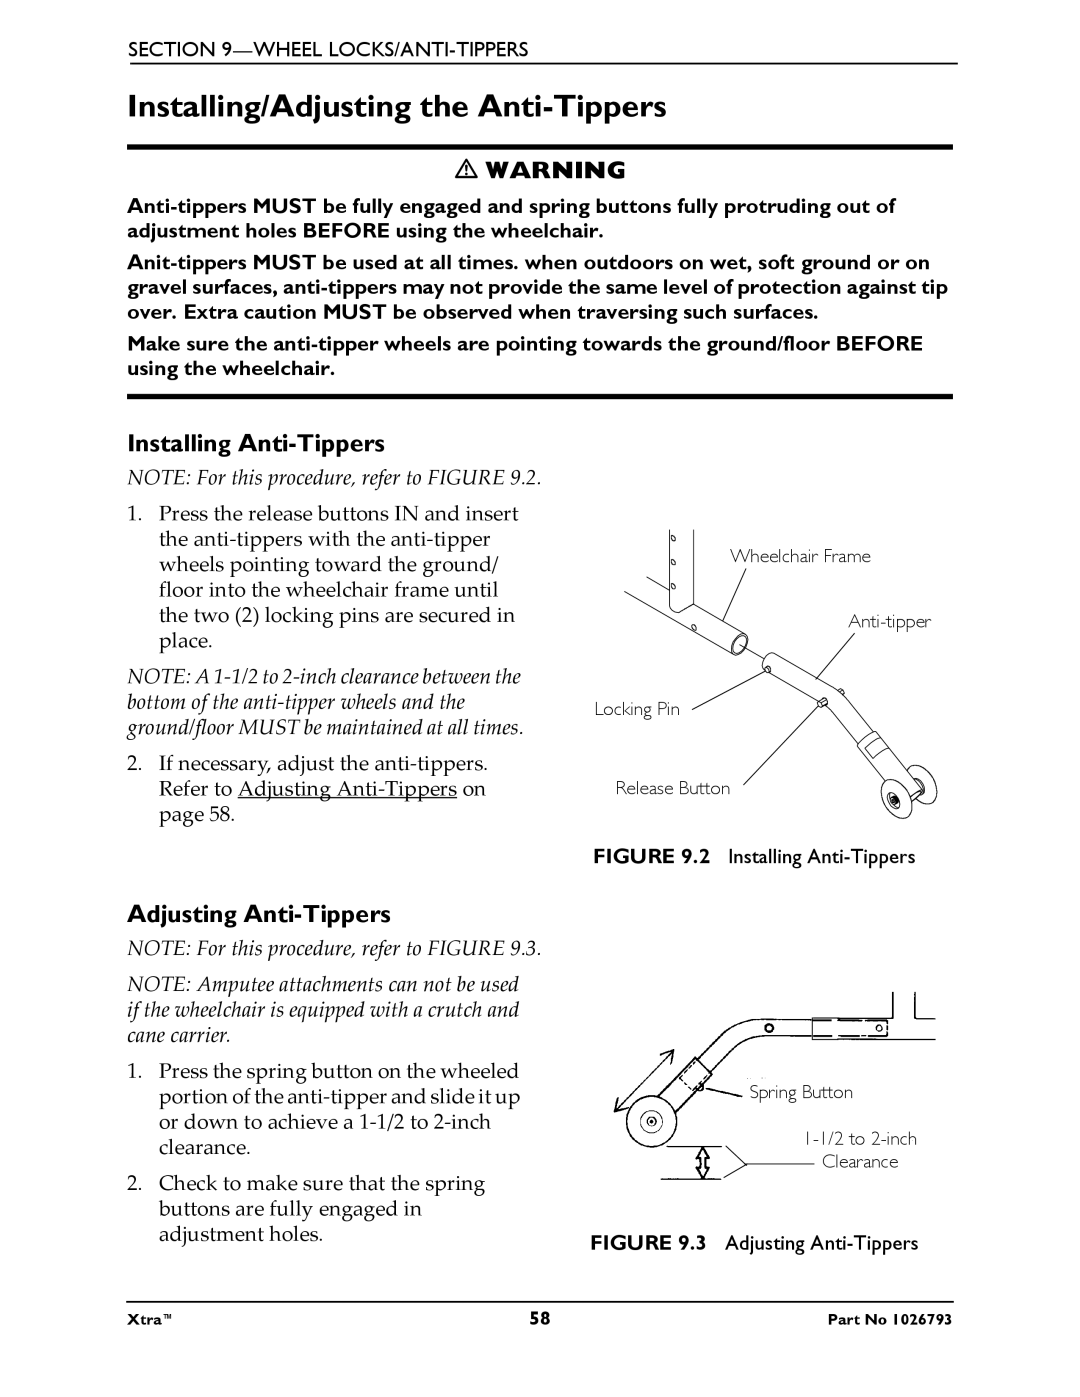
NOTE: For this procedure, refer to FIGURE 9.2.

1.Press the release buttons IN and insert the anti-tippers with the anti-tipper wheels pointing toward the ground/ floor into the wheelchair frame until the two (2) locking pins are secured in place.

NOTE: A 1-1/2 to 2-inch clearance between the bottom of the anti-tipper wheels and the ground/floor MUST be maintained at all times.

2.If necessary, adjust the anti-tippers. Refer to Adjusting Anti-Tippers on page 58.

Wheelchair Frame

Anti-tipper

Locking Pin

Release Button

FIGURE 9.2 Installing Anti-Tippers

Adjusting Anti-Tippers

NOTE: For this procedure, refer to FIGURE 9.3.

NOTE: Amputee attachments can not be used if the wheelchair is equipped with a crutch and cane carrier.

1.Press the spring button on the wheeled portion of the anti-tipper and slide it up or down to achieve a 1-1/2 to 2-inch clearance.

2.Check to make sure that the spring buttons are fully engaged in adjustment holes.

Spring Button

1-1/2 to 2-inch

Installing Anti-Tippers Clearance

FIGURE 9.3 Adjusting Anti-Tippers

Xtra™

58

Part No 1026793

Page 58
Image 58
Invacare 1026793 manual Installing/Adjusting the Anti-Tippers, Installing Anti-Tippers, Adjusting Anti-Tippers