PLAYBACK
Multi cue-up
Using the time codes recorded on the tape, up to 5 points on the tape can be registered as
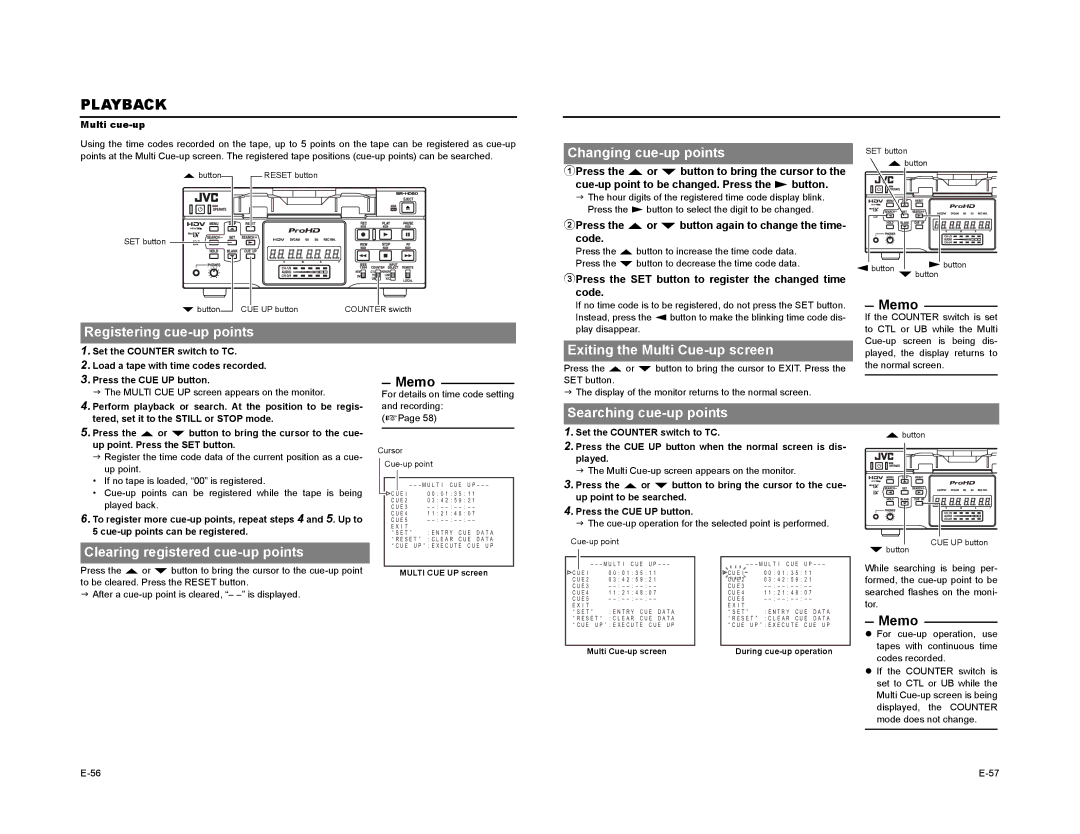
R button | RESET button |
|
SET button |
|
|
P button | CUE UP button | COUNTER swicth |
Changing cue-up points
1Press the R or P button to bring the cursor to the
JThe hour digits of the registered time code display blink. Press the S button to select the digit to be changed.
2Press the R or P button again to change the time- code.
Press the R button to increase the time code data. Press the P button to decrease the time code data.
3Press the SET button to register the changed time code.
If no time code is to be registered, do not press the SET button. Instead, press the Q button to make the blinking time code dis-
SET button
Rbutton
Qbutton Sbutton
Pbutton
Memo
If the COUNTER switch is set
Registering cue-up points
1. Set the COUNTER switch to TC. |
2. Load a tape with time codes recorded. |
3. Press the CUE UP button. |
J The MULTI CUE UP screen appears on the monitor. |
4. |
Memo
For details on time code setting and recording:
play disappear.
Exiting the Multi Cue-up screen
Press the R or P button to bring the cursor to EXIT. Press the SET button.
JThe display of the monitor returns to the normal screen.
to CTL or UB while the Multi
Perform playback or search. At the position to be regis- |
tered, set it to the STILL or STOP mode. |
5. Press the R or P button to bring the cursor to the cue- |
up point. Press the SET button. |
J Register the time code data of the current position as a cue- |
up point. |
• If no tape is loaded, “00” is registered. |
• |
played back. |
6. To register more |
5 |
(XPage 58)
Cursor
– – – M U L T I C U E U P – – – – – –
C U E I | 0 0 | : 0 1 | : 3 5 : 1 1 | |
C U E 2 | 0 3 | : 4 2 | : 5 9 | : 2 1 |
C U E 3 | – | : – | ||
C U E 4 | 1 1 | : 2 1 | : 4 8 | : 0 7 |
C U E 5 | – | : – | ||
E X I T |
|
|
|
|
“ S E T ” | : E N T R Y C U E D A T A | |||
Searching cue-up points
1.Set the COUNTER switch to TC.
2.Press the CUE UP button when the normal screen is dis- played.
J The Multi
3.Press the R or P button to bring the cursor to the cue- up point to be searched.
4.Press the CUE UP button.
J The
Rbutton
Clearing registered cue-up points
“ R E S E T ” : C L E A R C U E D A T A
“ C U E U P ” : E X E C U T E C U E U P
Pbutton
CUE UP button
Press the R or P button to bring the cursor to the
JAfter a
MULTI CUE UP screen
– – – M U L T I C U E U P – – – – – –
C U E I | 0 0 | : 0 1 | : 3 5 : 1 1 | |
C U E 2 | 0 3 | : 4 2 | : 5 9 | : 2 1 |
C U E 3 | – | : – | ||
C U E 4 | 1 1 | : 2 1 | : 4 8 | : 0 7 |
C U E 5 | – | : – | ||
E X I T |
|
|
|
|
“ S E T ” | : E N T R Y C U E D A T A | |||
“ R E S E T ” : C L E A R C U E D A T A
“ C U E U P ” : E X E C U T E C U E U P
– – – M U L T I C U E U P – – – – – –
C U E I | 0 0 | : 0 1 : 3 5 : 1 1 | ||
C U E 2 | 0 3 | : 4 2 | : 5 9 | : 2 1 |
C U E 3 | – | |||
C U E 4 | 1 1 | : 2 1 | : 4 8 | : 0 7 |
C U E 5 | – | |||
E X I T |
|
|
|
|
“ S E T ” | : E N T R Y C U E D A T A | |||
“ R E S E T ” : C L E A R C U E D A T A
“ C U E U P ” : E X E C U T E C U E U P
While searching is being per- formed, the
Memo
Multi | During |
zFor
zIf the COUNTER switch is set to CTL or UB while the Multi