RECORDING
Recording procedure
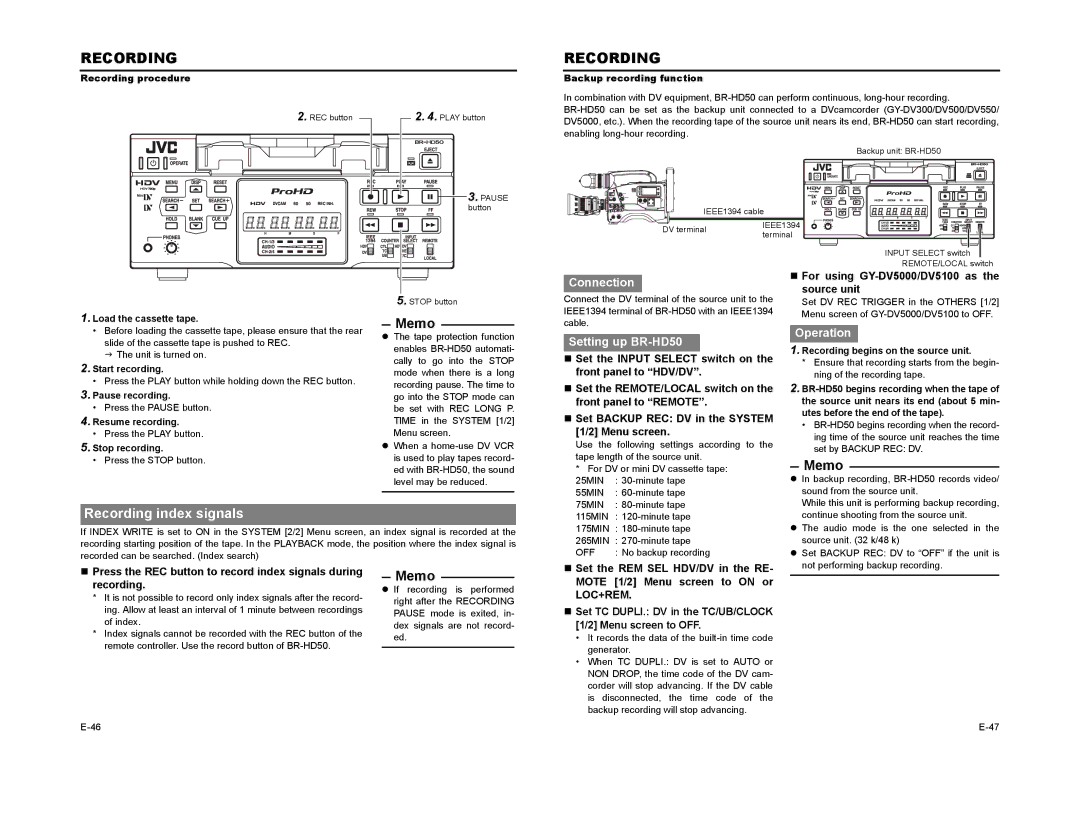
2. REC button | 2. 4. PLAY button |
| 3. PAUSE |
| button |
RECORDING
Backup recording function
In combination with DV equipment,
Backup unit:
IEEE1394 cable
DV terminal | IEEE1394 | |
terminal | ||
|
INPUT SELECT switch
REMOTE/LOCAL switch
Connection
Connect the DV terminal of the source unit to the IEEE1394 terminal of
For using |
source unit |
Set DV REC TRIGGER in the OTHERS [1/2] |
1.Load the cassette tape.
•Before loading the cassette tape, please ensure that the rear slide of the cassette tape is pushed to REC.
J The unit is turned on.
2.Start recording.
•Press the PLAY button while holding down the REC button.
3.Pause recording.
•Press the PAUSE button.
4.Resume recording.
•Press the PLAY button.
5.Stop recording.
•Press the STOP button.
Memo
zThe tape protection function enables
zWhen a
cable.
Setting up BR-HD50
Set the INPUT SELECT switch on the front panel to “HDV/DV”.
Set the REMOTE/LOCAL switch on the front panel to “REMOTE”.
Set BACKUP REC: DV in the SYSTEM [1/2] Menu screen.
Use the following settings according to the tape length of the source unit.
*For DV or mini DV cassette tape:
25MIN | : |
55MIN | : |
75MIN | : |
Menu screen of |
Operation
1.Recording begins on the source unit.
*Ensure that recording starts from the begin- ning of the recording tape.
2.
•
Memo
z In backup recording, |
sound from the source unit. |
While this unit is performing backup recording, |
Recording index signals
If INDEX WRITE is set to ON in the SYSTEM [2/2] Menu screen, an index signal is recorded at the recording starting position of the tape. In the PLAYBACK mode, the position where the index signal is recorded can be searched. (Index search)
115MIN | : |
175MIN | : |
265MIN | : |
OFF | : No backup recording |
continue shooting from the source unit. |
z The audio mode is the one selected in the |
source unit. (32 k/48 k) |
z Set BACKUP REC: DV to “OFF” if the unit is |
Press the REC button to record index signals during recording.
*It is not possible to record only index signals after the record- ing. Allow at least an interval of 1 minute between recordings of index.
*Index signals cannot be recorded with the REC button of the remote controller. Use the record button of
Memo
zIf recording is performed right after the RECORDING PAUSE mode is exited, in- dex signals are not record- ed.
Set the REM SEL HDV/DV in the RE- MOTE [1/2] Menu screen to ON or LOC+REM.
Set TC DUPLI.: DV in the TC/UB/CLOCK [1/2] Menu screen to OFF.
•It records the data of the
•When TC DUPLI.: DV is set to AUTO or NON DROP, the time code of the DV cam- corder will stop advancing. If the DV cable is disconnected, the time code of the backup recording will stop advancing.
not performing backup recording. |
