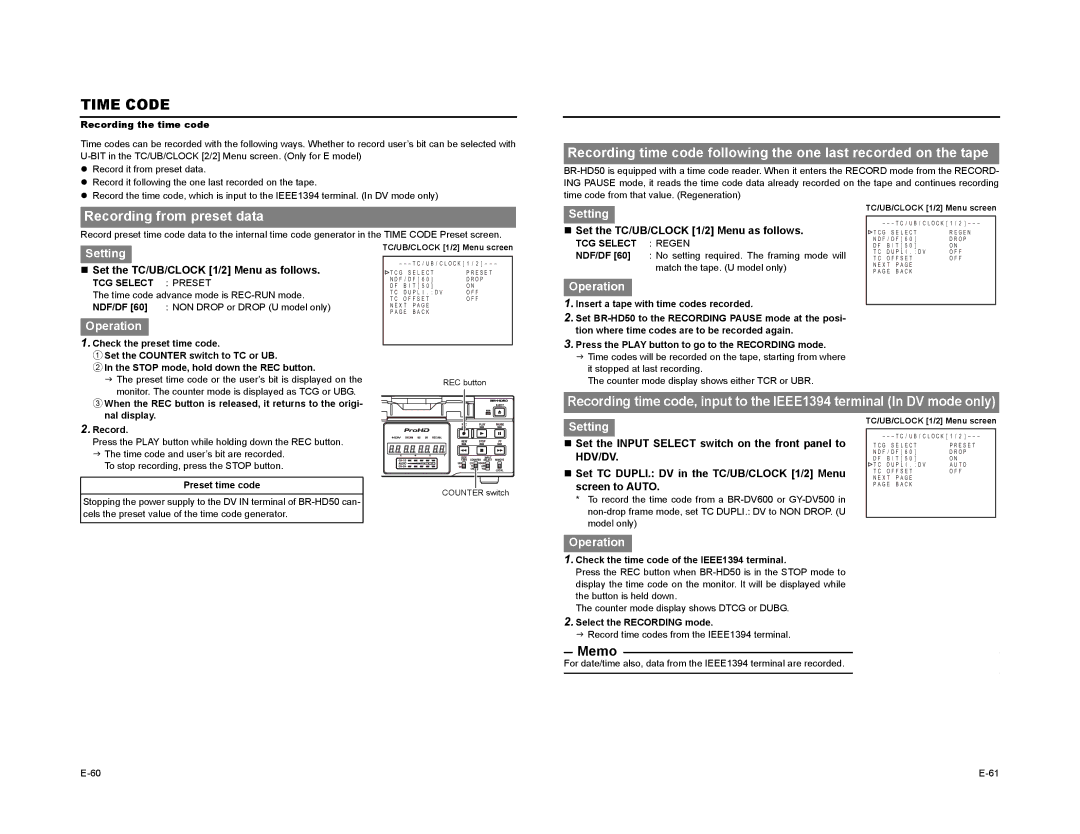
TIME CODE
Recording the time code
Time codes can be recorded with the following ways. Whether to record user’s bit can be selected with
zRecord it from preset data.
zRecord it following the one last recorded on the tape.
zRecord the time code, which is input to the IEEE1394 terminal. (In DV mode only)
Recording time code following the one last recorded on the tape
Recording from preset data
Record preset time code data to the internal time code generator in the TIME CODE Preset screen.
Setting
Set the TC/UB/CLOCK [1/2] Menu as follows. |
TCG SELECT : REGEN |
TC/UB/CLOCK [1/2] Menu screen
– – – T C / U B / C L O C K [ 1 / 2 ] – – –
T C G S E L E C T | R E G E N |
N D F / D F [ 6 0 ] | D R O P |
Setting
Set the TC/UB/CLOCK [1/2] Menu as follows.
TCG SELECT : PRESET
The time code advance mode is
Operation
1. Check the preset time code. |
1Set the COUNTER switch to TC or UB. |
2In the STOP mode, hold down the REC button. |
J The preset time code or the user’s bit is displayed on the |
monitor. The counter mode is displayed as TCG or UBG. |
TC/UB/CLOCK [1/2] Menu screen
– – – T C / U B / C L O C K [ 1 / 2 ] – – –
T C G S E L E C T | P R E S E T | |
N D F / D F [ 6 0 ] | D R O P | |
D F B I T [ 5 0 ] | O N | |
T C D U P L I . : D V | O F F | |
T C O F F S E T | O F F | |
N E X T | P A G E |
|
P A G E | B A C K |
|
REC button
NDF/DF [60] | : No setting required. The framing mode will |
| match the tape. (U model only) |
Operation
1.Insert a tape with time codes recorded.
2.Set
3.Press the PLAY button to go to the RECORDING mode.
J Time codes will be recorded on the tape, starting from where it stopped at last recording.
The counter mode display shows either TCR or UBR.
D F B I T [ 5 0 | ] | O N | |
T C D U P L I . : D V | O F F | ||
T C O F F S E T |
| O F F | |
N E X T | P A G E |
|
|
P A G E | B A C K |
|
|
3When the REC button is released, it returns to the origi- |
nal display. |
Recording time code, input to the IEEE1394 terminal (In DV mode only)
2. Record. |
Press the PLAY button while holding down the REC button. |
J The time code and user’s bit are recorded. |
To stop recording, press the STOP button. |
Preset time code
Stopping the power supply to the DV IN terminal of
COUNTER switch
Setting
Set the INPUT SELECT switch on the front panel to HDV/DV.
Set TC DUPLI.: DV in the TC/UB/CLOCK [1/2] Menu screen to AUTO.
*To record the time code from a
Operation
1.Check the time code of the IEEE1394 terminal.
Press the REC button when
The counter mode display shows DTCG or DUBG.
2.Select the RECORDING mode.
J Record time codes from the IEEE1394 terminal.
Memo
For date/time also, data from the IEEE1394 terminal are recorded.
TC/UB/CLOCK [1/2] Menu screen
– – – T C / U B / C L O C K [ 1 / 2 ] – – –
T C G S E L E C T | P R E S E T | |
N D F / D F [ 6 0 ] | D R O P | |
D F B I T [ 5 0 ] | O N | |
T C D U P L I . : D V | A U T O | |
T C O F F S E T | O F F | |
N E X T | P A G E |
|
P A G E | B A C K |
|
