RECORDING
Recording with SERIAL REMOTE terminals
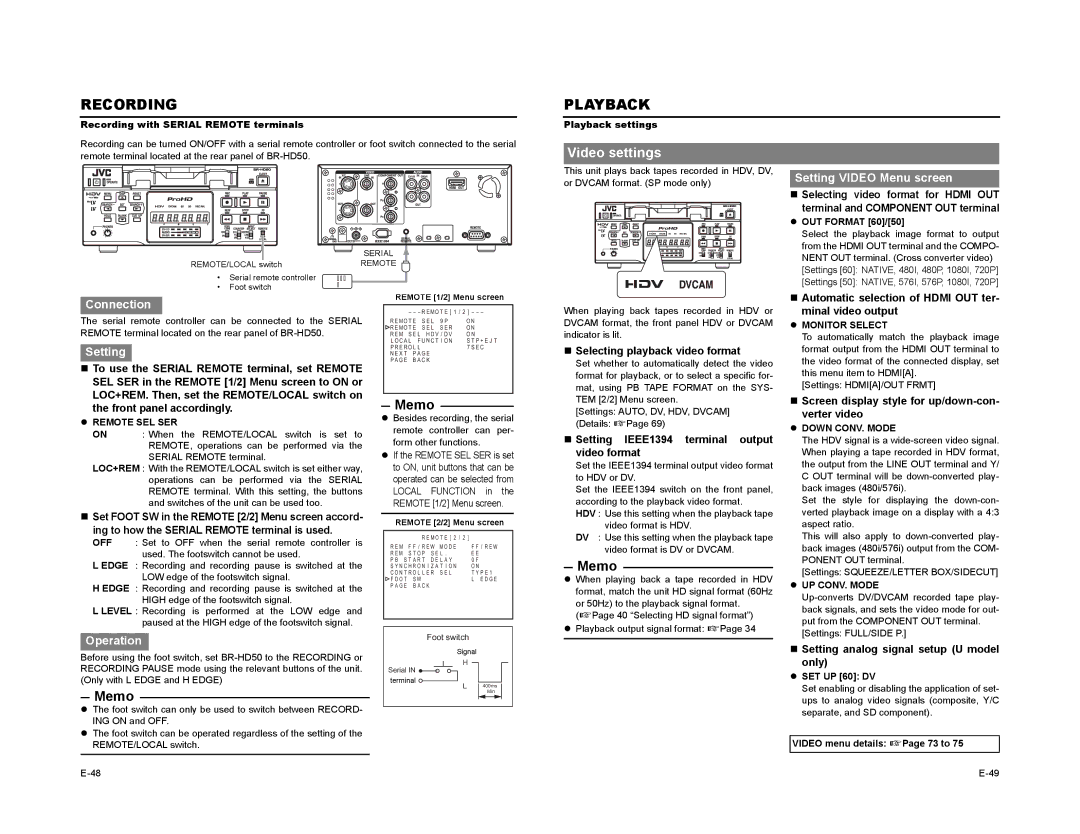
Recording can be turned ON/OFF with a serial remote controller or foot switch connected to the serial remote terminal located at the rear panel of
| SERIAL |
REMOTE/LOCAL switch | REMOTE |
PLAYBACK
Playback settings
Video settings
This unit plays back tapes recorded in HDV, DV, | Setting VIDEO Menu screen |
or DVCAM format. (SP mode only) |
Selecting video format for HDMI OUT terminal and COMPONENT OUT terminal
z OUT FORMAT [60]/[50] |
Select the playback image format to output |
from the HDMI OUT terminal and the COMPO- |
NENT OUT terminal. (Cross converter video) |
[Settings [60]: NATIVE, 480I, 480P, 1080I, 720P] |
• Serial remote controller
• Foot switch
Connection
The serial remote controller can be connected to the SERIAL REMOTE terminal located on the rear panel of
Setting
To use the SERIAL REMOTE terminal, set REMOTE SEL SER in the REMOTE [1/2] Menu screen to ON or LOC+REM. Then, set the REMOTE/LOCAL switch on the front panel accordingly.
zREMOTE SEL SER
ON : When the REMOTE/LOCAL switch is set to REMOTE, operations can be performed via the SERIAL REMOTE terminal.
LOC+REM : With the REMOTE/LOCAL switch is set either way, operations can be performed via the SERIAL REMOTE terminal. With this setting, the buttons and switches of the unit can be used too.
Set FOOT SW in the REMOTE [2/2] Menu screen accord- ing to how the SERIAL REMOTE terminal is used.
OFF : Set to OFF when the serial remote controller is used. The footswitch cannot be used.
L EDGE : Recording and recording pause is switched at the LOW edge of the footswitch signal.
H EDGE : Recording and recording pause is switched at the HIGH edge of the footswitch signal.
L LEVEL : Recording is performed at the LOW edge and paused at the HIGH edge of the footswitch signal.
Operation
REMOTE [1/2] Menu screen
| – – – R E MO T E [ 1 / 2 ] – – – | |
R E MO T E S E L 9 P | O N | |
R E MO T E S E L S E R | O N | |
R E M S E L H D V / D V | O N | |
L O C A L F U N C T I O N | S T P + E J T | |
P R E R O L L | 7 S E C | |
N E X T | P A G E |
|
P A G E | B A C K |
|
|
|
|
Memo
zBesides recording, the serial remote controller can per- form other functions.
zIf the REMOTE SEL SER is set to ON, unit buttons that can be operated can be selected from LOCAL FUNCTION in the REMOTE [1/2] Menu screen.
REMOTE [2/2] Menu screen
– – – R E M O T E [ 2 / 2 ] – – –
R E M F F / R E W M O D E | F F / R E W |
R E M S T O P S E L . | E E |
P B S T A R T D E L A Y | 0 F |
S Y N C H R O N I Z A T I O N | O N |
C O N T R O L L E R S E L | T Y P E 1 |
F O O T S W | L E D G E |
P A G E B A C K |
|
Foot switch
When playing back tapes recorded in HDV or DVCAM format, the front panel HDV or DVCAM indicator is lit.
Selecting playback video format
Set whether to automatically detect the video format for playback, or to select a specific for- mat, using PB TAPE FORMAT on the SYS- TEM [2/2] Menu screen.
[Settings: AUTO, DV, HDV, DVCAM]
(Details: XPage 69)
Setting IEEE1394 terminal output video format
Set the IEEE1394 terminal output video format to HDV or DV.
Set the IEEE1394 switch on the front panel, according to the playback video format.
HDV : Use this setting when the playback tape video format is HDV.
DV : Use this setting when the playback tape video format is DV or DVCAM.
Memo
zWhen playing back a tape recorded in HDV format, match the unit HD signal format (60Hz or 50Hz) to the playback signal format.
(XPage 40 “Selecting HD signal format”)
zPlayback output signal format: XPage 34
[Settings [50]: NATIVE, 576I, 576P, 1080I, 720P] |
Automatic selection of HDMI OUT ter- minal video output
zMONITOR SELECT
To automatically match the playback image format output from the HDMI OUT terminal to the video format of the connected display, set this menu item to HDMI[A].
[Settings: HDMI[A]/OUT FRMT]
Screen display style for up/down-con- verter video
zDOWN CONV. MODE
The HDV signal is a
Set the style for displaying the
This will also apply to
[Settings: SQUEEZE/LETTER BOX/SIDECUT]
zUP CONV. MODE
[Settings: FULL/SIDE P.]
Before using the foot switch, set
Memo
zThe foot switch can only be used to switch between RECORD- ING ON and OFF.
zThe foot switch can be operated regardless of the setting of the REMOTE/LOCAL switch.
Signal
H
Serial IN ![]()
terminal
L 400ms
Min
Setting analog signal setup (U model only)
zSET UP [60]: DV
Set enabling or disabling the application of set- ups to analog video signals (composite, Y/C separate, and SD component).
VIDEO menu details: XPage 73 to 75