Recording Operations
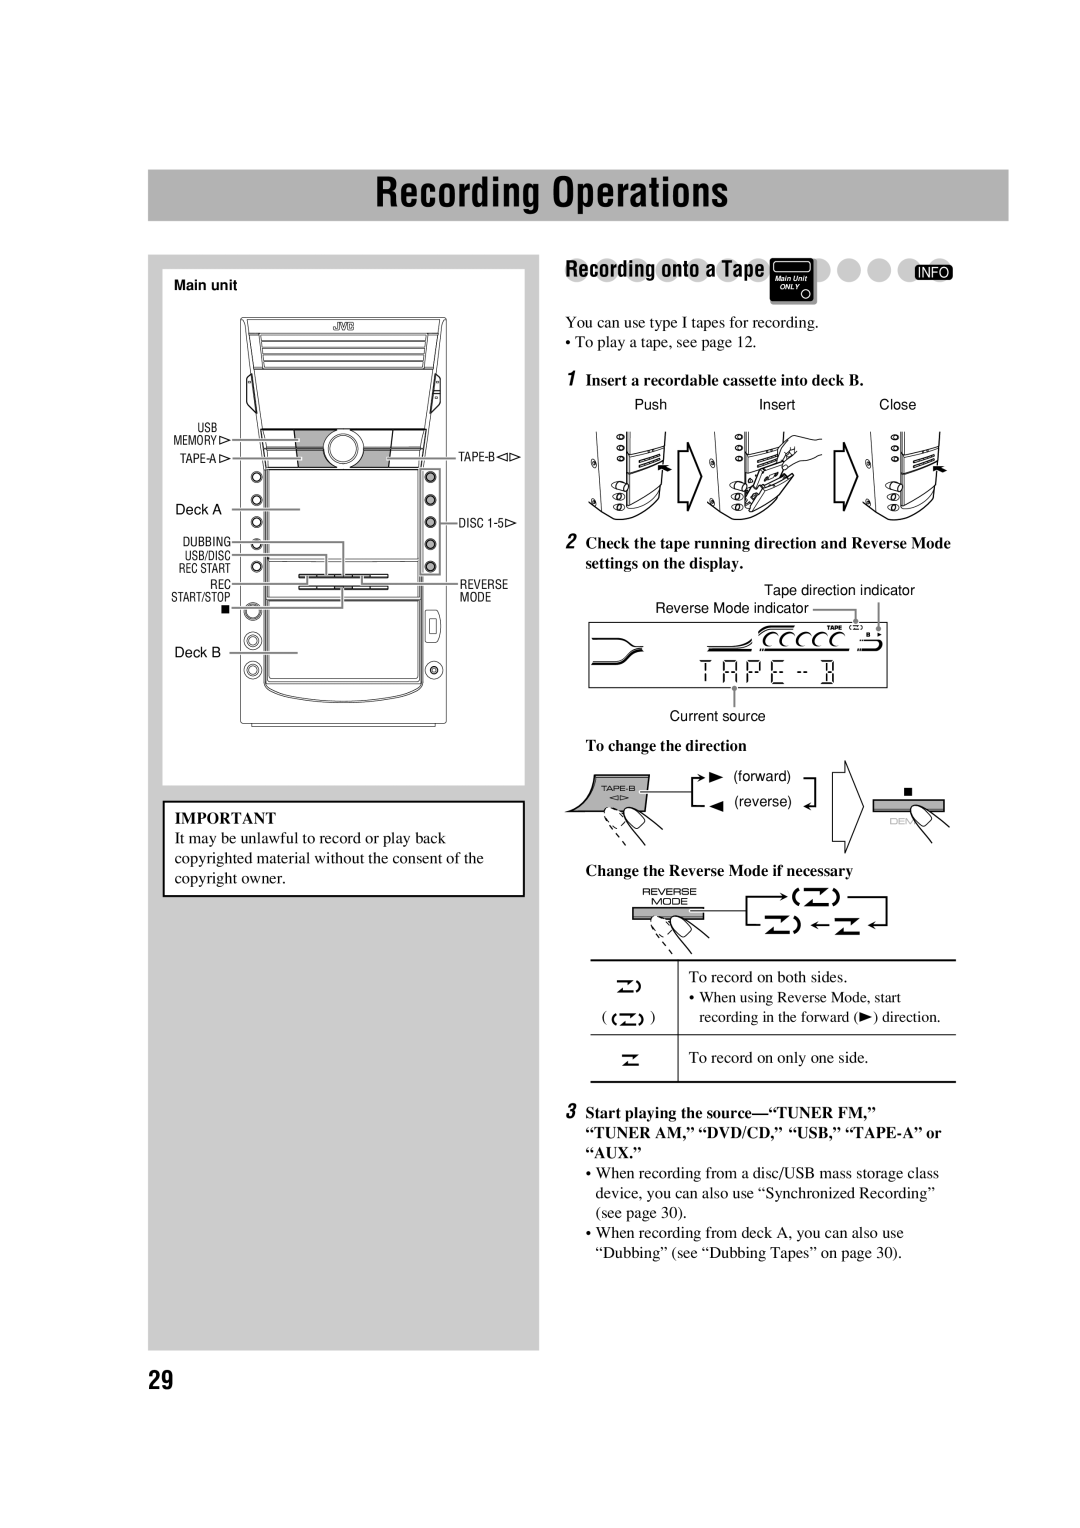
Main unit |
|
USB |
|
MEMORY |
|
Deck A | DISC |
| |
DUBBING |
|
USB/DISC |
|
REC START |
|
REC | REVERSE |
START/STOP | MODE |
Deck B |
|
IMPORTANT
It may be unlawful to record or play back copyrighted material without the consent of the copyright owner.
Recording onto a Tape Main Unit | INFO |
ONLY |
|
You can use type I tapes for recording.
• To play a tape, see page 12.
1Insert a recordable cassette into deck B.
Push | Insert | Close |
2Check the tape running direction and Reverse Mode settings on the display.
Tape direction indicator
Reverse Mode indicator
Current source
To change the direction
 3 (forward) 2 (reverse)
Change the Reverse Mode if necessary
To record on both sides.
•When using Reverse Mode, start
( ![]()
![]()
![]() ) recording in the forward (3) direction.
) recording in the forward (3) direction.
To record on only one side.
3Start playing the
•When recording from a disc/USB mass storage class device, you can also use “Synchronized Recording” (see page 30).
•When recording from deck A, you can also use “Dubbing” (see “Dubbing Tapes” on page 30).
29