Connections (Continued)
Typical connections
❊ For connection, see “Connecting an
Personal computer | Personal computer | External Control Unit” below. |
(used as the playback source) | (used to control the Monitor) | Remote control |
(supplied)
MENU/EXIT
Amplifier, etc.
VOLUME | MUTING | |
A RGB |
| B |
|
| VIDEO |
.COMPO |
| A |
SELECT INPUT | ||
ASPECT |
| DISPLAY |
ON | POWER | OFF |
Toaudio output | Tomonitor output |
To RS![]()
![]()
![]()
❊
Cable with stereo mini jacks
(not supplied)
To audio input
Power cord (supplied)
To a wall outlet
AUDIO
IN
|
|
| OUT |
|
| |
|
| MAKE | L |
|
| |
|
|
|
|
| ||
| WIRED | R |
|
| ||
RGB A | REMOTE | AUDIO | AC IN | POWER | ||
|
Connecting an External Control Unit
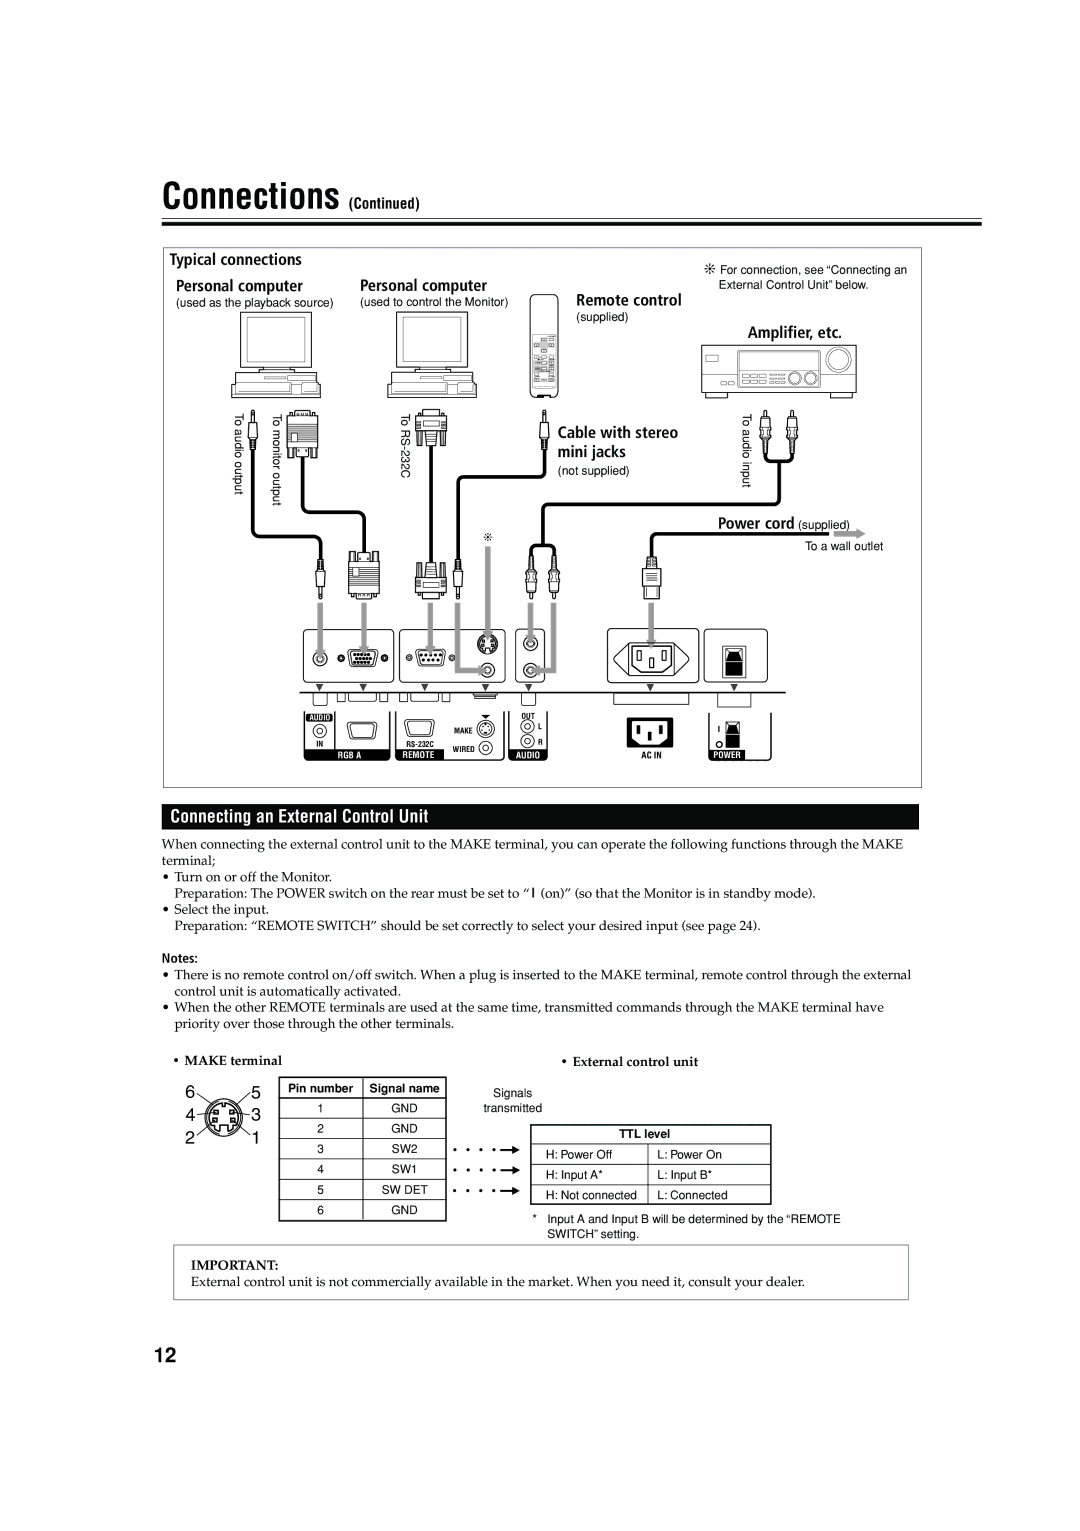
When connecting the external control unit to the MAKE terminal, you can operate the following functions through the MAKE terminal;
•Turn on or off the Monitor.
Preparation: The POWER switch on the rear must be set to “(on)” (so that the Monitor is in standby mode).
•Select the input.
Preparation: “REMOTE SWITCH” should be set correctly to select your desired input (see page 24).
Notes:
•There is no remote control on/off switch. When a plug is inserted to the MAKE terminal, remote control through the external control unit is automatically activated.
•When the other REMOTE terminals are used at the same time, transmitted commands through the MAKE terminal have priority over those through the other terminals.
• MAKE terminal
6 | 5 | Pin number | Signal name | |
|
| |||
4 | 3 | 1 | GND | |
|
| |||
2 | GND | |||
2 | 1 | |||
|
| |||
3 | SW2 | |||
|
| |||
|
|
|
| |
|
| 4 | SW1 | |
|
|
|
| |
|
| 5 | SW DET | |
|
|
|
| |
|
| 6 | GND | |
|
|
|
|
• External control unit
Signals
transmitted
= | TTL level | |
|
| |
H: Power Off | L: Power On | |
= |
|
|
H: Input A* | L: Input B* | |
= |
|
|
H: Not connected | L: Connected | |
*Input A and Input B will be determined by the “REMOTE SWITCH” setting.
IMPORTANT:
External control unit is not commercially available in the market. When you need it, consult your dealer.
12
