Parts Identification
Monitor: Front View
1 | 2 |
|
|
|
|
|
|
| MENU INPUT |
|
| MENU INPUT |
| |
| Bottom View |
|
|
|
| 3 | 4 | 5 | 6 |
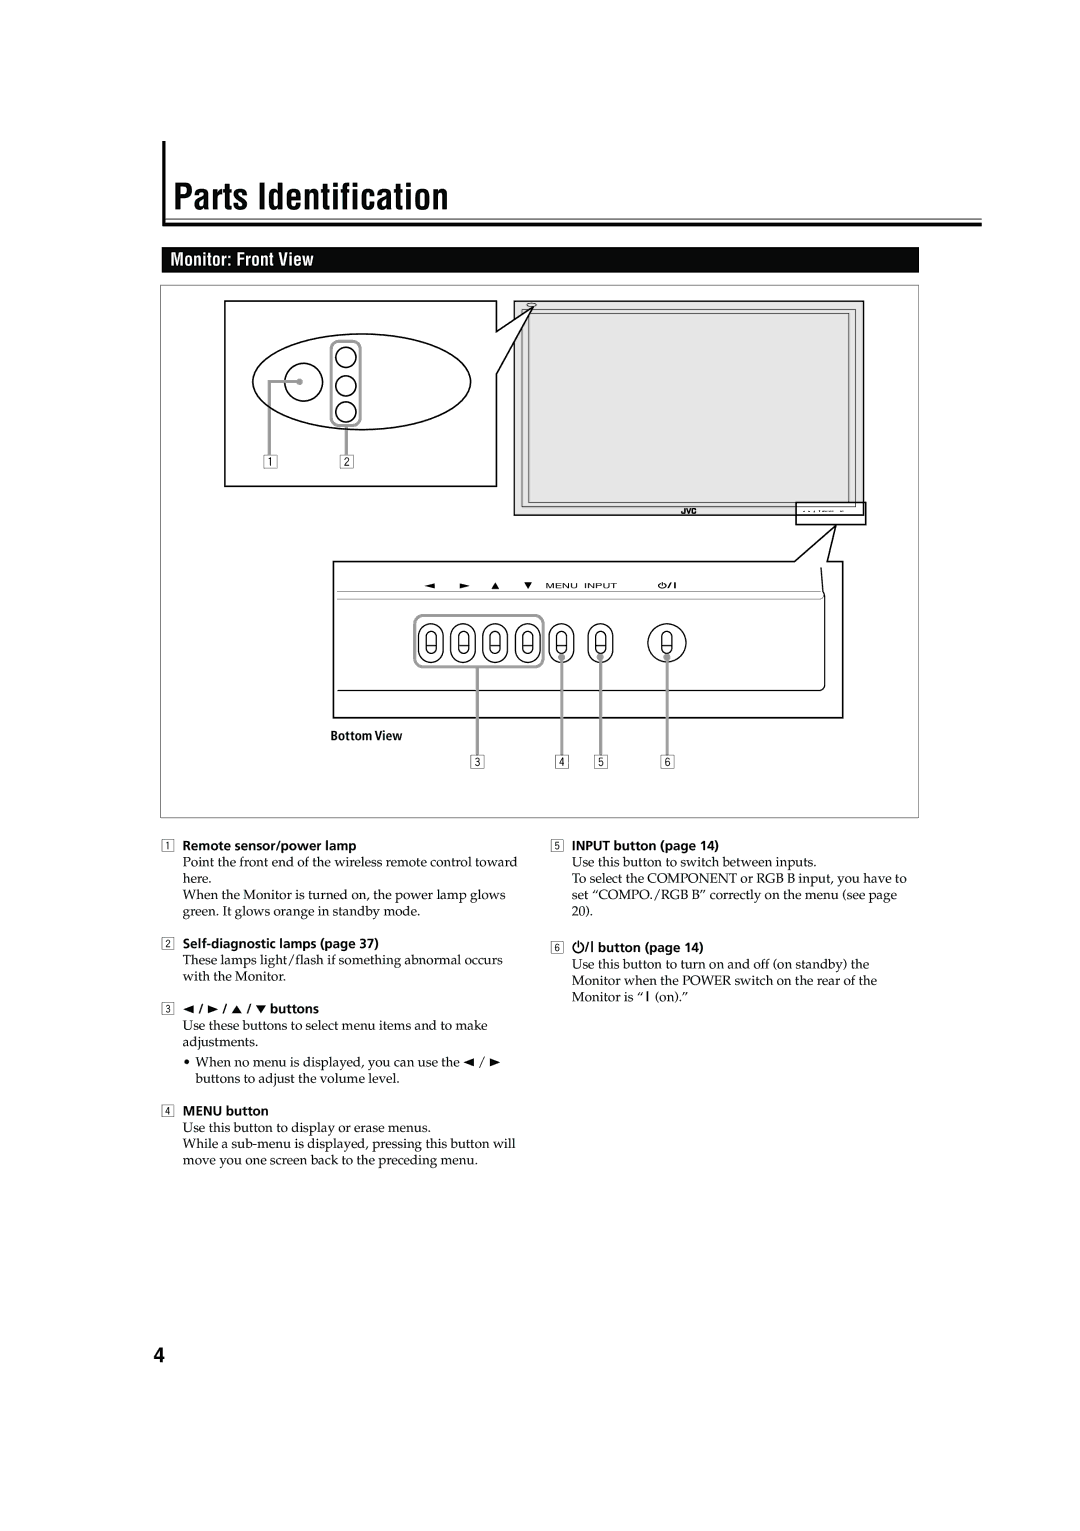
1Remote sensor/power lamp
Point the front end of the wireless remote control toward here.
When the Monitor is turned on, the power lamp glows green. It glows orange in standby mode.
2
These lamps light/flash if something abnormal occurs with the Monitor.
32 / 3 / 5 / ∞ buttons
Use these buttons to select menu items and to make adjustments.
•When no menu is displayed, you can use the 2 / 3 buttons to adjust the volume level.
4MENU button
Use this button to display or erase menus.
While a
5INPUT button (page 14)
Use this button to switch between inputs.
To select the COMPONENT or RGB B input, you have to set “COMPO./RGB B” correctly on the menu (see page 20).
6 button (page 14)
Use this button to turn on and off (on standby) the Monitor when the POWER switch on the rear of the Monitor is “(on).”
4
