2. CONTROLS, INDICATORS AND CONNECTORS
2-4 Top Section
![]() PUSH OPEN
PUSH OPEN
w
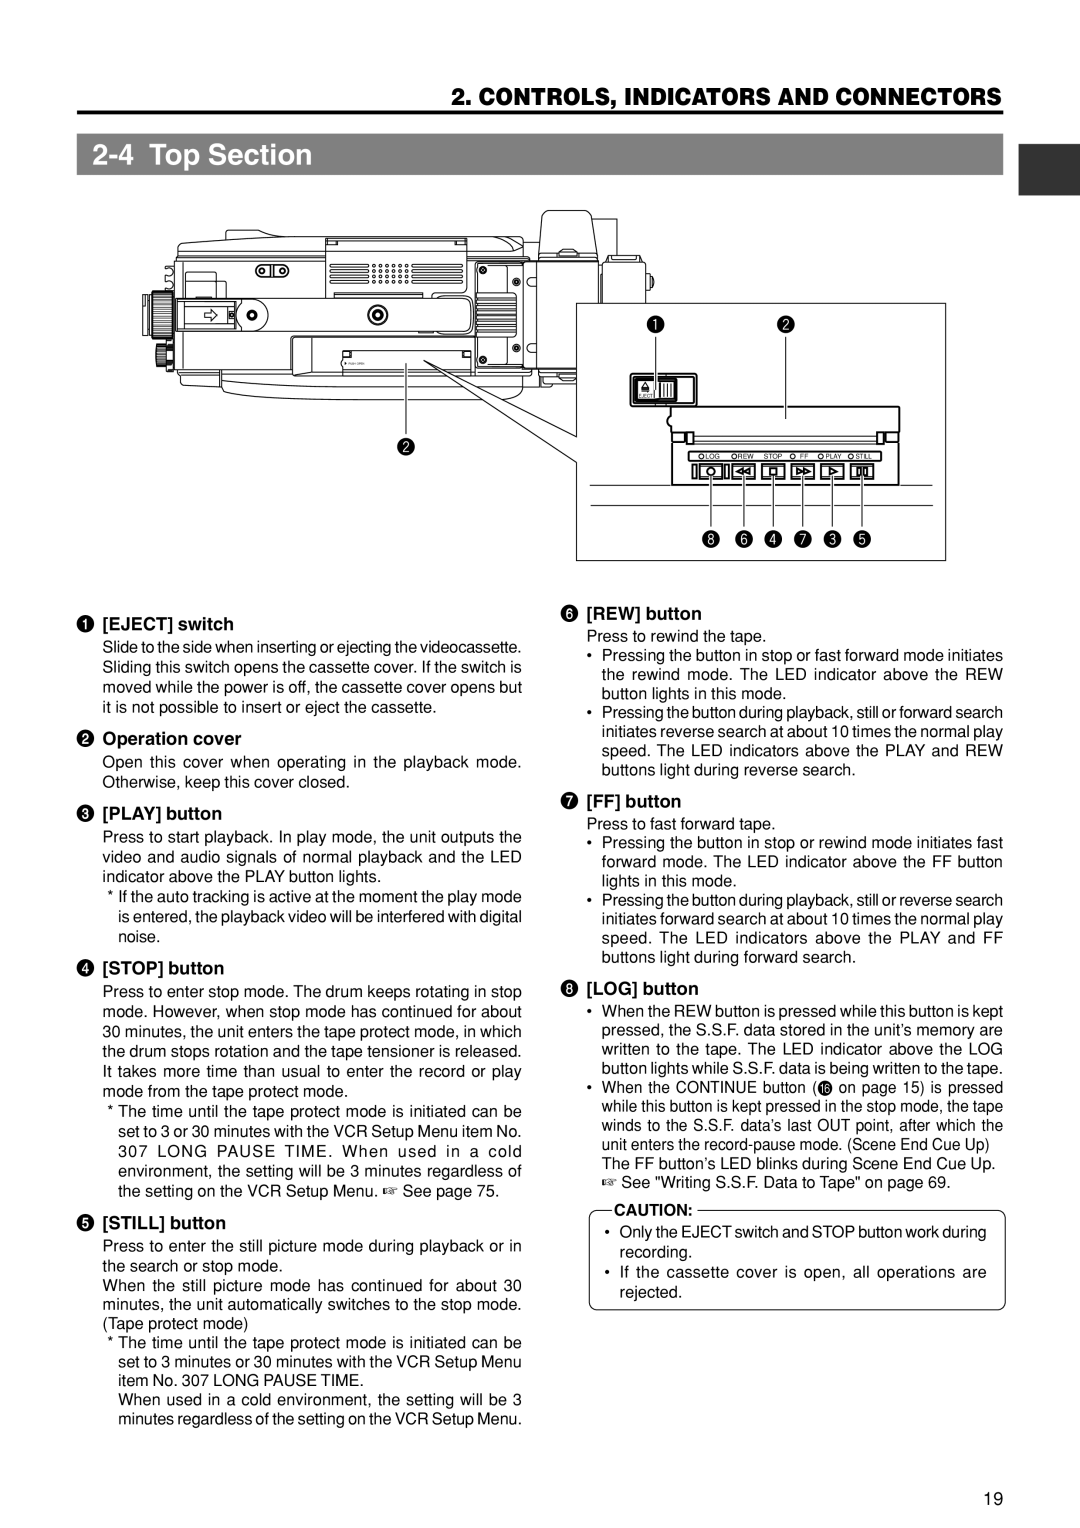
1[EJECT] switch
Slide to the side when inserting or ejecting the videocassette. Sliding this switch opens the cassette cover. If the switch is moved while the power is off, the cassette cover opens but it is not possible to insert or eject the cassette.
2Operation cover
Open this cover when operating in the playback mode. Otherwise, keep this cover closed.
3[PLAY] button
Press to start playback. In play mode, the unit outputs the video and audio signals of normal playback and the LED indicator above the PLAY button lights.
*If the auto tracking is active at the moment the play mode is entered, the playback video will be interfered with digital noise.
4[STOP] button
Press to enter stop mode. The drum keeps rotating in stop mode. However, when stop mode has continued for about 30 minutes, the unit enters the tape protect mode, in which the drum stops rotation and the tape tensioner is released. It takes more time than usual to enter the record or play mode from the tape protect mode.
*The time until the tape protect mode is initiated can be set to 3 or 30 minutes with the VCR Setup Menu item No. 307 LONG PAUSE TIME. When used in a cold environment, the setting will be 3 minutes regardless of the setting on the VCR Setup Menu. ☞ See page 75.
5[STILL] button
Press to enter the still picture mode during playback or in the search or stop mode.
When the still picture mode has continued for about 30 minutes, the unit automatically switches to the stop mode. (Tape protect mode)
*The time until the tape protect mode is initiated can be set to 3 minutes or 30 minutes with the VCR Setup Menu item No. 307 LONG PAUSE TIME.
When used in a cold environment, the setting will be 3 minutes regardless of the setting on the VCR Setup Menu.
q w
EJECT
LOG | REW STOP | FF | PLAY STILL |
i y r u e t
6[REW] button
Press to rewind the tape.
•Pressing the button in stop or fast forward mode initiates the rewind mode. The LED indicator above the REW button lights in this mode.
•Pressing the button during playback, still or forward search initiates reverse search at about 10 times the normal play speed. The LED indicators above the PLAY and REW buttons light during reverse search.
7[FF] button
Press to fast forward tape.
•Pressing the button in stop or rewind mode initiates fast forward mode. The LED indicator above the FF button lights in this mode.
•Pressing the button during playback, still or reverse search initiates forward search at about 10 times the normal play speed. The LED indicators above the PLAY and FF buttons light during forward search.
8[LOG] button
•When the REW button is pressed while this button is kept pressed, the S.S.F. data stored in the unit’s memory are written to the tape. The LED indicator above the LOG button lights while S.S.F. data is being written to the tape.
•When the CONTINUE button (F on page 15) is pressed while this button is kept pressed in the stop mode, the tape winds to the S.S.F. data’s last OUT point, after which the unit enters the
The FF button’s LED blinks during Scene End Cue Up. ☞ See "Writing S.S.F. Data to Tape" on page 69.
CAUTION:
•Only the EJECT switch and STOP button work during recording.
•If the cassette cover is open, all operations are rejected.
19