48 EN | TIMER RECORDING (cont.) |
i.LINK Timer Programming
•Turn on the VCR and the TV (and/or Digital Set Top Box).
•Set the [VCR/TV/CABLE/DBS] selector on the Remote to [VCR].
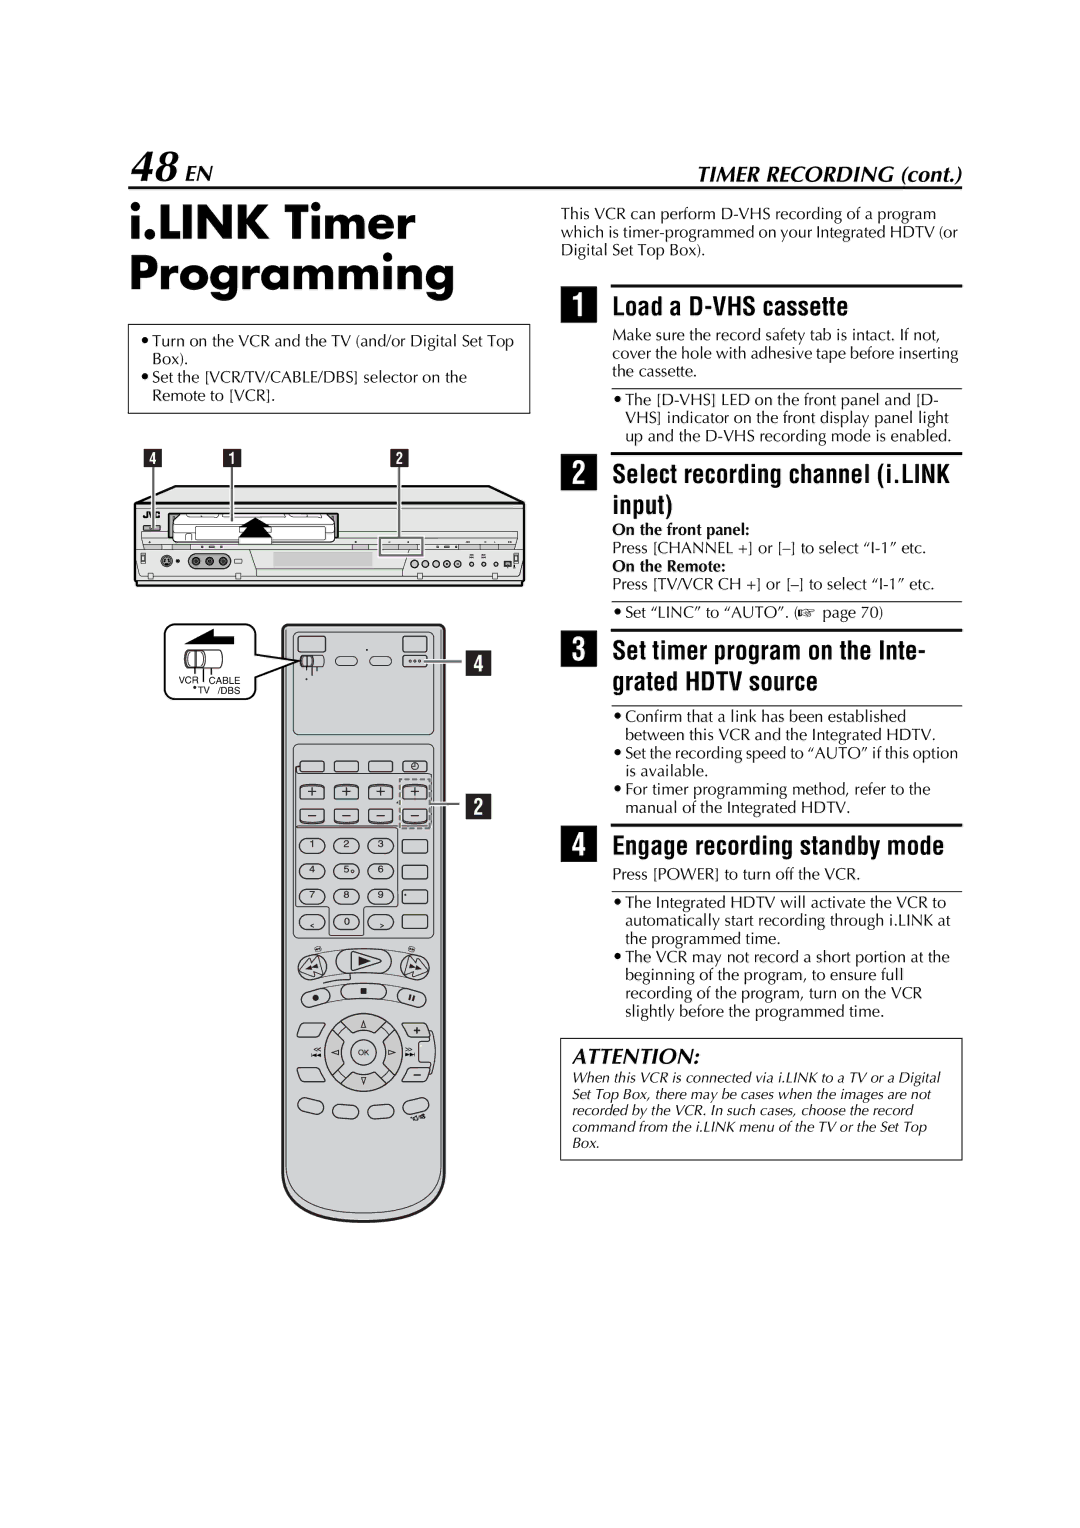
D | A | B |
![]()
![]()
![]() D
D
VCR CABLE
![]() TV /DBS
TV /DBS
![]()
![]()
![]() B
B
This VCR can perform
ALoad a D-VHS cassette
Make sure the record safety tab is intact. If not, cover the hole with adhesive tape before inserting the cassette.
•The
BSelect recording channel (i.LINK
input)
On the front panel:
Press [CHANNEL +] or
On the Remote:
Press [TV/VCR CH +] or
•Set “LINC” to “AUTO”. (A page 70)
CSet timer program on the Inte- grated HDTV source
•Confirm that a link has been established between this VCR and the Integrated HDTV.
•Set the recording speed to “AUTO” if this option is available.
•For timer programming method, refer to the manual of the Integrated HDTV.
DEngage recording standby mode
Press [POWER] to turn off the VCR.
•The Integrated HDTV will activate the VCR to automatically start recording through i.LINK at the programmed time.
•The VCR may not record a short portion at the beginning of the program, to ensure full recording of the program, turn on the VCR slightly before the programmed time.
ATTENTION:
When this VCR is connected via i.LINK to a TV or a Digital Set Top Box, there may be cases when the images are not recorded by the VCR. In such cases, choose the record command from the i.LINK menu of the TV or the Set Top Box.