EN 73
AMake connections
AConnection with the camcorder
Connect a DV cable between the camcorder’s DV connector and your VCR’s [i.LINK] connector.
BConnection with the VCR
Connect an i.LINK cable between the playback VCR’s i.LINK input/output connector and the recording VCR’s [i.LINK IN/OUT] connector.
NOTES:
•Depending on the devices equipped with the i.LINK connector which is connected to the VCR, picture noise on this VCR may differ from the noise on the connected devices. It is caused by the difference of the data processing method.
•Connection with certain product(s) may not be supported. (A ‘ATTENTION’ on the back cover.)
BLoad a cassette
Insert the cassette to be recorded on into this VCR (for recording).
EStart playback
Press [PLAY (I)] on the connected device.
NOTE:
If the connected device is equipped with a superimpose/ OSD disable feature then set it to “OFF” before starting playback.
FStart recording
On the front panel:
Press [REC (R)].
On the Remote:
Press [REC (R)] and [PLAY (I)] at the same time.
NOTE:
If “108 REC BY HS MODE” appears on the TV screen, refer to ‘Error Codes and Messages’ on page 84.
Do not connect this VCR to the PC with the i.LINK cable. The operation is not guaranteed.
CSelect input location on this VCR
On the front panel:
Press [CHANNEL
On the Remote:
Press [TV/VCR CH
•When
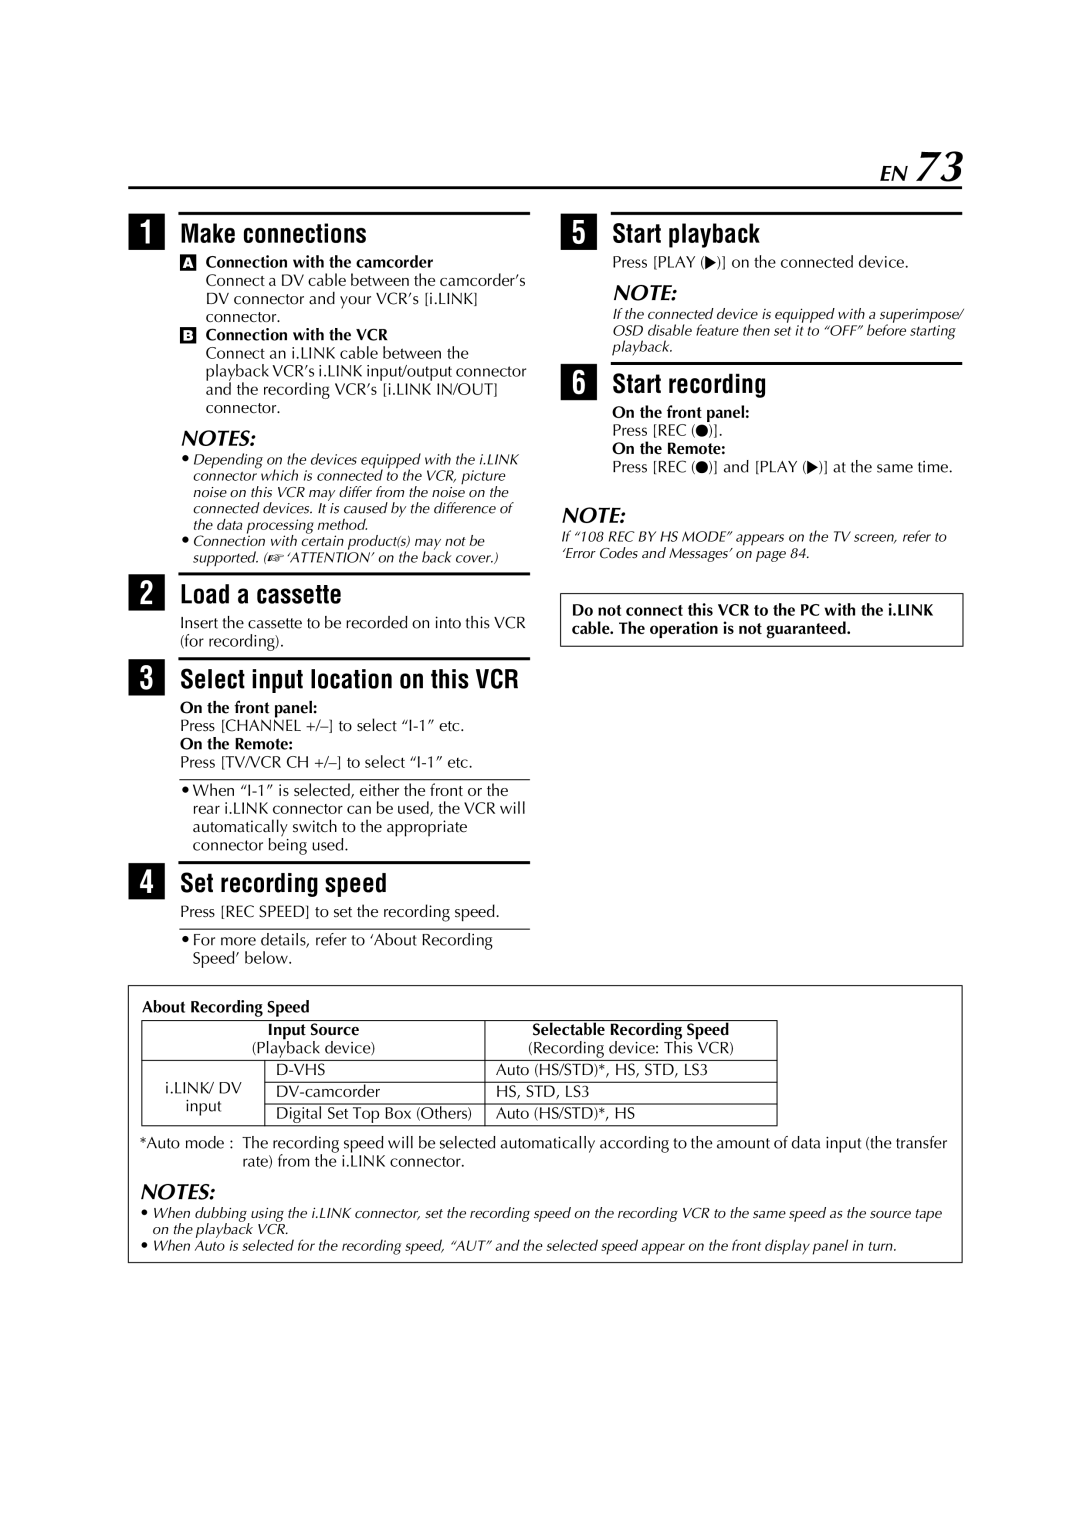
DSet recording speed
Press [REC SPEED] to set the recording speed.
•For more details, refer to ‘About Recording Speed’ below.
About Recording Speed
|
| Input Source | Selectable Recording Speed |
| (Playback device) | (Recording device: This VCR) | |
|
|
|
|
i.LINK/ DV |
| Auto (HS/STD)*, HS, STD, LS3 | |
| HS, STD, LS3 | ||
input |
|
|
|
| Digital Set Top Box (Others) | Auto (HS/STD)*, HS | |
|
| ||
*Auto mode : The recording speed will be selected automatically according to the amount of data input (the transfer rate) from the i.LINK connector.
NOTES:
• When dubbing using the i.LINK connector, set the recording speed on the recording VCR to the same speed as the source tape on the playback VCR.
• When Auto is selected for the recording speed, “AUT” and the selected speed appear on the front display panel in turn.
